How To Install Wall Sconces Without an Electrician
Disclaimer: This is not my original idea!
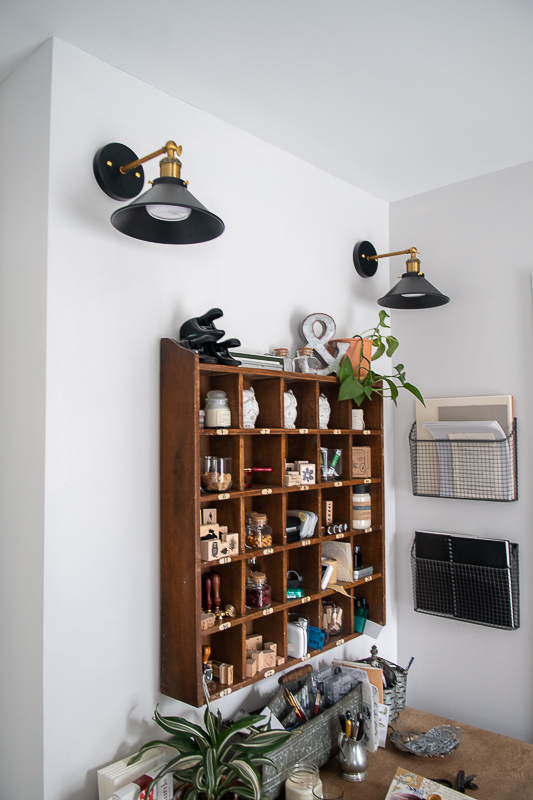
In the process of re-fabbing my office space, I was inspired by Lindsay from My Creative Days. She has these great farmhouse wall sconces on either side of her desk space. One problem, I didn’t have an electrical source on that wall (switch or outlet) and didn’t really care to call an electrician.
While educating myself about wall sconces, I ran across multiple bloggers posts about this “Magic Light Trick.” Hanging a sconce without electricity. Now, listen. I’m a traditionalist. I like things to be “right.” But currently, I’m not paying for or inviting an electrician in my home (CVOID-19 and all.)
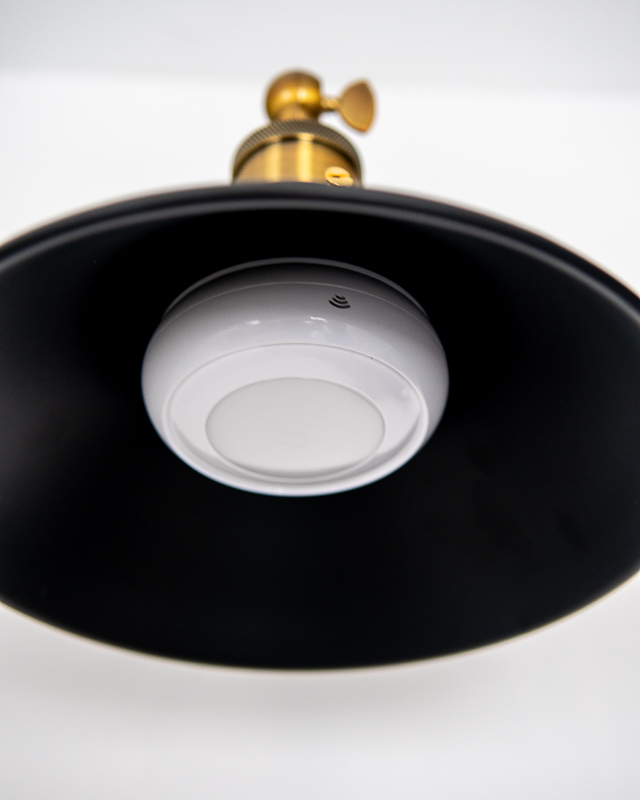
So I decided to give the “Magic Light Trick” thing a chance. I ordered this pair of sconces and these LED lights. The lights are called “puck” lights due to their shape. They resemble the shape of a hockey puck.
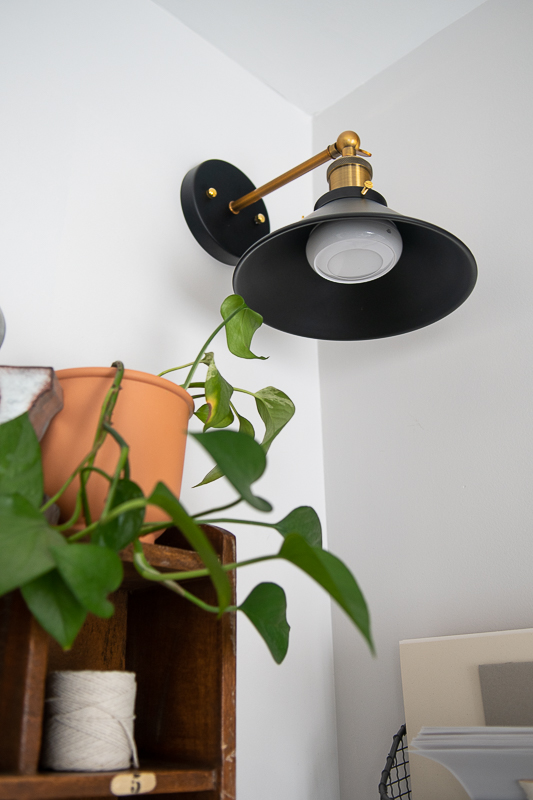
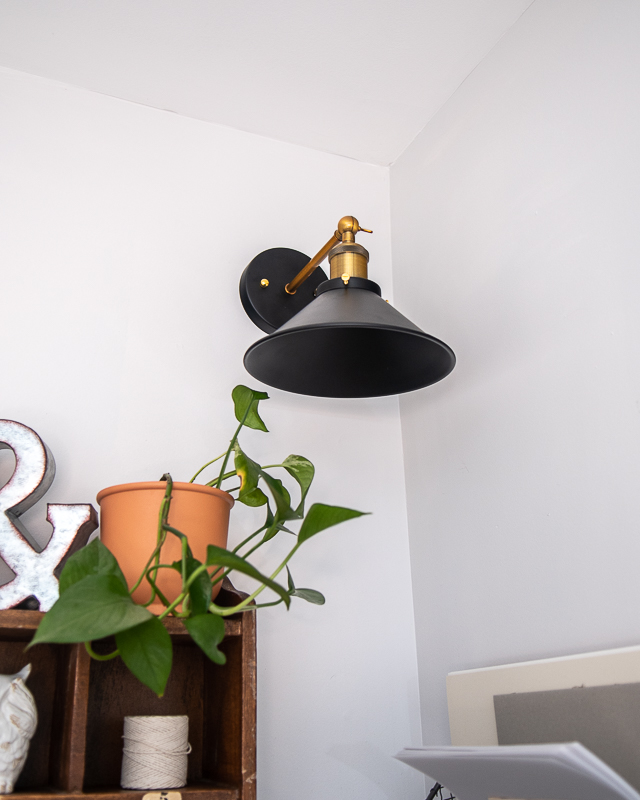
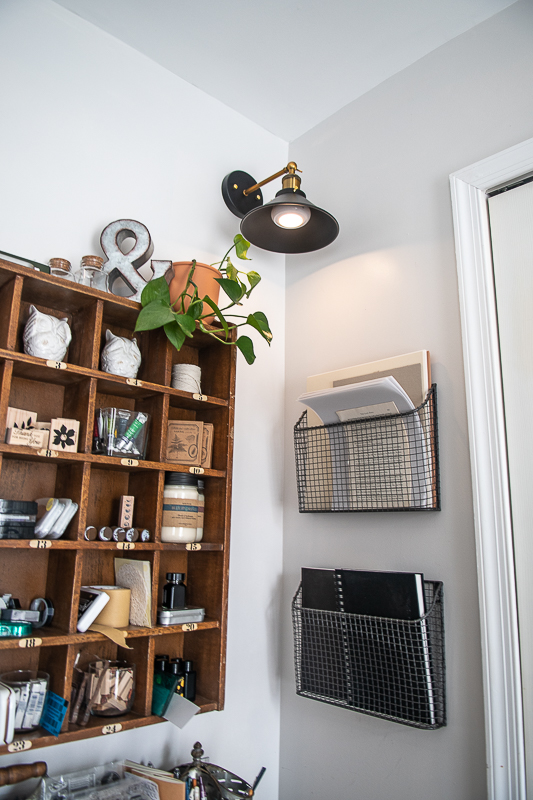
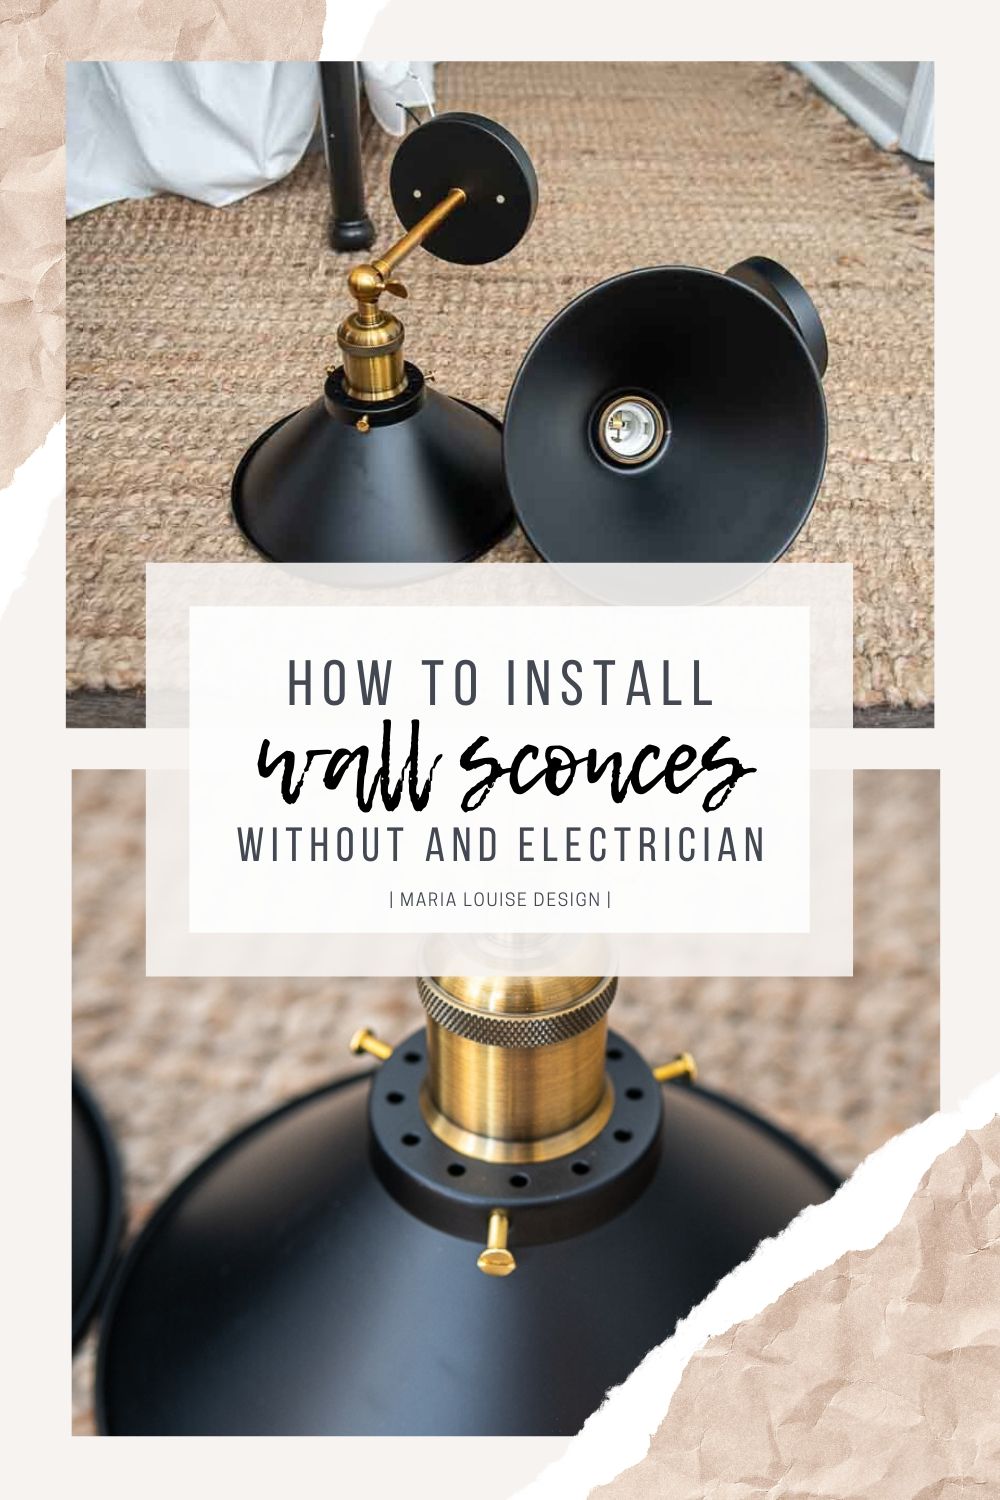
I purchased these awesome wall sconces from Amazon for less than $50. I am officially embracing black and the new farmhouse acceptable color! The brass details gave them a vintage look and the matte black shade was the right size for the puck light.
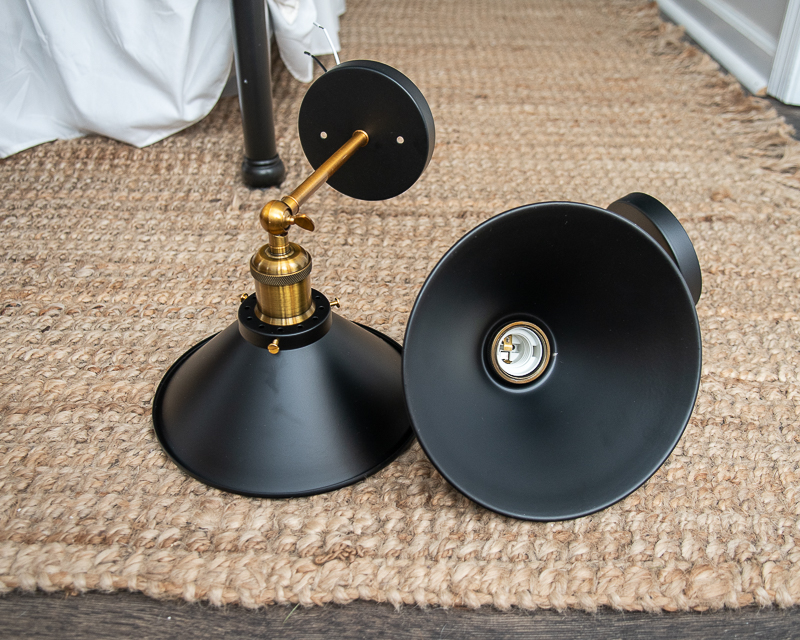
I measured out where I wanted to install the wall sconces and installed the mounting brackets. Since I wasn’t actually hardwiring these into the wall, I simply tucked the electrical wires behind the bracket, and then attached them to the mounts.
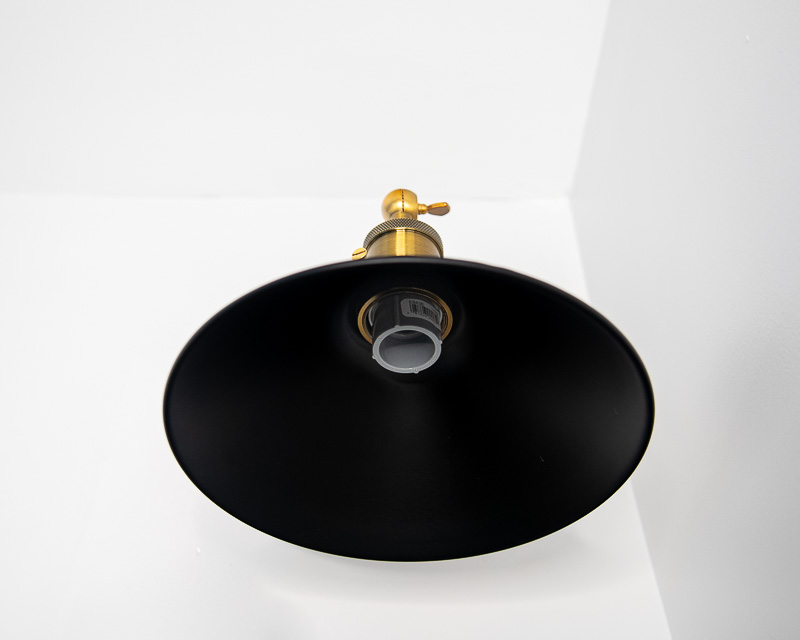
Once mounted on the wall, I needed to figure out how to hang the puck lights in the fixture without causing damage. Now, there are many bloggers out there that have posted about installing wall sconces without calling an electrician. They each have their own way of mounting the puck light into the sconce. Some more permanent than others. I wanted something less permanent incase I ever wanted to actually hardwire these beauties.
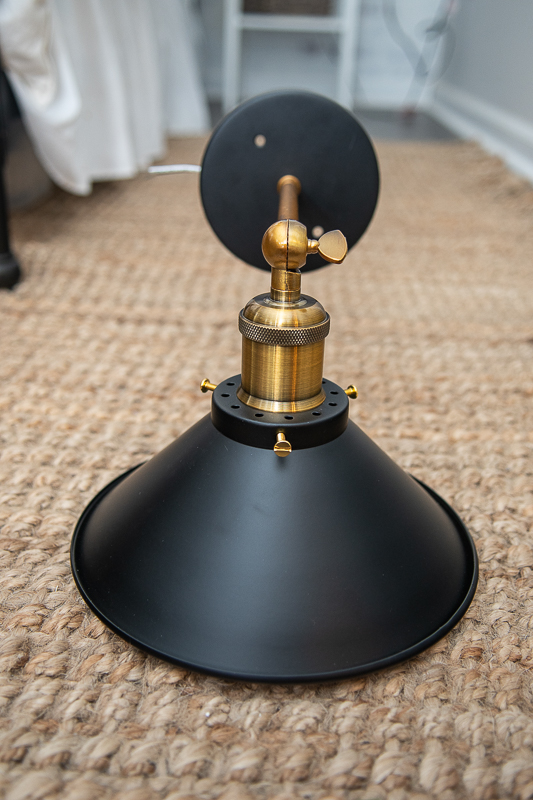
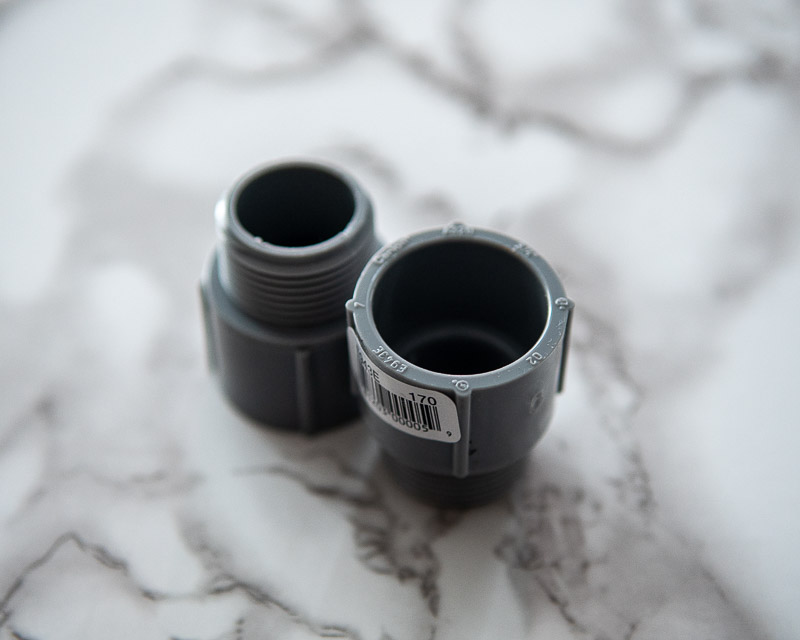
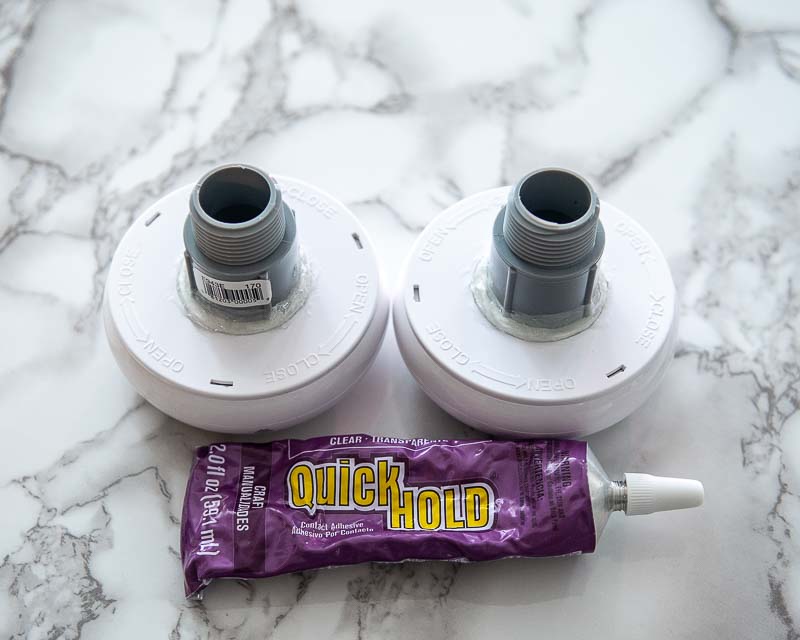
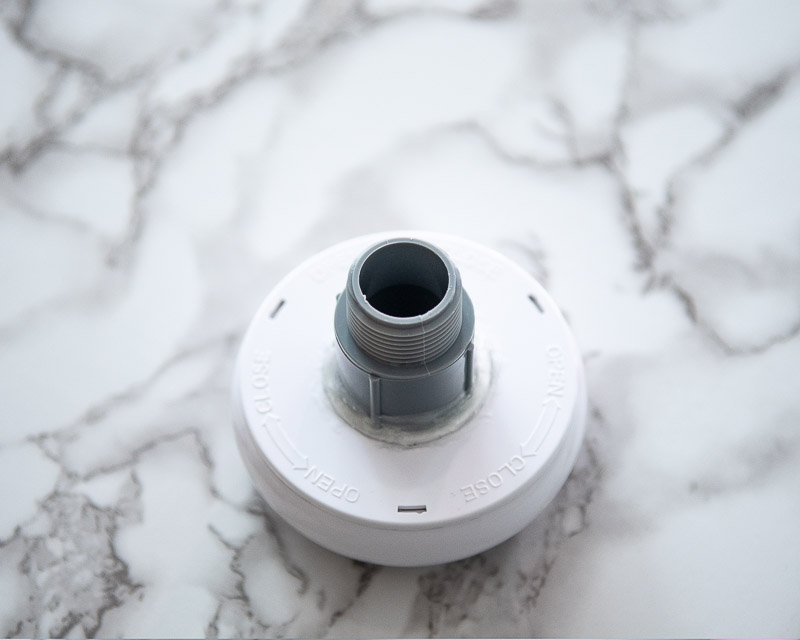
With that said, I snagged these inexpensive PVC adapters from my local big box store. They were a whopping $0.45 a piece. You can find them in the electrical isle, labeled 3/4″ male adapters. These adapters will fit most standard size (also known as E6 or “medium” size light socket.)
The puck lights I ordered came with 3M adhesive disks. However, I wanted to reinforce them with something stronger. Using some quick dry adhesive glue, I adhered the base of the puck light to the adapter. In 15 minutes the glue was strong enough for me to install them into the light fixture.
Once the adhesive dried, I simply screwed these puppies. They sit perfectly in these wide shades without any alterations. If your shade is a difficult fit, don’t worry. You can purchase the adapter and then a 1″-2″ extension that simply screws into the female end. Still making this a less permanent option.
I did want to mention, I choose these puck lights because they were the brightest (60 lumens). They also came with a remote! Turning them on is as easy as flipping a switch – see what I did there? The lights were also less than $15, so that was a bonus!
And then he said… “Let there be light!”
Now, remember these are accent lights, so don’t expect them to light up the entire room. However, these are bright enough to enhance the lighting in this corner of the room.
So now you know how to install wall sconces easily in your own home without an electrician. This is a great way to add some additional lighting without the expense. The entire project cost $60, and took less than 2 hours from start to finish.
If you’re looking to purchase some modern farmhouse wall sconces, head over to my collection and look at some for inspiration. There are so many creative and unique options out there. Take a peak.
Thanks for visiting my little piece of the internet!
I’m Maria, a lover of furry things, coffee and anything creative. This blog is where I love to share affordable home decor ideas, great DIYs, yummy recipes, unique crafts and so much more.


2 thoughts on “How To Install Wall Sconces Without an Electrician”
Love your sconces!!!
Lindsay,
Aww thanks lady! I’m so glad you love them. I was worried about the black, but I’m in love with them now. 😀
Thanks for reading and your sweet comment.
XO,
Maria