Getting into the spirit of Valentine’s Day, I grabbed a skein of my favorite yarn a came up with this super cute bow tie pattern. I just had to make these for the boys!
They come together super quickly and are so adorable!
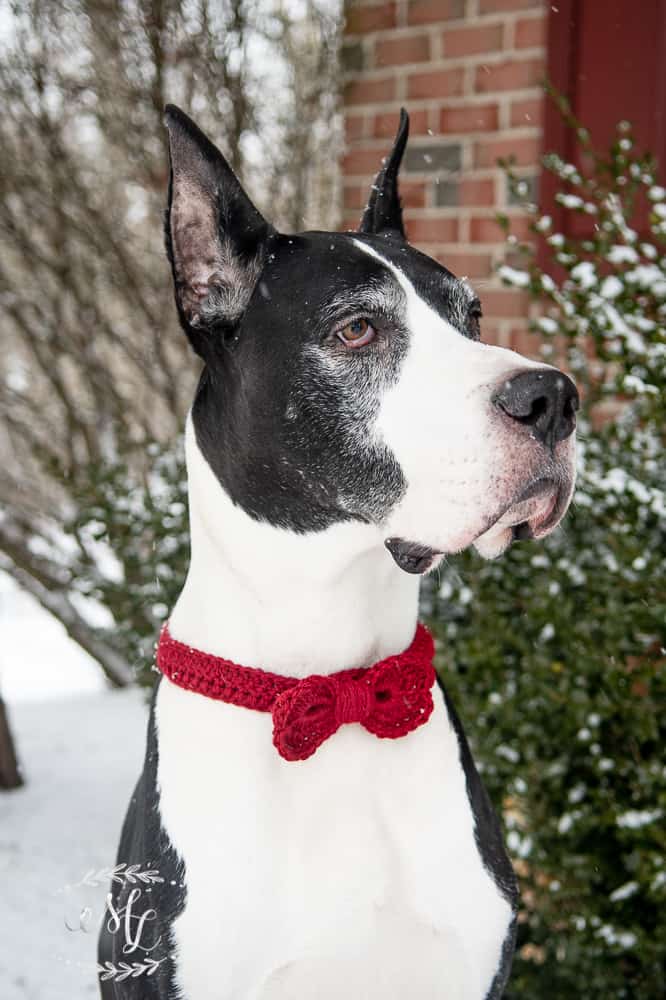
In Maryland, we recently had some beautiful snowfall. I absolutely love a good snow day. It gives me the perfect excuse to actually sit back and relax for a bit!
These cute little bow ties whipped up in a few hours. Below, I am providing my free pattern in an easy to print PDF. Just click on the link and subscribe to gain VIP access to my printable library for your own copy. Or follow along below to make your own!
{Note: this post contains affiliate links. This means that I will make a small commission – at no additional cost to you – if you make a purchase using my links.}
Thanks you for supporting my blog!
Now, if you’ve never had to crochet something from a pattern here’s a great article on how to crochet from a pattern as a reference. I also linked some great videos from YouTube showing the stitches you’ll need to complete this pattern.
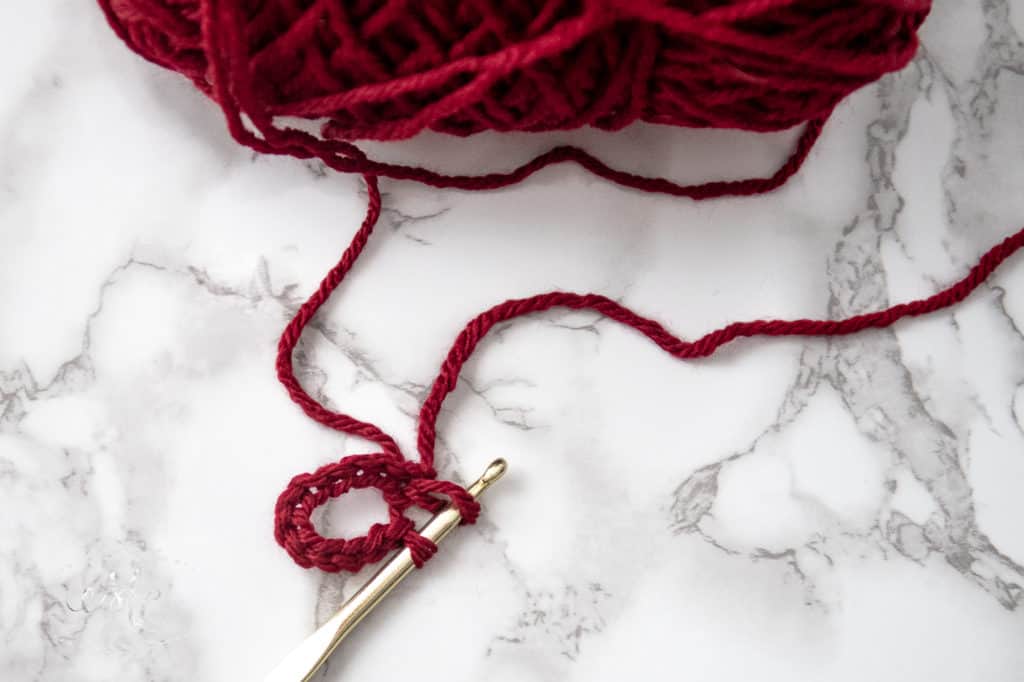
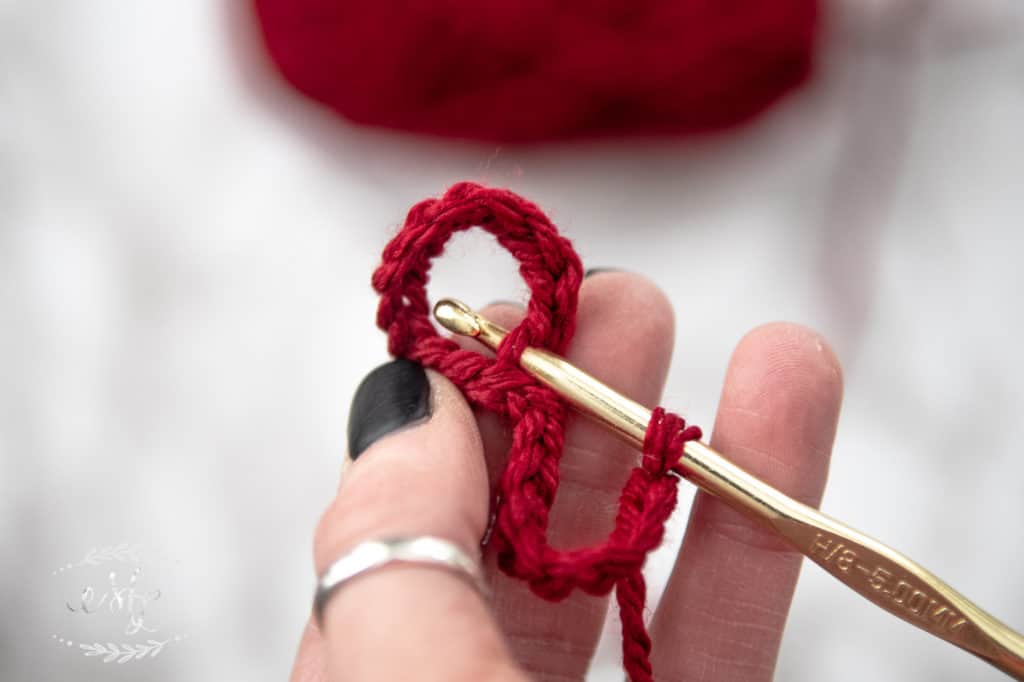
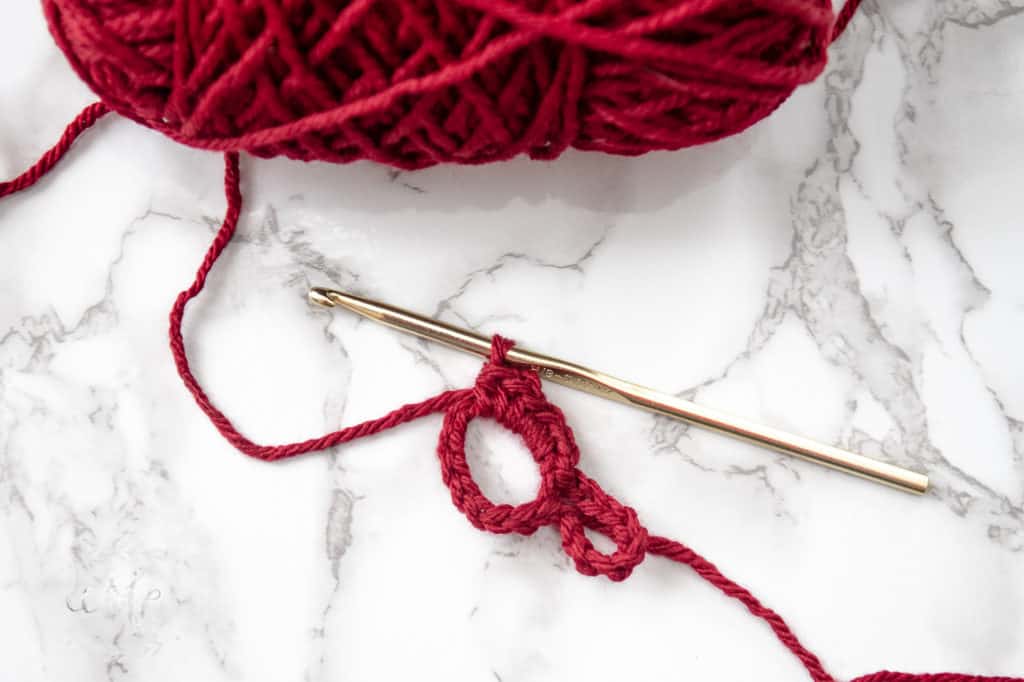
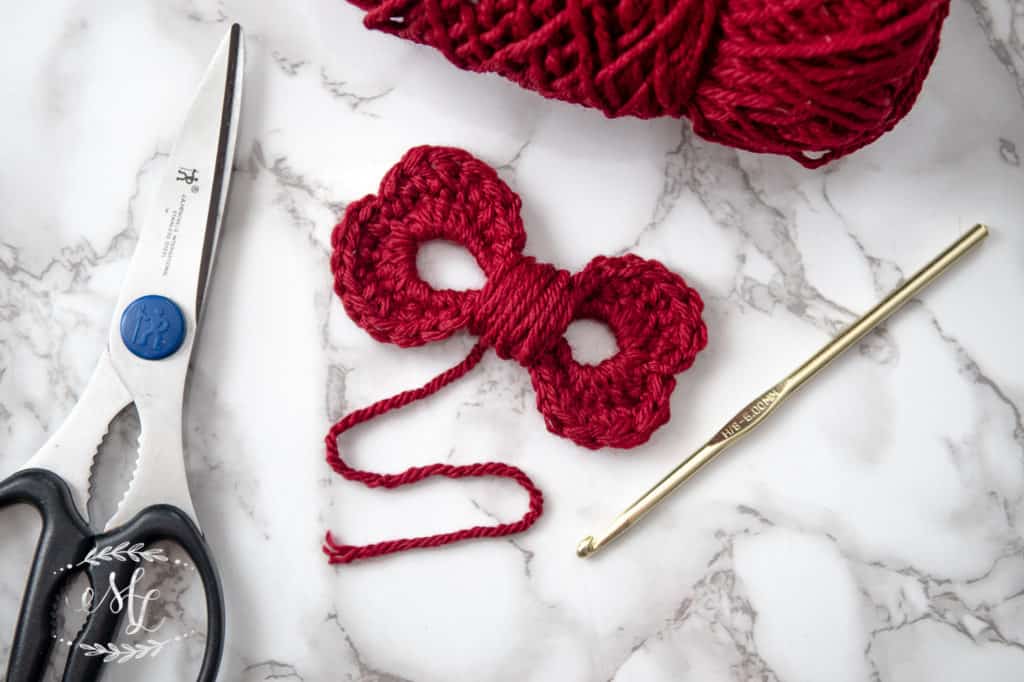
ch 8 and then sl st into the first chain space. (This is your first loop of your bow tie.)
ch 8 then sl st back into the same ch stitch as previously used to close the first loop. (This is your foundation of your bow tie.)
Round 1:
sl st into the first chain loop (not the chain stitch)
4 SC around the foundation ch
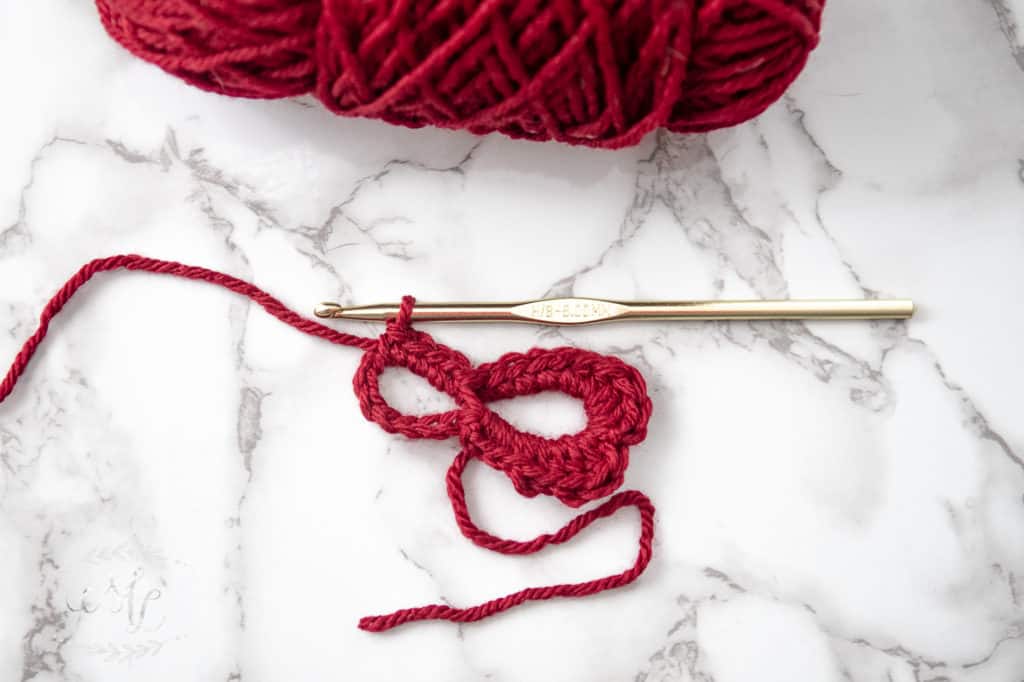
2 HDC st
2 DC st
sl st around the foundation loop (this creates the center dip of the heart)
2 DC st
3 HDC st
4 SC
Moving through the SC to the HDC and then to the DC creates the shape of the heart.
The slip stitch in the center makes the dip in the center, creating the center point of the heart.
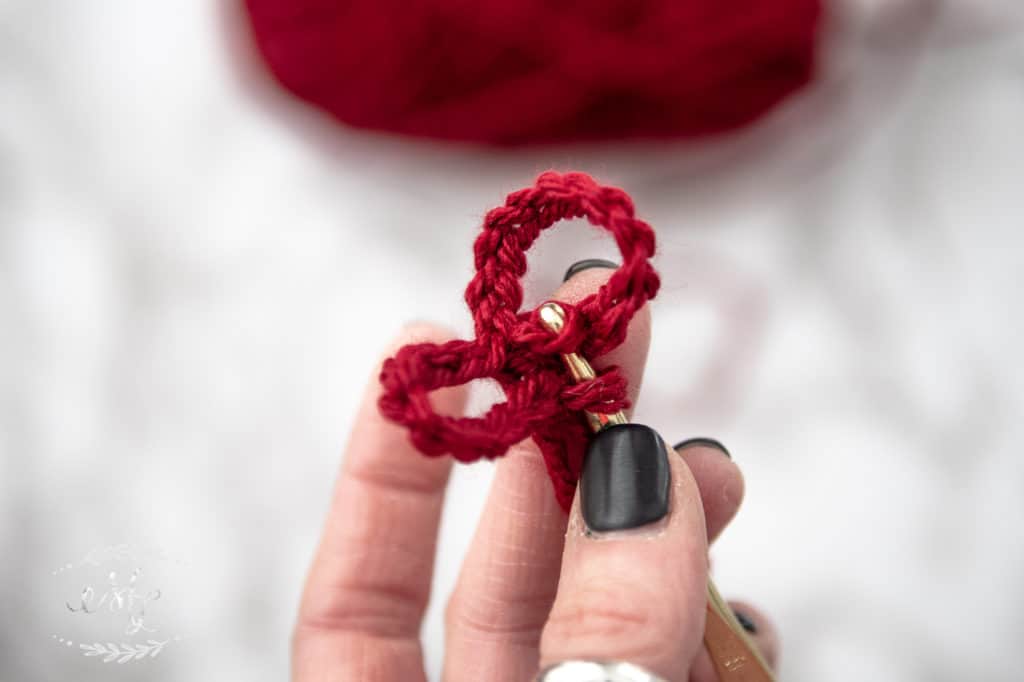
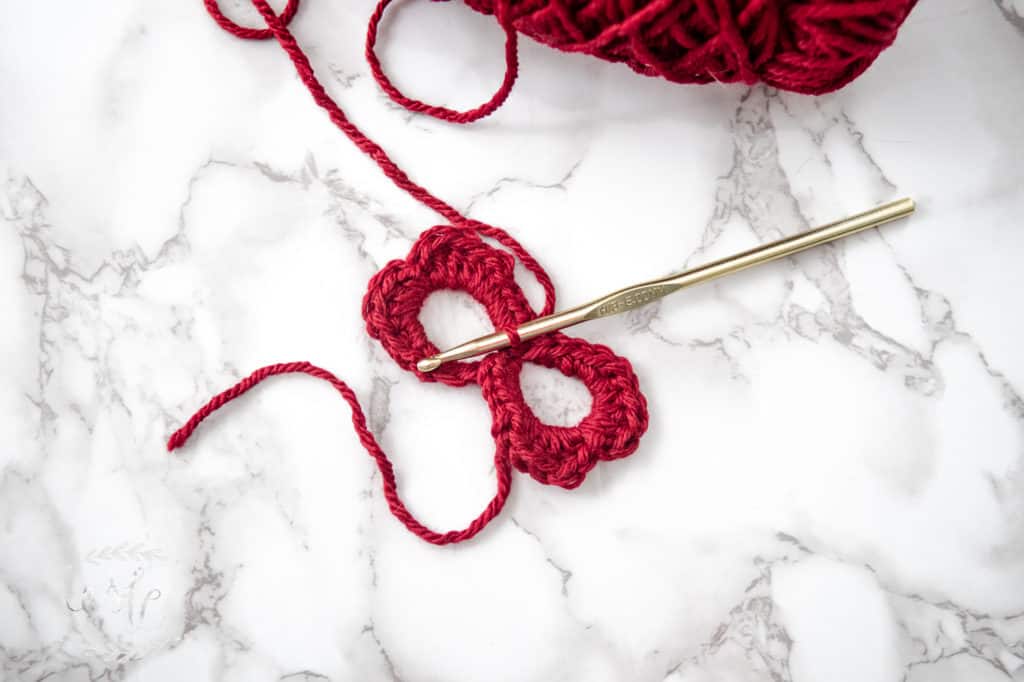
Continue round 1 by sl st into the other loop and repeat pattern (4 SC, 2 HDC, 2 DC, sl st, 2 DC, 2 HDC, and 4 SC) on the other foundational chain loop.
Slip stitch into the center to complete the round. You just completed round 1.
Round 2:
(Repeat Round 1 – adding another layer)
4 SC around the foundation ch (not into the ch space, continue with this)
2 HDC st
2 DC st
sl st into the previous sl st
2 DC st
3 HDC st
4 SC
Slip stitch back into the other loop and repeat on the side. Once the round is complete, tie off and weave in the loose ends using a crochet needle.
Wrap extra yarn around center to make the middle piece of the bow tie. And you’re done!
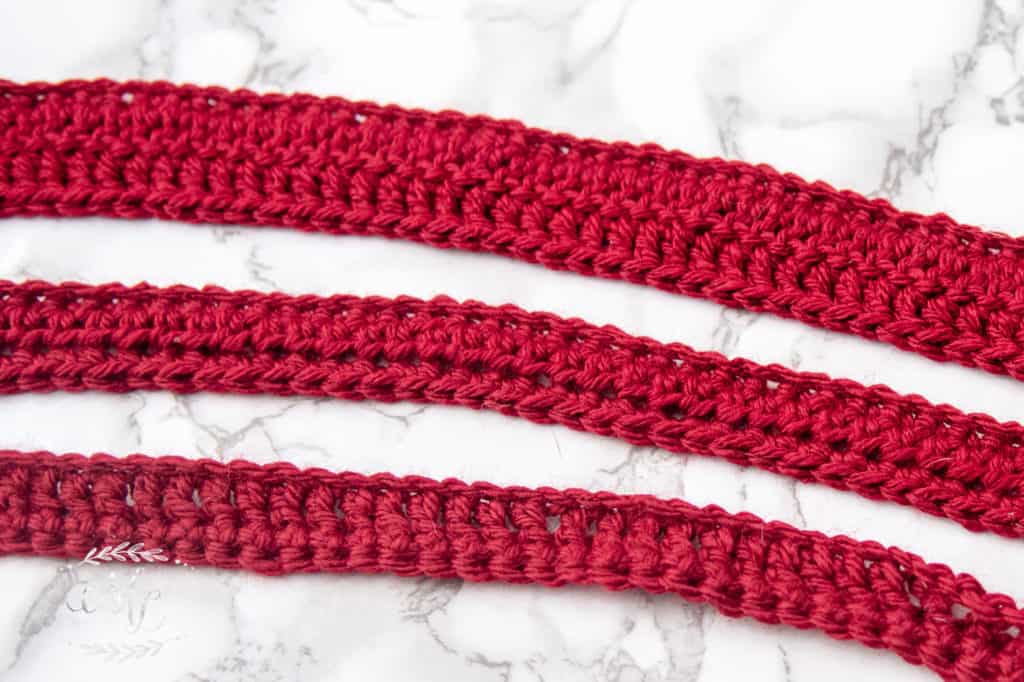
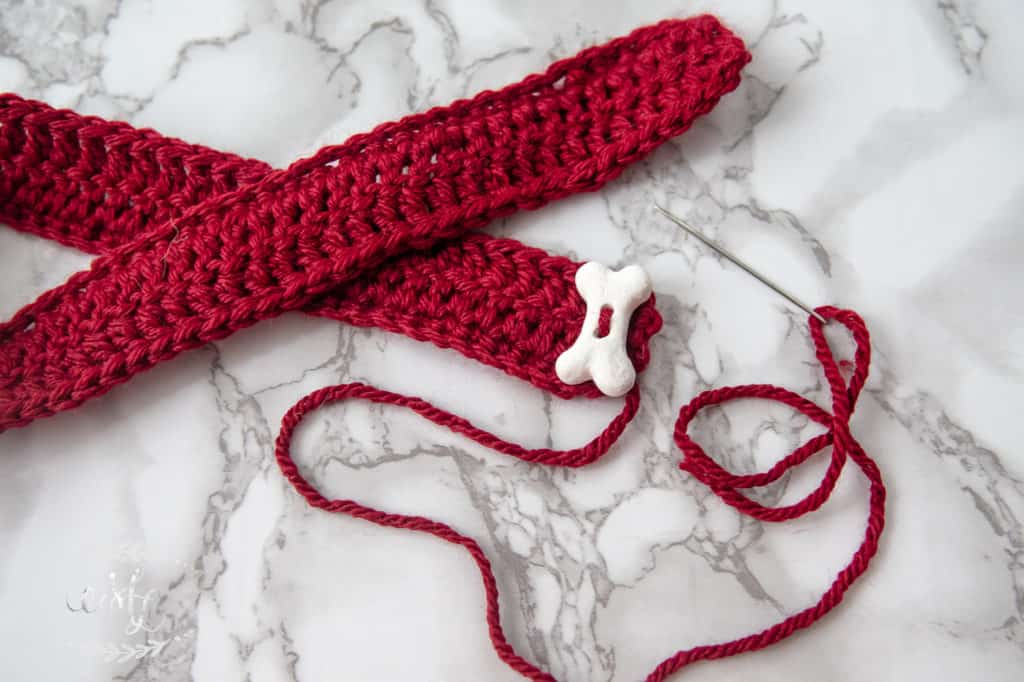
How To Make Dog Collars
For the boys collars I used half double crochet or double crochet stitches, running two rows depending on the height I needed. I made sure to measure their necks and allow for a little give. Finish and weave in the ends.
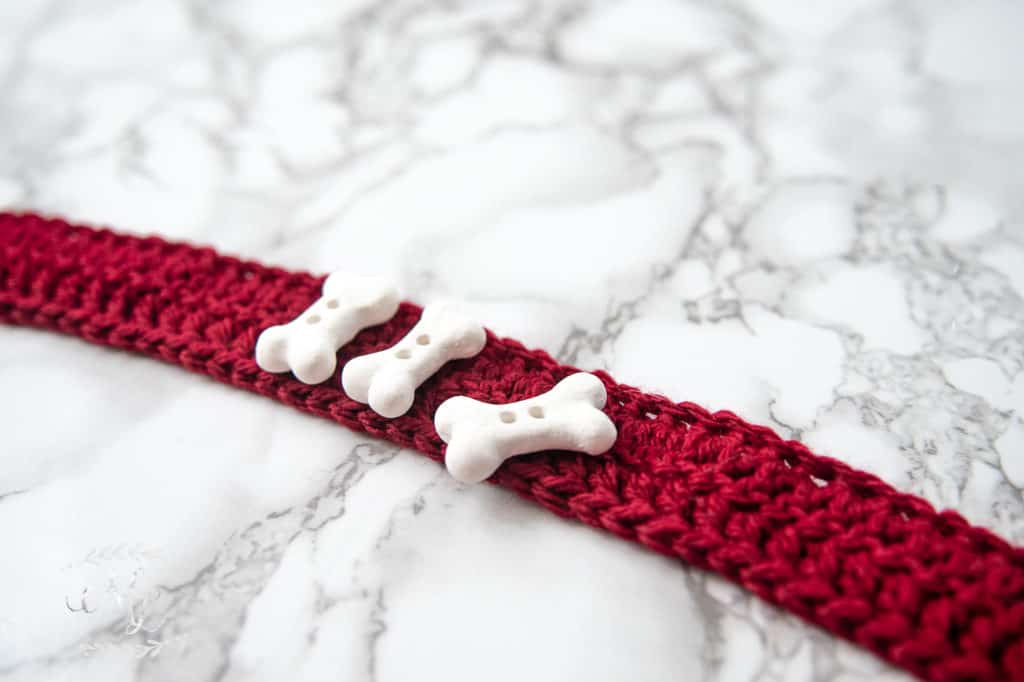
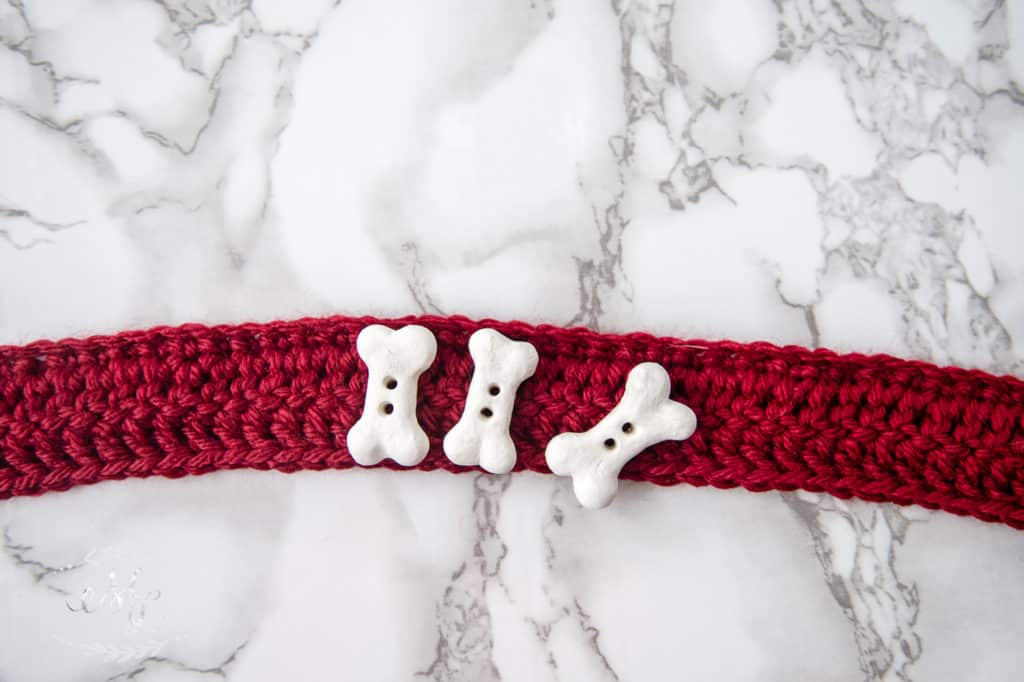
To fasten the collars, I made dog bone buttons out of easy bake Sculpey Clay! I simply stitched them on with some excess yarn. No need for button holes in the collars. The use of double crochet/half double crochet stitches provide enough room for the bone buttons.
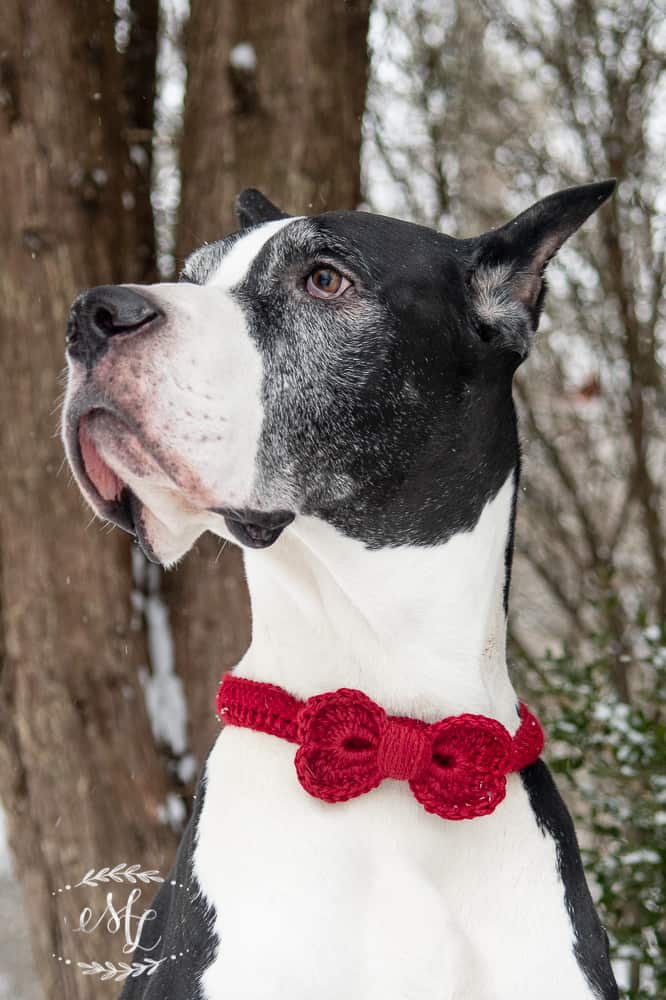
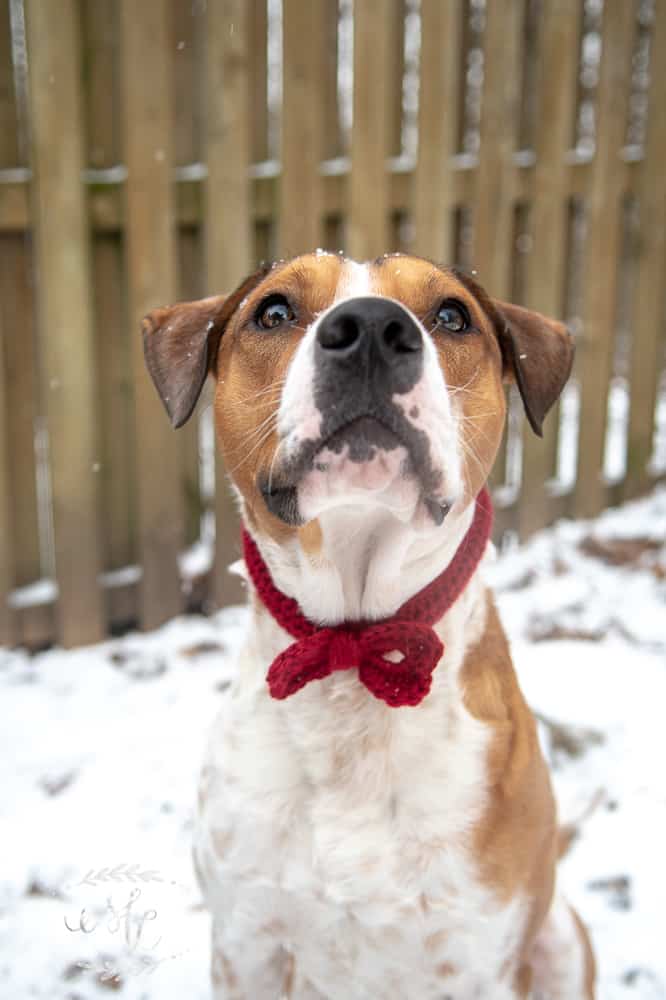
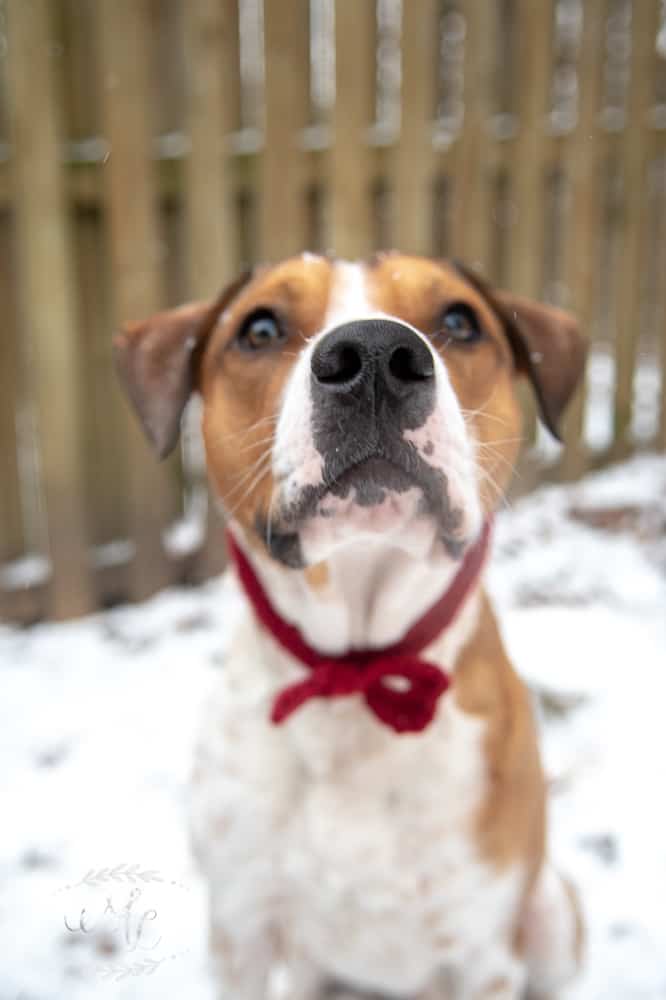
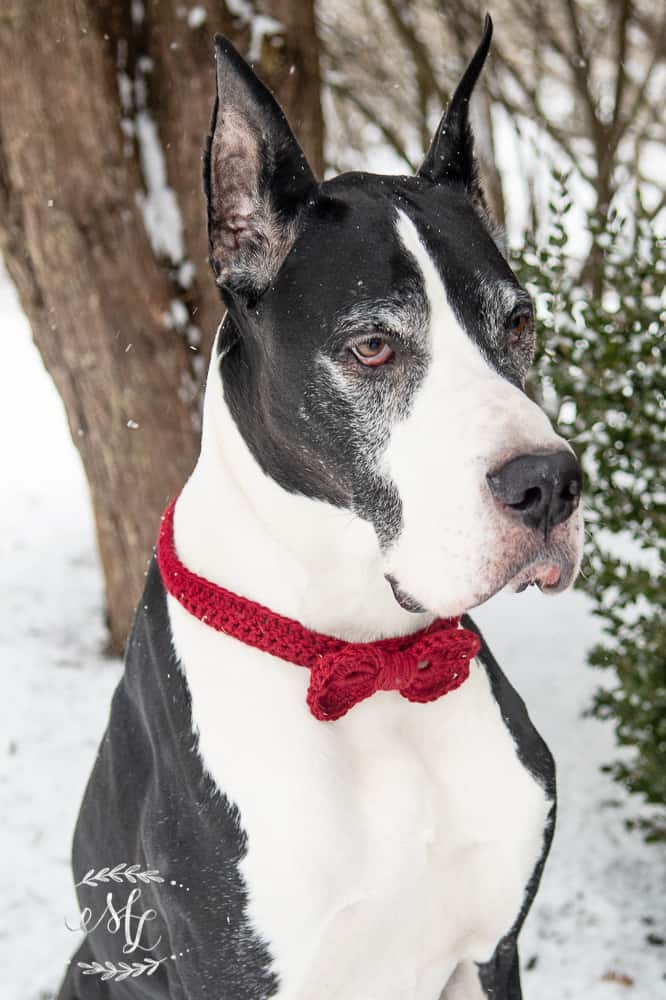
Tanner would love to show you his little red heart bow tie. Makes him the perfect gentleman.
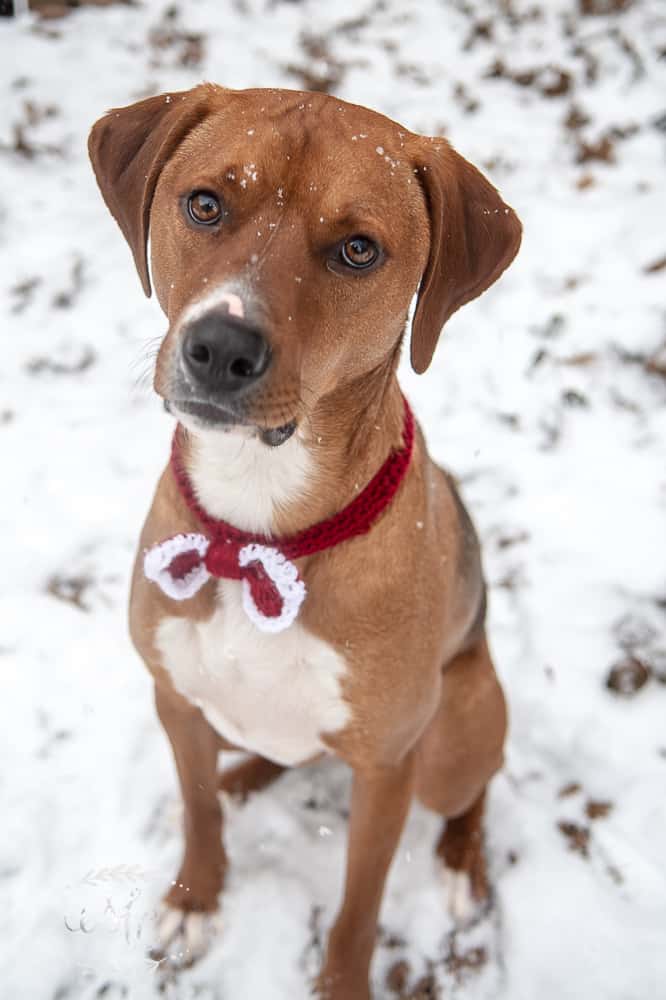
For Duncan’s bow tie, I used white Red Heart Soft Yarn for the second round. This gives his bow tie a little piping edge and really outlines the heart shape.
Since Ridley is such a big man, I used a third round to increase the size of his bow tie. If you want to increase the overall size of the bow tie you just have to increase the stitches of the foundation chain as well as the numbers in the rounds proportionally. The pattern is easy enough, play with it and make it your own!
If you want your free printable version of this pattern click below to subscribe and get your VIP access to everything in my free library.
If you are already a subscriber, your free printable pattern should already be in your inbox. (or you can access my free library anytime, just click the printable library link with the password that’s at the bottom of all of my emails.)
I hope you guys enjoy this pattern as much as I do and if you are feeling inspired I encourage you to make it your own!
Thanks for visiting my little piece of the internet!
I’m Maria, a lover of furry things, coffee and anything creative. This blog is where I love to share affordable home decor ideas, great DIYs, yummy recipes, unique crafts and so much more.