Making polymer clay earrings is one of my favorite creative outlets. Not only are polymer clay earrings fun and trendy, but they are lightweight and relatively inexpensive.
Most of all, I enjoy the endless creative possibilities!
With Christmas coming quickly, I starting thinking of personal gifts I can make. It didn’t take long for me to quickly became obsessed with all things polymer clay.
I will admit, I have spent hours on Instagram, following all these wonderful clay artists and absorbing all that I could. Call it research.
I spent weeks watching videos, reels and reading up on all that is polymer clay.
Within a few weeks I purchased my fair share of supplies and started creating. Who’s kidding,I bought WAY too much supplies! Honestly, it wouldn’t be me if I didn’t dive in head first.
Let me share with you all I’ve learned and the fantastic joy of making polymer clay earrings.
Let's Make Some Polymer Clay Earrings
PRICE
$25 – 100
TIME
2-4 Hours
DIFFICULTY
Easy
{Note: this post contains affiliate links. This means that I will make a small commission – at no additional cost to you – if you make a purchase using my links.}
Polymer clay is a man made modeling medium that is composed of polymers, resins, coloring agents and polyvinyl chloride (PVC). It is known for being so soft and simplistic to work with.
Polymer clay so versatile – you can blend existing colors to make your own custom colors, mold it, sculpt it, mix it with paints/alcohol inks/mica powder, and add texture with impressions.
Once sculpted, polymer clay is oven baked to cure. After baked, you can paint it, sand it and/or polish it to a sheen.
The creativity opportunities are endless!
Likewise, I love this medium for earrings because it’s lightweight, and durable!
Which Clay to Choose
You want a clay soft enough to be sculpted with your hands, and firm enough to hold your designs without distortion during transferring and baking.
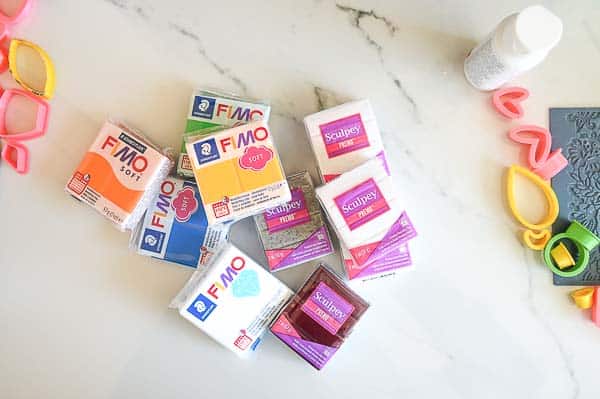
Sculpey’s Souffléis known for its matte finish and it’s soft and sculpt-able quality (did I make another word up?)
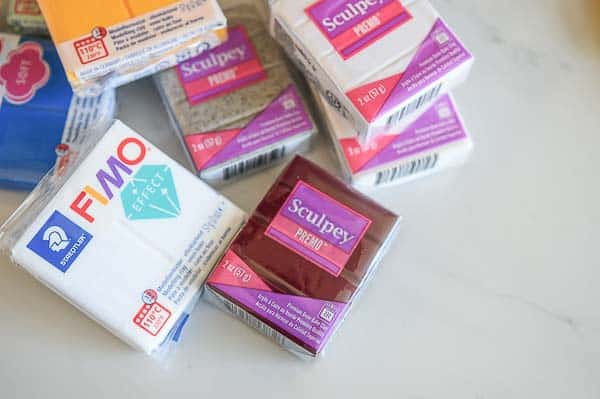
Sculpey Premo is probably the most sought after polymer clay, after the Scupley Soufflé, due to it’s flexibility and strength once baked. Premo is also one of the most lightweight and inexpensive clays out of all the higher quality clays. This is one of the preferred clays on the market to use to make earrings.
Fimo Polymer Clay is on the more expensive side of the types of clay available. Fimo Professional has true colors that allow for a better mixing pallet (if you’re into color theory.) Fimo Professional is also firmer than their alternative Fimo Soft (if that wasn’t self explanatory in the name of the product) and can be mixed with other types of Fimo without any issues.
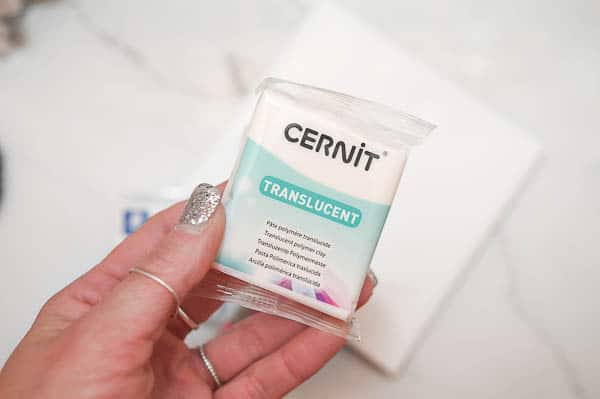
Cernit is similar to the other professional brands of clay. Used more internationally, it is more responsive to temperature changes. As it warms, it becomes soft, let it cool and it firms up nicely. Cernit is highly desired for it’s transparent “color” as it is one of the more pure on the market.
Lastly, Kato Polyclay is known for it’s firmness and durability. This means it’s best for making “canes,” or rolls of clay that is cut to make thin slices. Due to its firmness, it resists distortion when being cut.
Which Clay to Avoid
Most the verity packs you can order off Amazon are not desirable to make polymer clay earrings. They tend to become too soft and are not the best for sculpting.
In addition, Sculpey III and Scupley Bake Shop, often becomes too brittle for creating earrings. These clays are not as durable, therefore making them least desired.
Supplies You'll Need
Clay.
Alright, that is obvious!
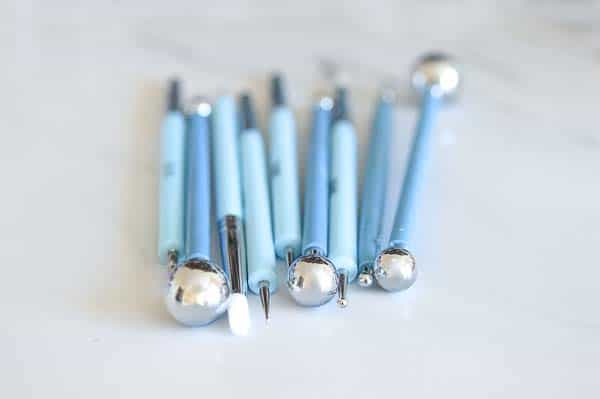
There are a few supplies/materials you need to get started. Below, I have listed my favorites… but it’s all in what you want your polymer clay earrings to look like.
Before you break into your first bar of clay, there are some things you should know…
Polymer clay is completely safe to work with, however it will stain your work surface. With that said, I recommend using a large tile, piece of glass, or wax paper to prevent staining your furniture.
I use this 12×24 inch tile, that I bought for a whopping $1.99 as my work surface. Worried the tile would scratch my desk, I put these awesome furniture pads on the bottom and voila!
For smaller detailed work, I use smaller 4×4 white tiles. I find the smaller tiles are really helpful.
Keep in mind, polymer clay will attract any dust, pet hair or random fiber that’s within a 100 mile radius. Take extra caution to wipe down your tools, cutters and work surface often.
Initially, when you open your first block of polymer clay, it will be hard and initially difficult to work with. This is because polymer clay needs to be conditioned.
Conditioning clay involves working the new clay to bring the oils to the surface.Once conditioned, the clay becomes softer and easier to work with, less likely to crack when being molded and baked.
There are a few different ways to condition clay. One way is using your hands and knead the clay. I hope you’re strong! Some of this stuff can be tough.
Another method you can use to condition your clay, is a craft roller or “pasta” machine. The machine does all the hard work, you just crank and fold and crank some more… until the clay becomes soft.
Once conditioned, clay can be mixed to make a variety of colors. If you’re familiar with the basics of color theory, you can really have fun blending colors. The sky’s the limit!
Also, most professional quality clay can be intermixed, just keep in mind this might change your bake times to get a fully cured piece.
Making Polymer Clay Earrings
Now that you have perfectly conditioned clay, it’s time to get creative!
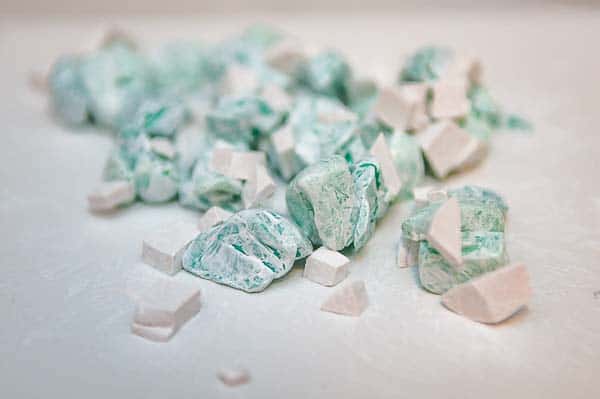
Clay cane is made of various colors cut into pieces and then rolled together. To help the pieces adhere to one another, I use a little of this to make everything stick together.
Once rolled, I cut 1/4″ slices and laid them next to one another to make a slab. I took a roller over the slices to help them all adhere to one another.
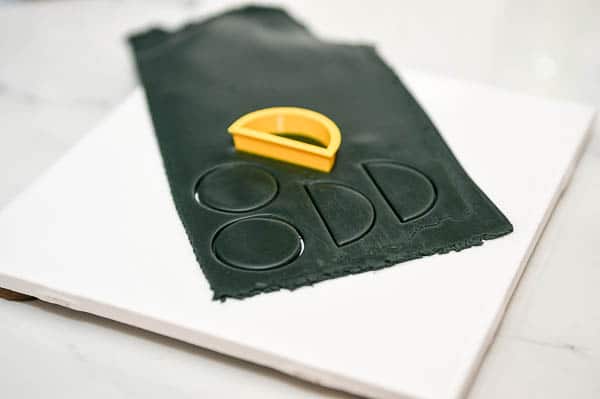
Once rolled together, I was ready to cut out the various shapes.
If you don’t want to make your own canes, you can use solid clay too.
Before baking, keep in mind it’s important to make sure your clay is of a consistent in thickness. This will allow your pieces to bake evenly.
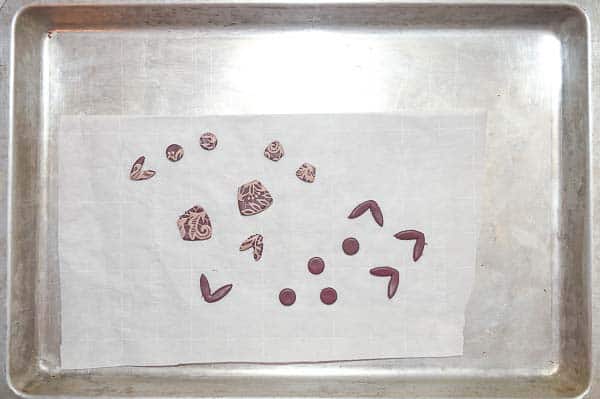
Once you’re done cutting your pieces, transfer them to a baking sheet covered with parchment paper.
Baking Your Polymer Clay
Before you bake your pieces, clean up the edges and fix any imperfections. Use a little rubbing alcohol to help clean up the surface of the clay, especially white clay.
Once your pieces are finished, transfer them to parchment paper on a baking sheet.
Make sure you preheat your oven to the recommended temperature. Check your packaging, each brand of clay has different temperature and time recommendations for baking.
Keep in mind not all ovens are accurate.
I recommend using an oven thermometer to check the accuracy of your oven’s temperature before baking your pieces. Mine is off about 50 degrees, trust me, this is an important step.
Baking your pieces cures the chemicals within the clay, allowing the longevity of your project. Properly baked polymer clay is very flexible and will not crumble. If you’re unsure if your pieces fully cured, let them cool and give them the “bend” test.
If your clay isn’t fully baked, you can easily re-bake your clay to make sure the pieces are fully cured.
Sealing, Sanding and Polishing
Once your pieces have baked and are fully cured, it is important to finish them correctly.
You can seal your pieces using polycrylic, modge podge, and resins. However, it is not necessary to seal your polymer clay earrings. Simple sanding will give a really good finish.
There are a bunch of different methods to finish polymer clay. I finish my polymer clay earrings first with a buffing tool on my Dremel, and then hand sand them using use the wet sanding method.
First, I clean up the edges using my Dremel and buffing tool. Once cleaned up, I dunk the pieces in a water bath (with a drop of dish soap.) Then, one at a time, I take each piece through 400, 600, 800 and 1,500 grit sand paper. Occasionally, I wash off the sandpaper to keep it from getting gunked up.
Once all the pieces are sanded, it’s time to assemble your earrings!
Finishings and Assembly
There is unlimited possibilities when it comes to finishings for your polymer clay earrings.
To adhere earring posts to the pieces, I use superglue to first attach them. Next, I choose to use resin around the entire backing, curing them under UV light. You can also cure resin outside in the natural sunlight, if you don’t have a UV light.
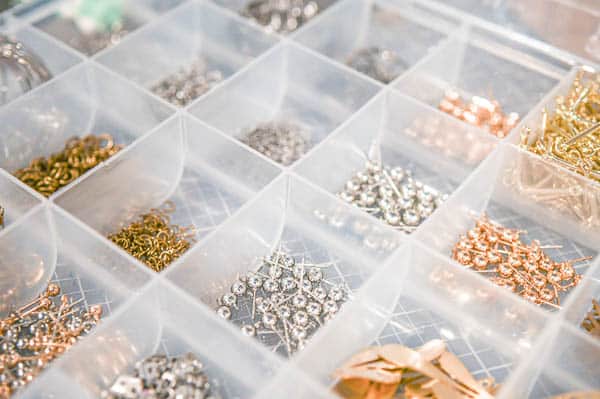
You can use post, hooks, hoops… whatever your hearts desire! I have a box of hardware to give me as many options as possible.
If you have sensitive ears, make sure your finishings are nickel free. I typically purchase surgical steel finishings for my polymer clay earrings, because my skin reacts so dramatically to most metals.
I have to say, the creativity is endless when making these!
I have indulged is so many different methods, and each one is more exciting than the next. Making polymer clay earrings has turned into one of my favorite creative outlets.
If you’ve have started making polymer clay earrings, send me photos of your finish pieces! I’d love to showcase them here for all to see. Email me at [email protected]. I can’t wait to see what you all come up with!
Hi Maria, I make polymer clay earrings as a hobby. I’ve perfected most parts of the process however I cannot for the life of me work out how to do the white with black earrings you have in this post. The effect is beautiful. Could you help me out by telling me how to do the white with a black design on the top of the earring. I’ve tried a few things with no luck.
I’d be very grateful if you could tell me the secret.
I will gladly share my secret since I learned from another blogger!
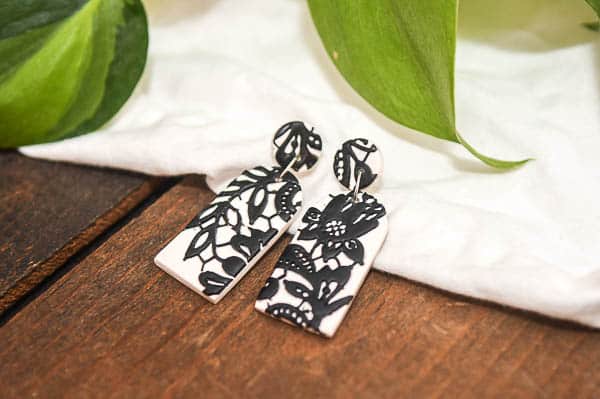
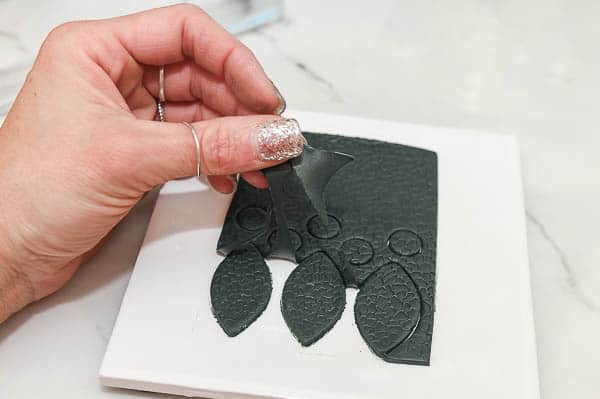
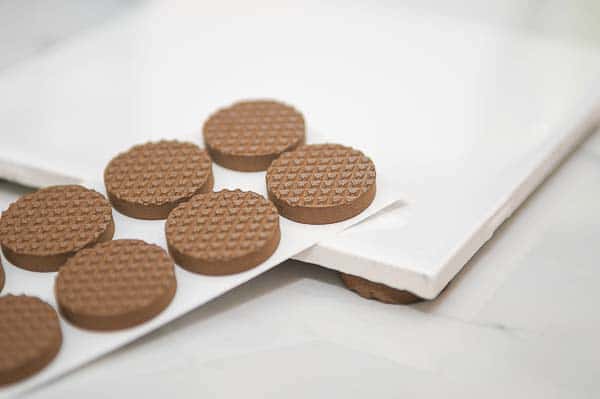
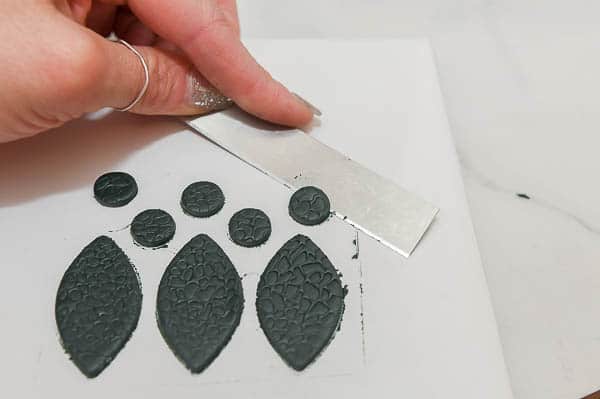
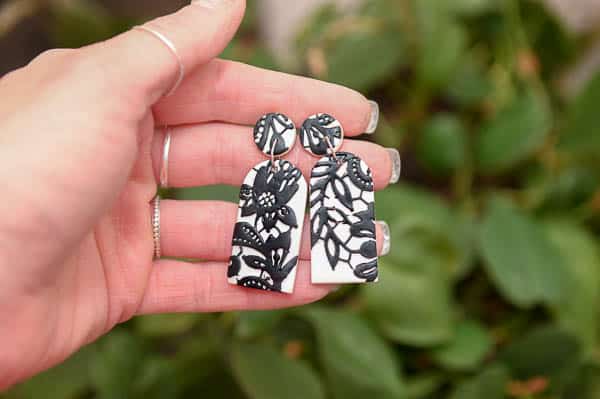
The quick answer is, I cheat! I use these silicon fondant molds. I really work my clay so it’s nice and soft, then piece by piece I smush it into the mold. Once they’re full I take my polymer clay blade and cut off the excess till just the lace pattern is visible. I will be honest this is the hard part. You will cut the molds occasionally, it happens. Also, some might just not stick in the mold. My secrete to this is… before you cut the excess off… put it in the fridge for a few to let it harden some! It’s not always perfect, but it helps.
once the excess is removed and just the lace pattern is visible, I gently roll the lace onto the base and carefully press down. Most of the time it sticks, sometimes it needs some transfer liquid.
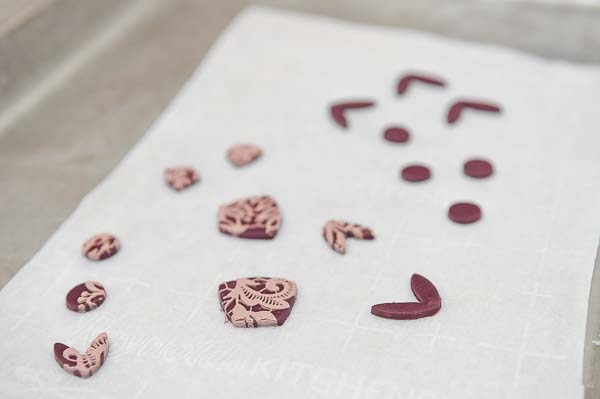
When you peel the mold back the lace pattern remains! Then I cut my earring shapes. Since the mold doesn’t always come out perfect, I wait to cut my shapes, picking the best parts of the pattern.
It takes a little practice and technique, but it’s one of my favorite techniques. I have a few different variations of this pair pictured.
I hope that helps you figure out the technique. Feel free to email me or message me again if you’re having any difficulties! Thanks for reading along. Happy creating!
I love this question! It’s so easy! I use these silicon fondant molds and mush in some white clay. Once they’re full I take my polymer clay blade and cut off the excess till just the lace pattern is visible. Don’t worry, you will cut the molds occasionally! It happens.
Then I gentle roll the lace onto the base color gentle pressing down. When you peel the mold back the lace pattern remains! It takes a little practice and technique, but it’s one of my favorite techniques. They sell these molds in all sorts of patterns and can really add depth and texture to your earrings!
Thanks for visiting my little piece of the internet!
I’m Maria, a lover of furry things, coffee and anything creative. This blog is where I love to share affordable home decor ideas, great DIYs, yummy recipes, unique crafts and so much more.


4 thoughts on “How to Make Polymer Clay Earrings”
Hi Maria, I make polymer clay earrings as a hobby. I’ve perfected most parts of the process however I cannot for the life of me work out how to do the white with black earrings you have in this post. The effect is beautiful. Could you help me out by telling me how to do the white with a black design on the top of the earring. I’ve tried a few things with no luck.
I’d be very grateful if you could tell me the secret.
Kind regards, julieann shaw, Australia.
Julieann,
I will gladly share my secret since I learned from another blogger!
The quick answer is, I cheat! I use these silicon fondant molds. I really work my clay so it’s nice and soft, then piece by piece I smush it into the mold. Once they’re full I take my polymer clay blade and cut off the excess till just the lace pattern is visible. I will be honest this is the hard part. You will cut the molds occasionally, it happens. Also, some might just not stick in the mold. My secrete to this is… before you cut the excess off… put it in the fridge for a few to let it harden some! It’s not always perfect, but it helps.
once the excess is removed and just the lace pattern is visible, I gently roll the lace onto the base and carefully press down. Most of the time it sticks, sometimes it needs some transfer liquid.
When you peel the mold back the lace pattern remains! Then I cut my earring shapes. Since the mold doesn’t always come out perfect, I wait to cut my shapes, picking the best parts of the pattern.
It takes a little practice and technique, but it’s one of my favorite techniques. I have a few different variations of this pair pictured.
I hope that helps you figure out the technique. Feel free to email me or message me again if you’re having any difficulties! Thanks for reading along. Happy creating!
XOXO,
Maria
Hey Maria,
How did you make this nice lace like texture on your clay?
Kate,
I love this question! It’s so easy! I use these silicon fondant molds and mush in some white clay. Once they’re full I take my polymer clay blade and cut off the excess till just the lace pattern is visible. Don’t worry, you will cut the molds occasionally! It happens.
Then I gentle roll the lace onto the base color gentle pressing down. When you peel the mold back the lace pattern remains! It takes a little practice and technique, but it’s one of my favorite techniques. They sell these molds in all sorts of patterns and can really add depth and texture to your earrings!
Happy creating! I hope that helped some.
XOXO,
Maria