So if you don’t know me, I have a huge love of witty, motivational, and inspirational quotes. You’ll see them features in my posts and all throughout my house.
For months now, I’ve been coveting these wooden letter boards that have been all over instagram and pinterest. However, $150 is not in my budget at the moment! Per usual, I knew I could make it for less. I just needed a little bit of creativity.
With that said, today I am sharing with you how I made my marquee letter board. I got some very special help putting this project together as well as much needed inspiration for the featured quote.
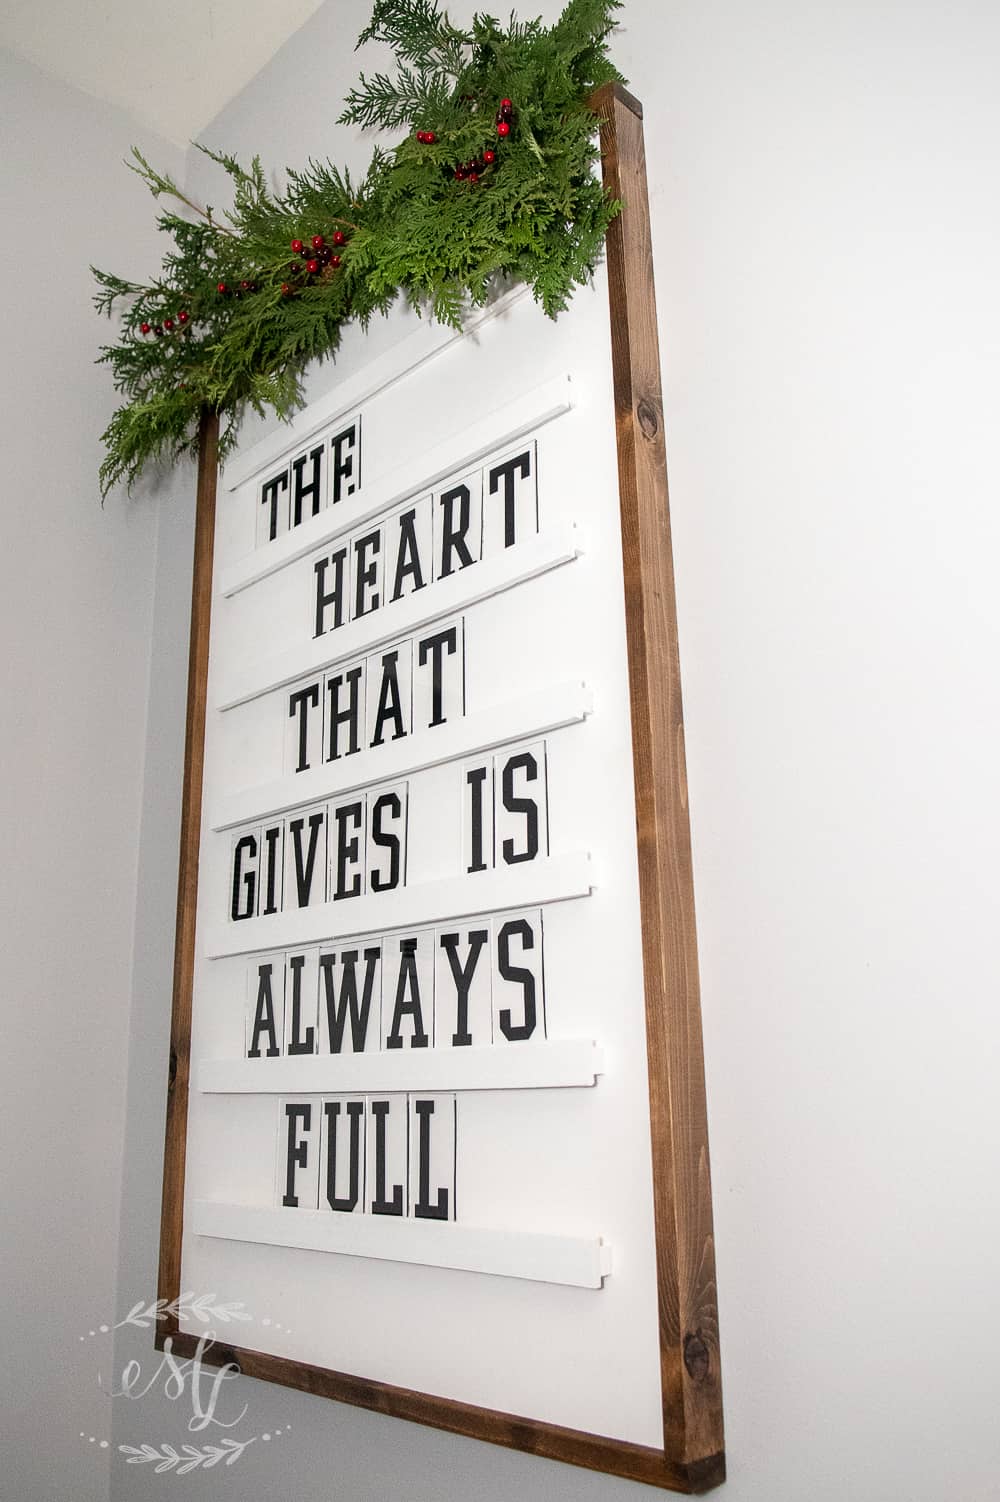
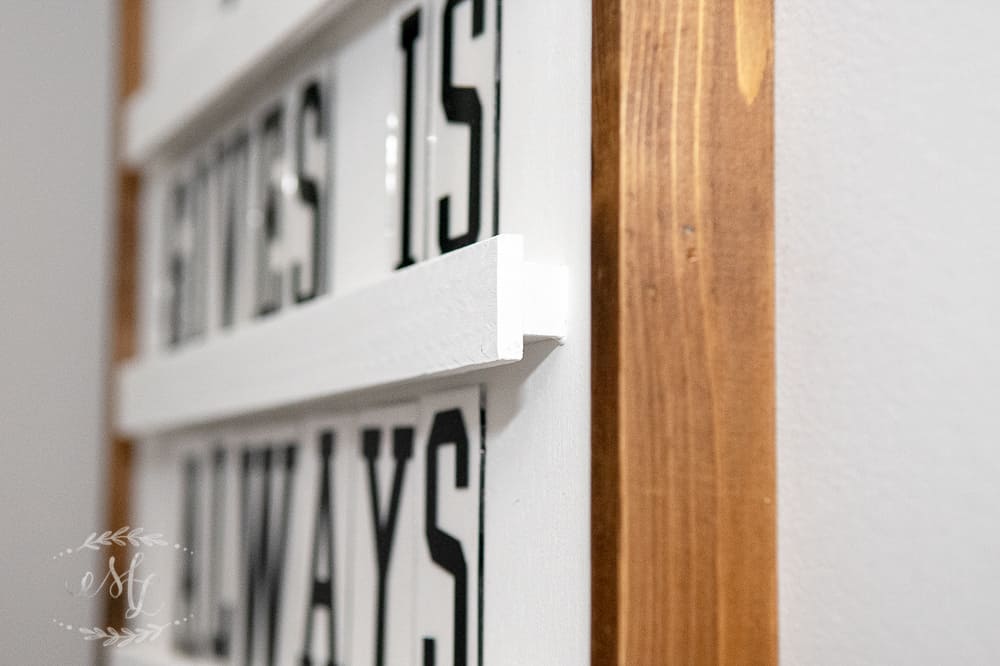
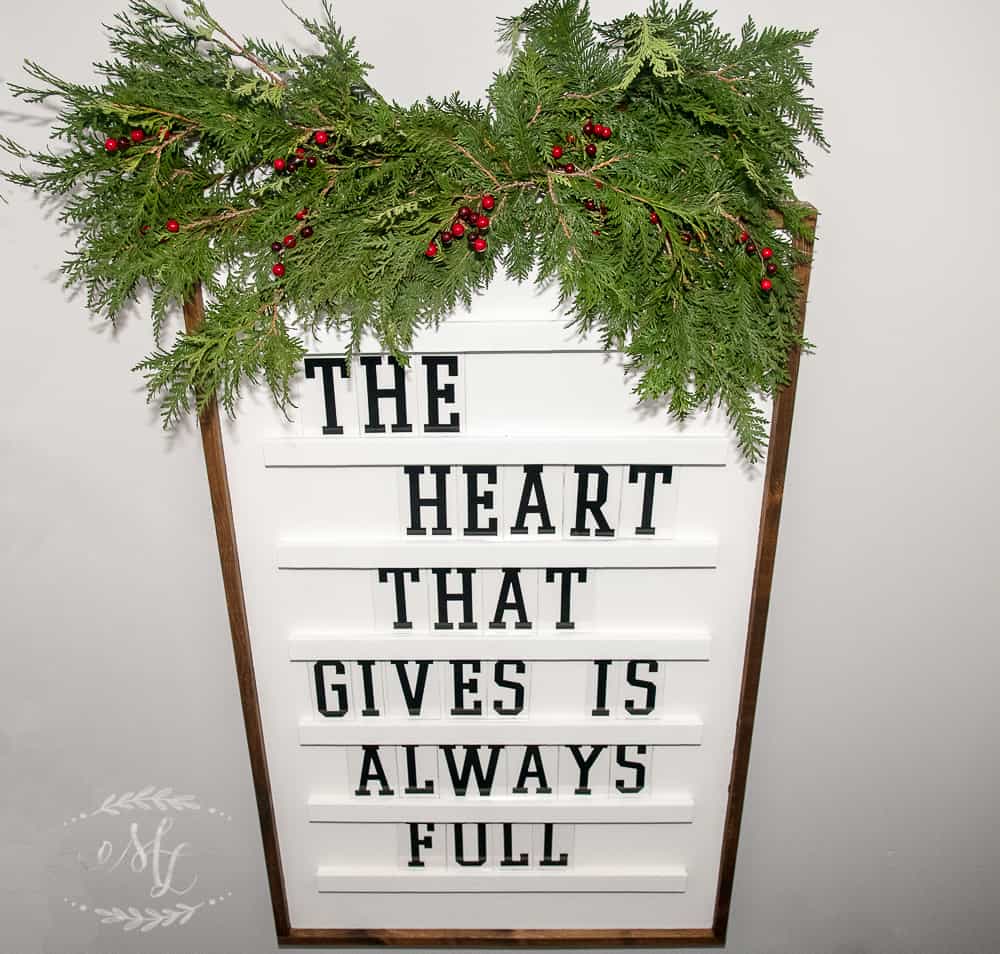
This changeable letter board is the perfect blend between those trendy felt boards and a marquee sign. Moreover, it has both modern elements as well as a little rustic charm.
Please, follow along and see how you can make one of these marquee letter boards of your own!
{Note: this post contains affiliate links. This means that I will make a small commission – at no additional cost to you – if you make a purchase using my links.}
Thanks you for supporting my blog!
Making the Marquee Letter Board
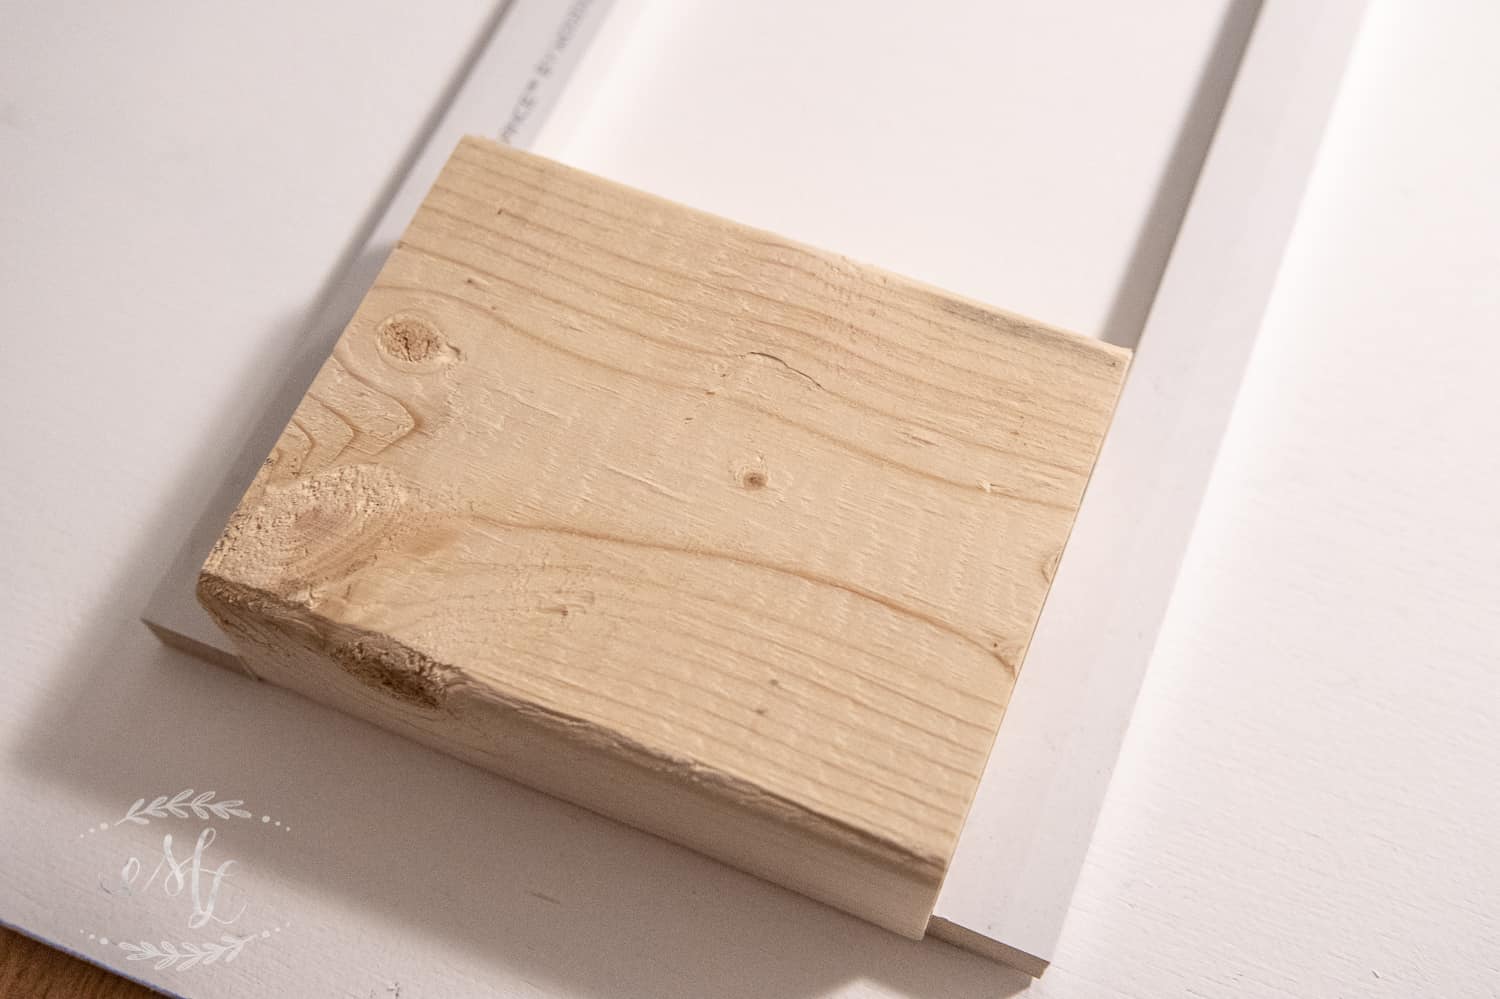
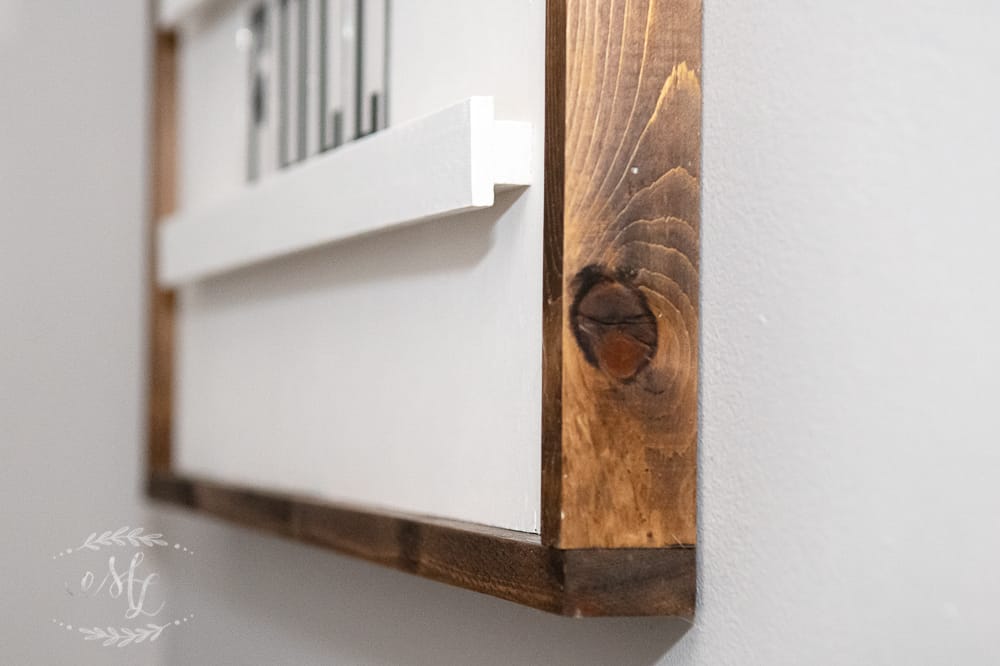
First, I cut down the 2′ x 4′ plywood down to 24″ x 40″ using my table saw. Then, using 1×2″ boards, I measured them and cut them to size, framing the plywood. Next, I stained them first using Minwax’s Golden Oak and then a coat of Minwax’s Dark Walnut. This gave me the perfect color I was looking for.
Once the frame was stained and left to dry, I painted the large piece of plywood solid white, and let it stand to dry too.
Surprisingly, we all know how terrible I am at math right? With this in mind, I handed over the math duties to someone much more suited for the job. And I’m so thankful for it!
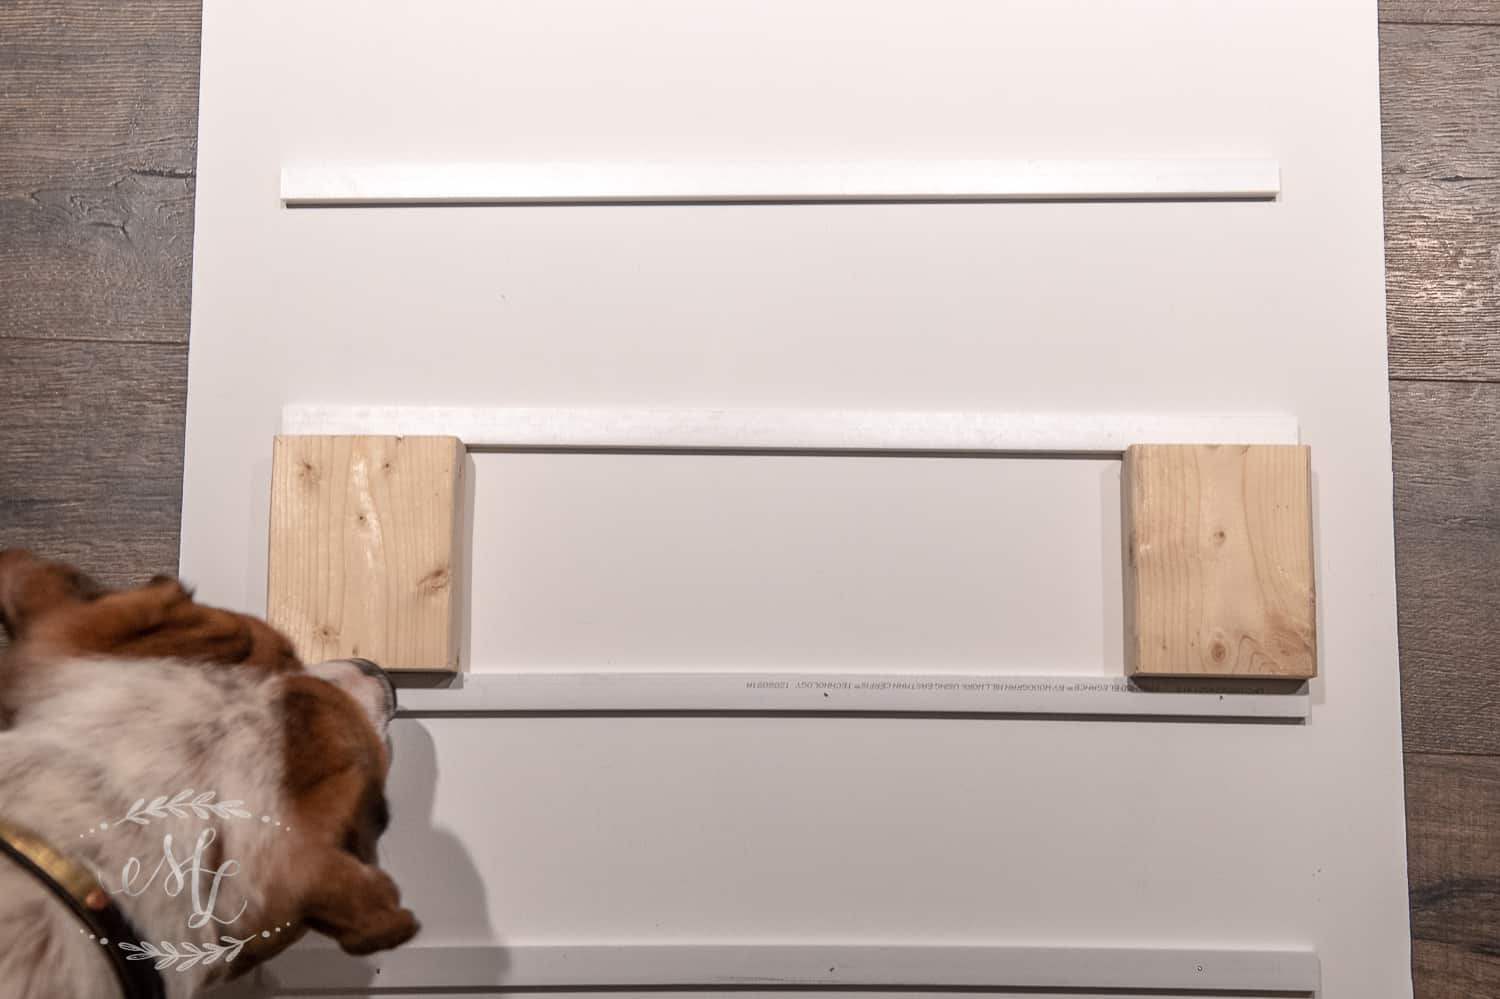
We calculated a total of 7 rows would fit on the board. This made each row 20″ long with 4 5/8″ space in between each row.
Finally, off to the miter saw – we cut 7 strips of the Board Moulding and the 7 strips of the lattice trim, each one measuring 20″ long. {Ok I’ll be honest, I only cut 6 of the lattice strips… and found out during assembly I’m terrible at counting past 6!}
I am however, damn good at sanding! I sanded the lattice down to take off any rough edges and splinters for a good finish. Once sanded, the lattice got a first coat of paint.
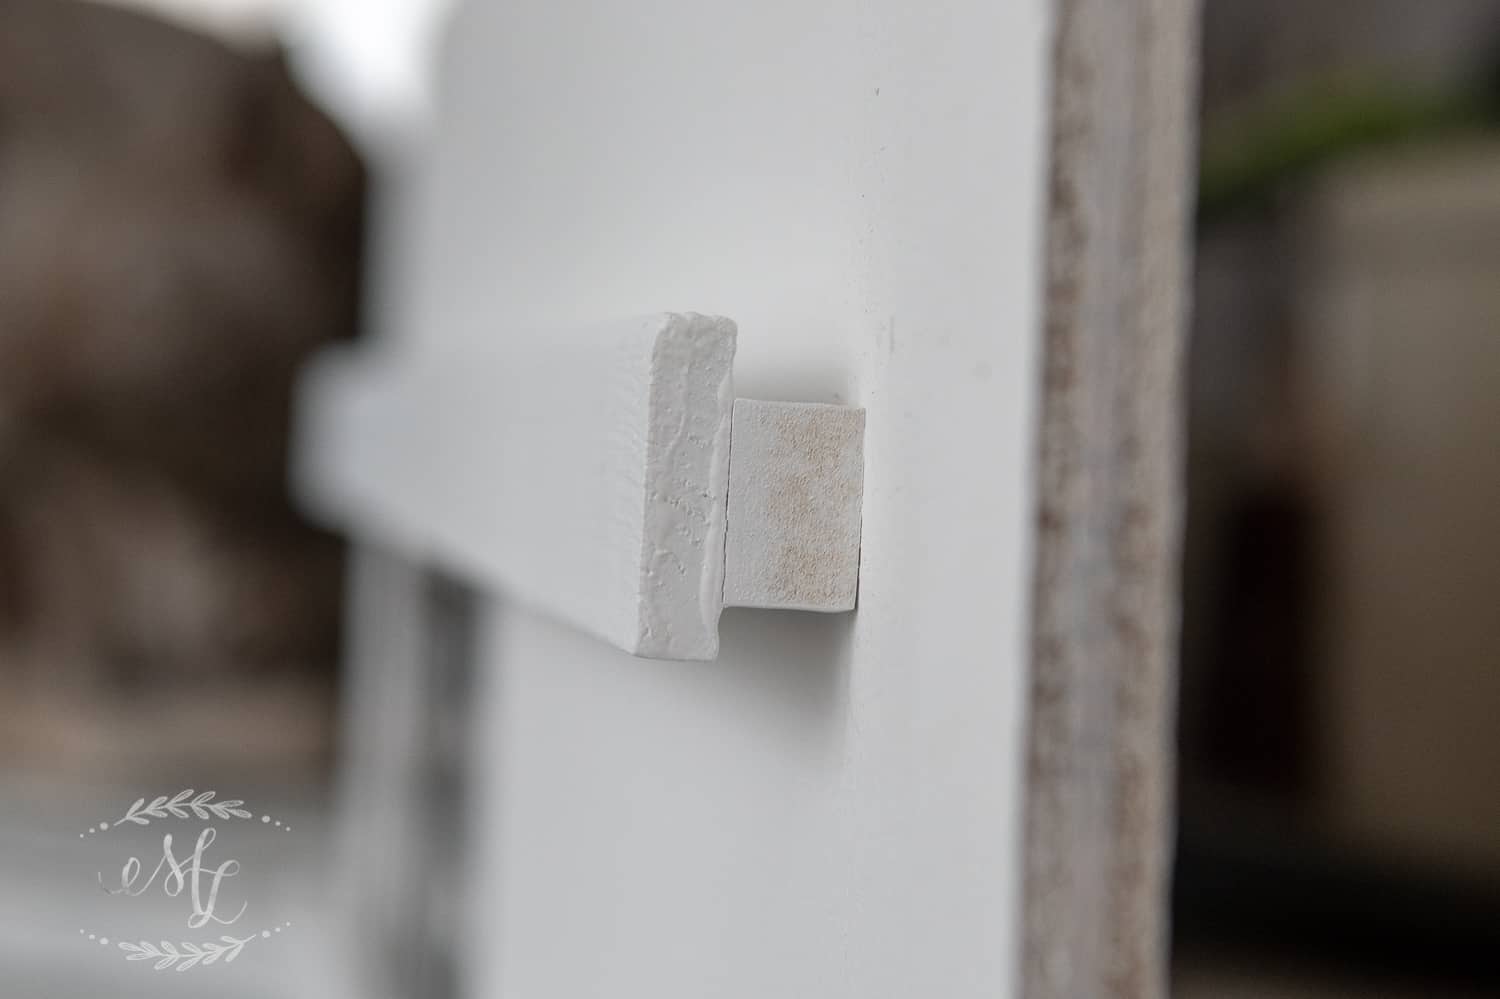
Pro Tip: To measure consistently between each row, we made two 4 5/8″ guides from 2x4s. This allowed us to have consistent measurements between each row, making it much more efficient than using a tape measure. Altogether, it took 5 minutes to get them all nailed to the plywood!
Once the square moulding was fixed to the plywood back, we then attached the lattice. We did this by simply eyeballing them centered on the square molding. A little nail gun action, wood filler, and one last coat of pain. Poof, Fineto!
Making the Letters
Now, you can easily purchase your own marquee letters for this project. They’ll run you about $60+… yes those little vinyl letters you see on light up marquees…soooo not in my budget! Of course, I decided I was going to make my own.
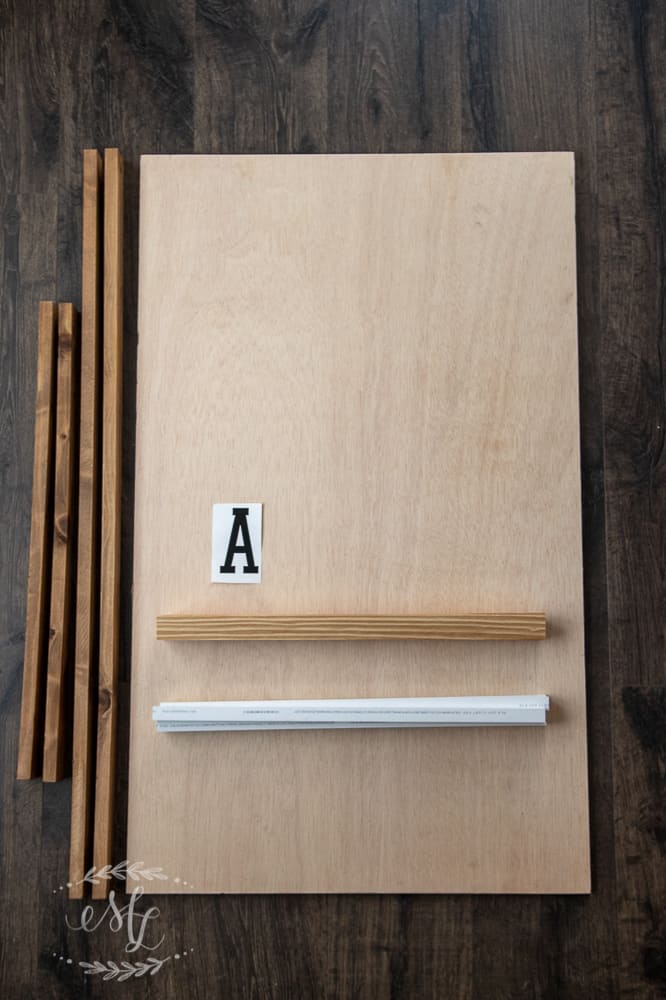
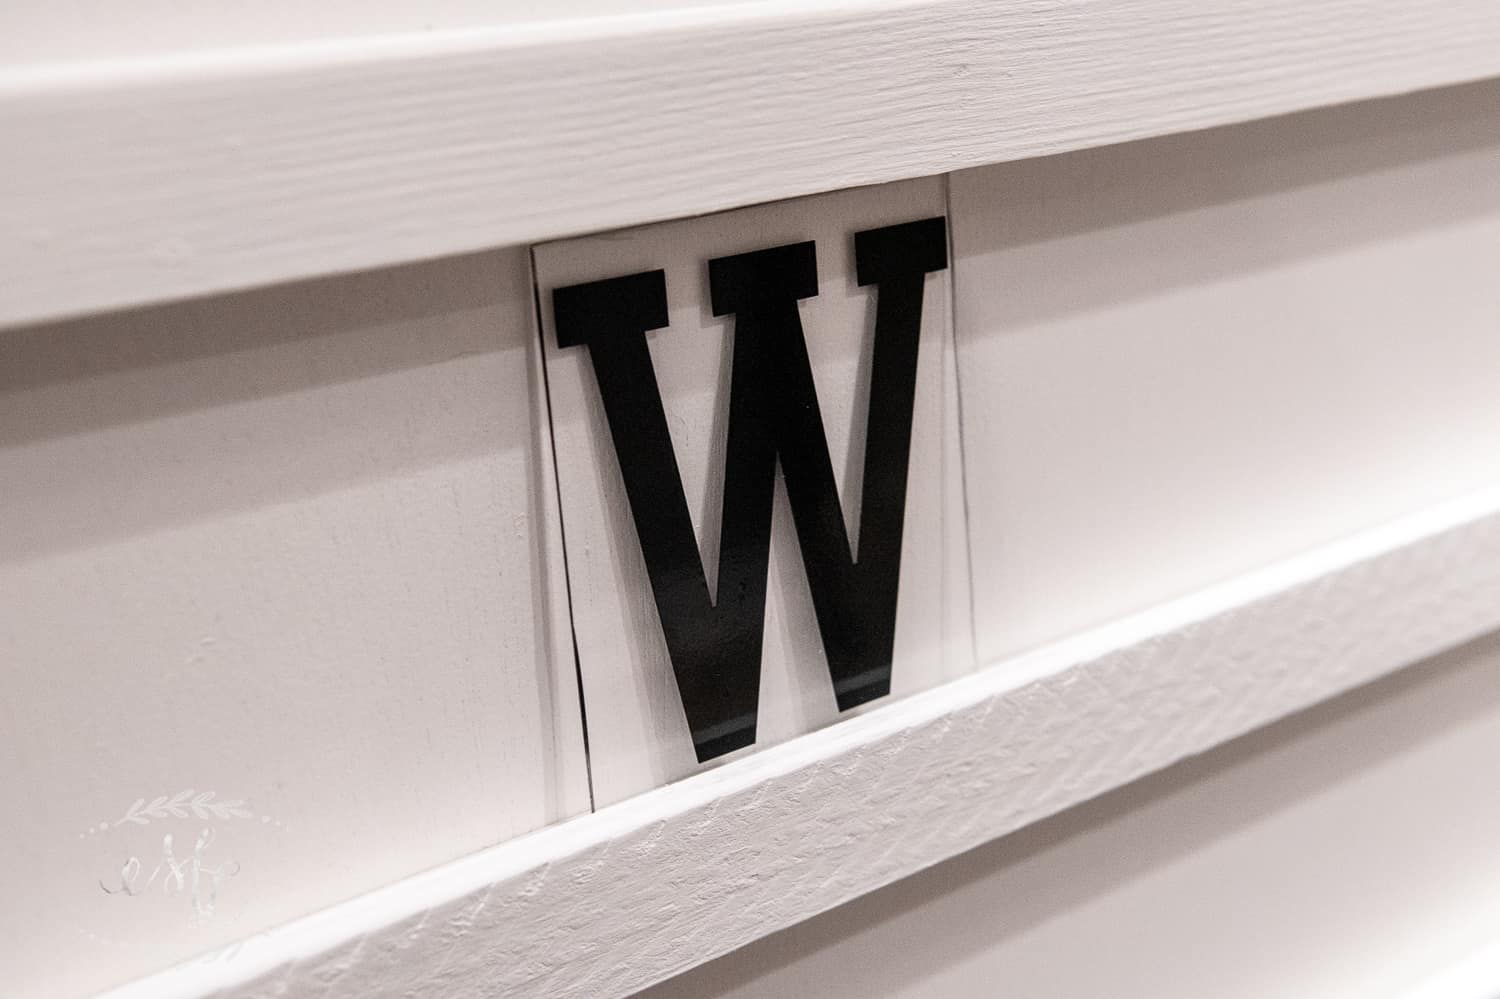
I used clear acrylic as the background. The big box stores sell clear acrylic in sheets of various sizes and thicknesses. For this project, I used .093 thick clear acrylic by Optix, which came in a 18 x 24″ sheet. Best of all, the 18 x 24″ sheet cost $11.98. Between that and the vinyl, making the the letters only cost me $15!
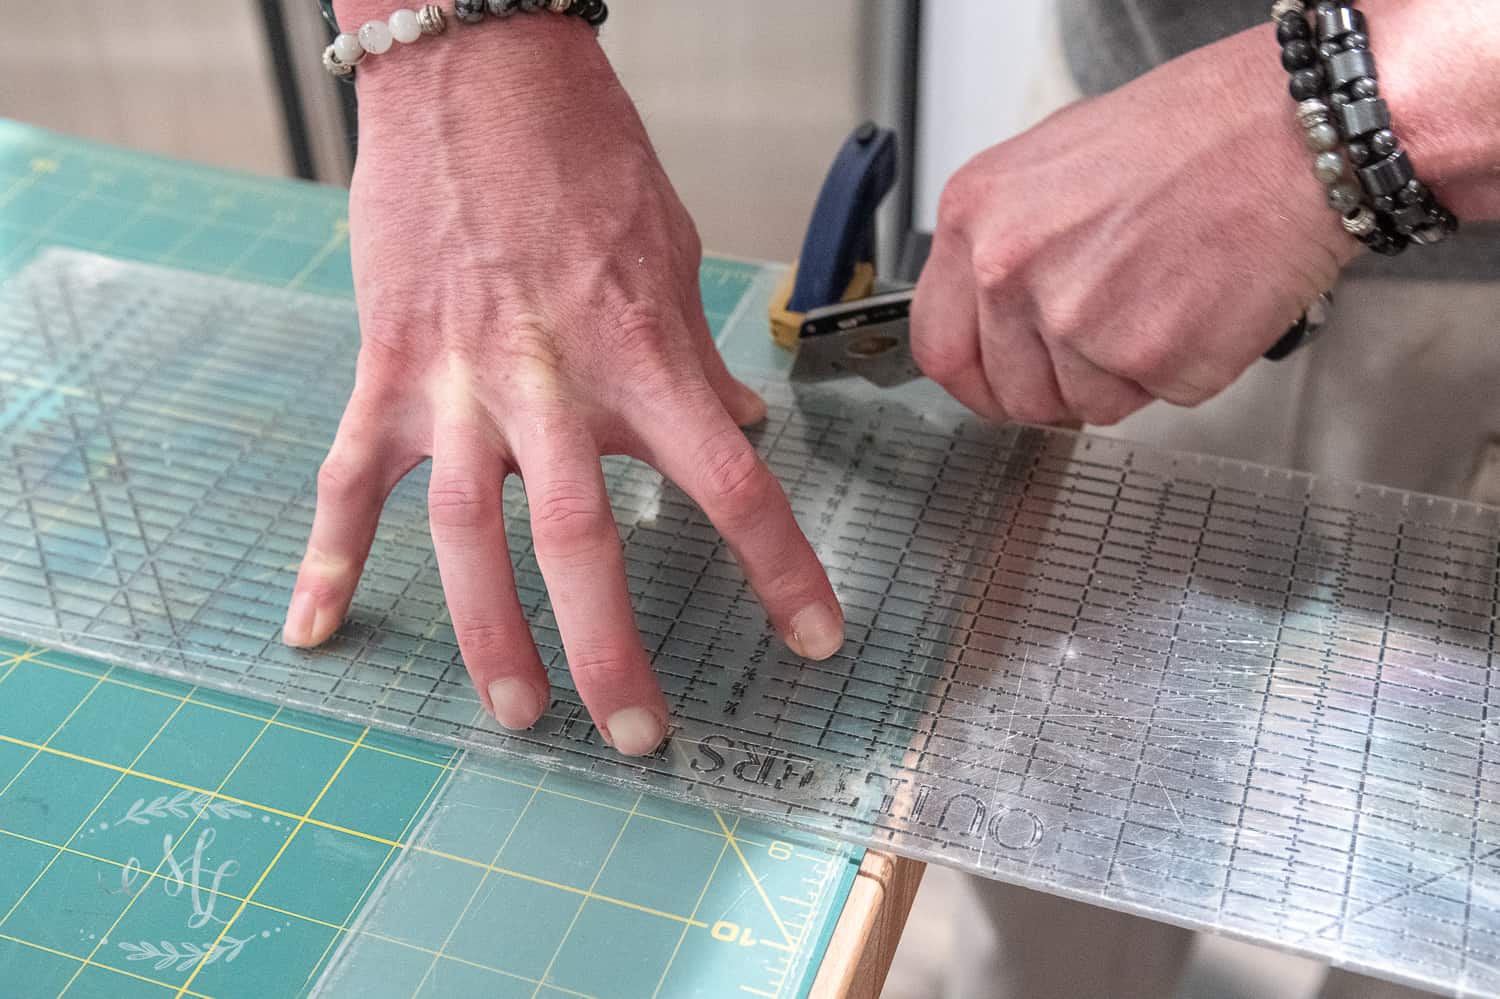
I had never worked with acrylic before. I’ll be honest, I was intimidated to try it out. But seriously, it wasn’t really that difficult to work with.
First, we scored the acrylic with a utility knife a few times. Then using a plastic sheet cutting tool we scored it a million several more times, until till there was a good ridge. Using the straight edge of a bench or counter and a little pressure, you should get a clean snap! It really isn’t hard, it’s just tedious.
Tip: To make the letters I used a font called College Boy I downloaded from dafont.com.
Using my Silhouette Cameo, I cut out 4″ tall letters out of glossy black vinyl. I printed the entire quote on just one 12 x 24 sheet of vinyl.
To put the vinyl letters onto the acrylic plates, I used transfer paper and my eye. Each letter is a different width so we kept most of the acrylic plates the same size. However, the “W” and the “Y” needed slightly larger plates. Use your best judgement here.
The Finished Product
I have to say, I’m pleasantly surprised at how quickly this project came together in an afternoon.
I’ll forever love this piece. This quote is just perfect for this time of year and where I am in my life.
Thanks for visiting my little piece of the internet!
I’m Maria, a lover of furry things, coffee and anything creative. This blog is where I love to share affordable home decor ideas, great DIYs, yummy recipes, unique crafts and so much more.