As beautiful and colorful as mosaics are, sadly they do not really go with the décor of my home. Not in the traditional sense at least. This didn’t stop me. I really wanted to try this technique, it just needed a little farmhouse spin.
Before You Start
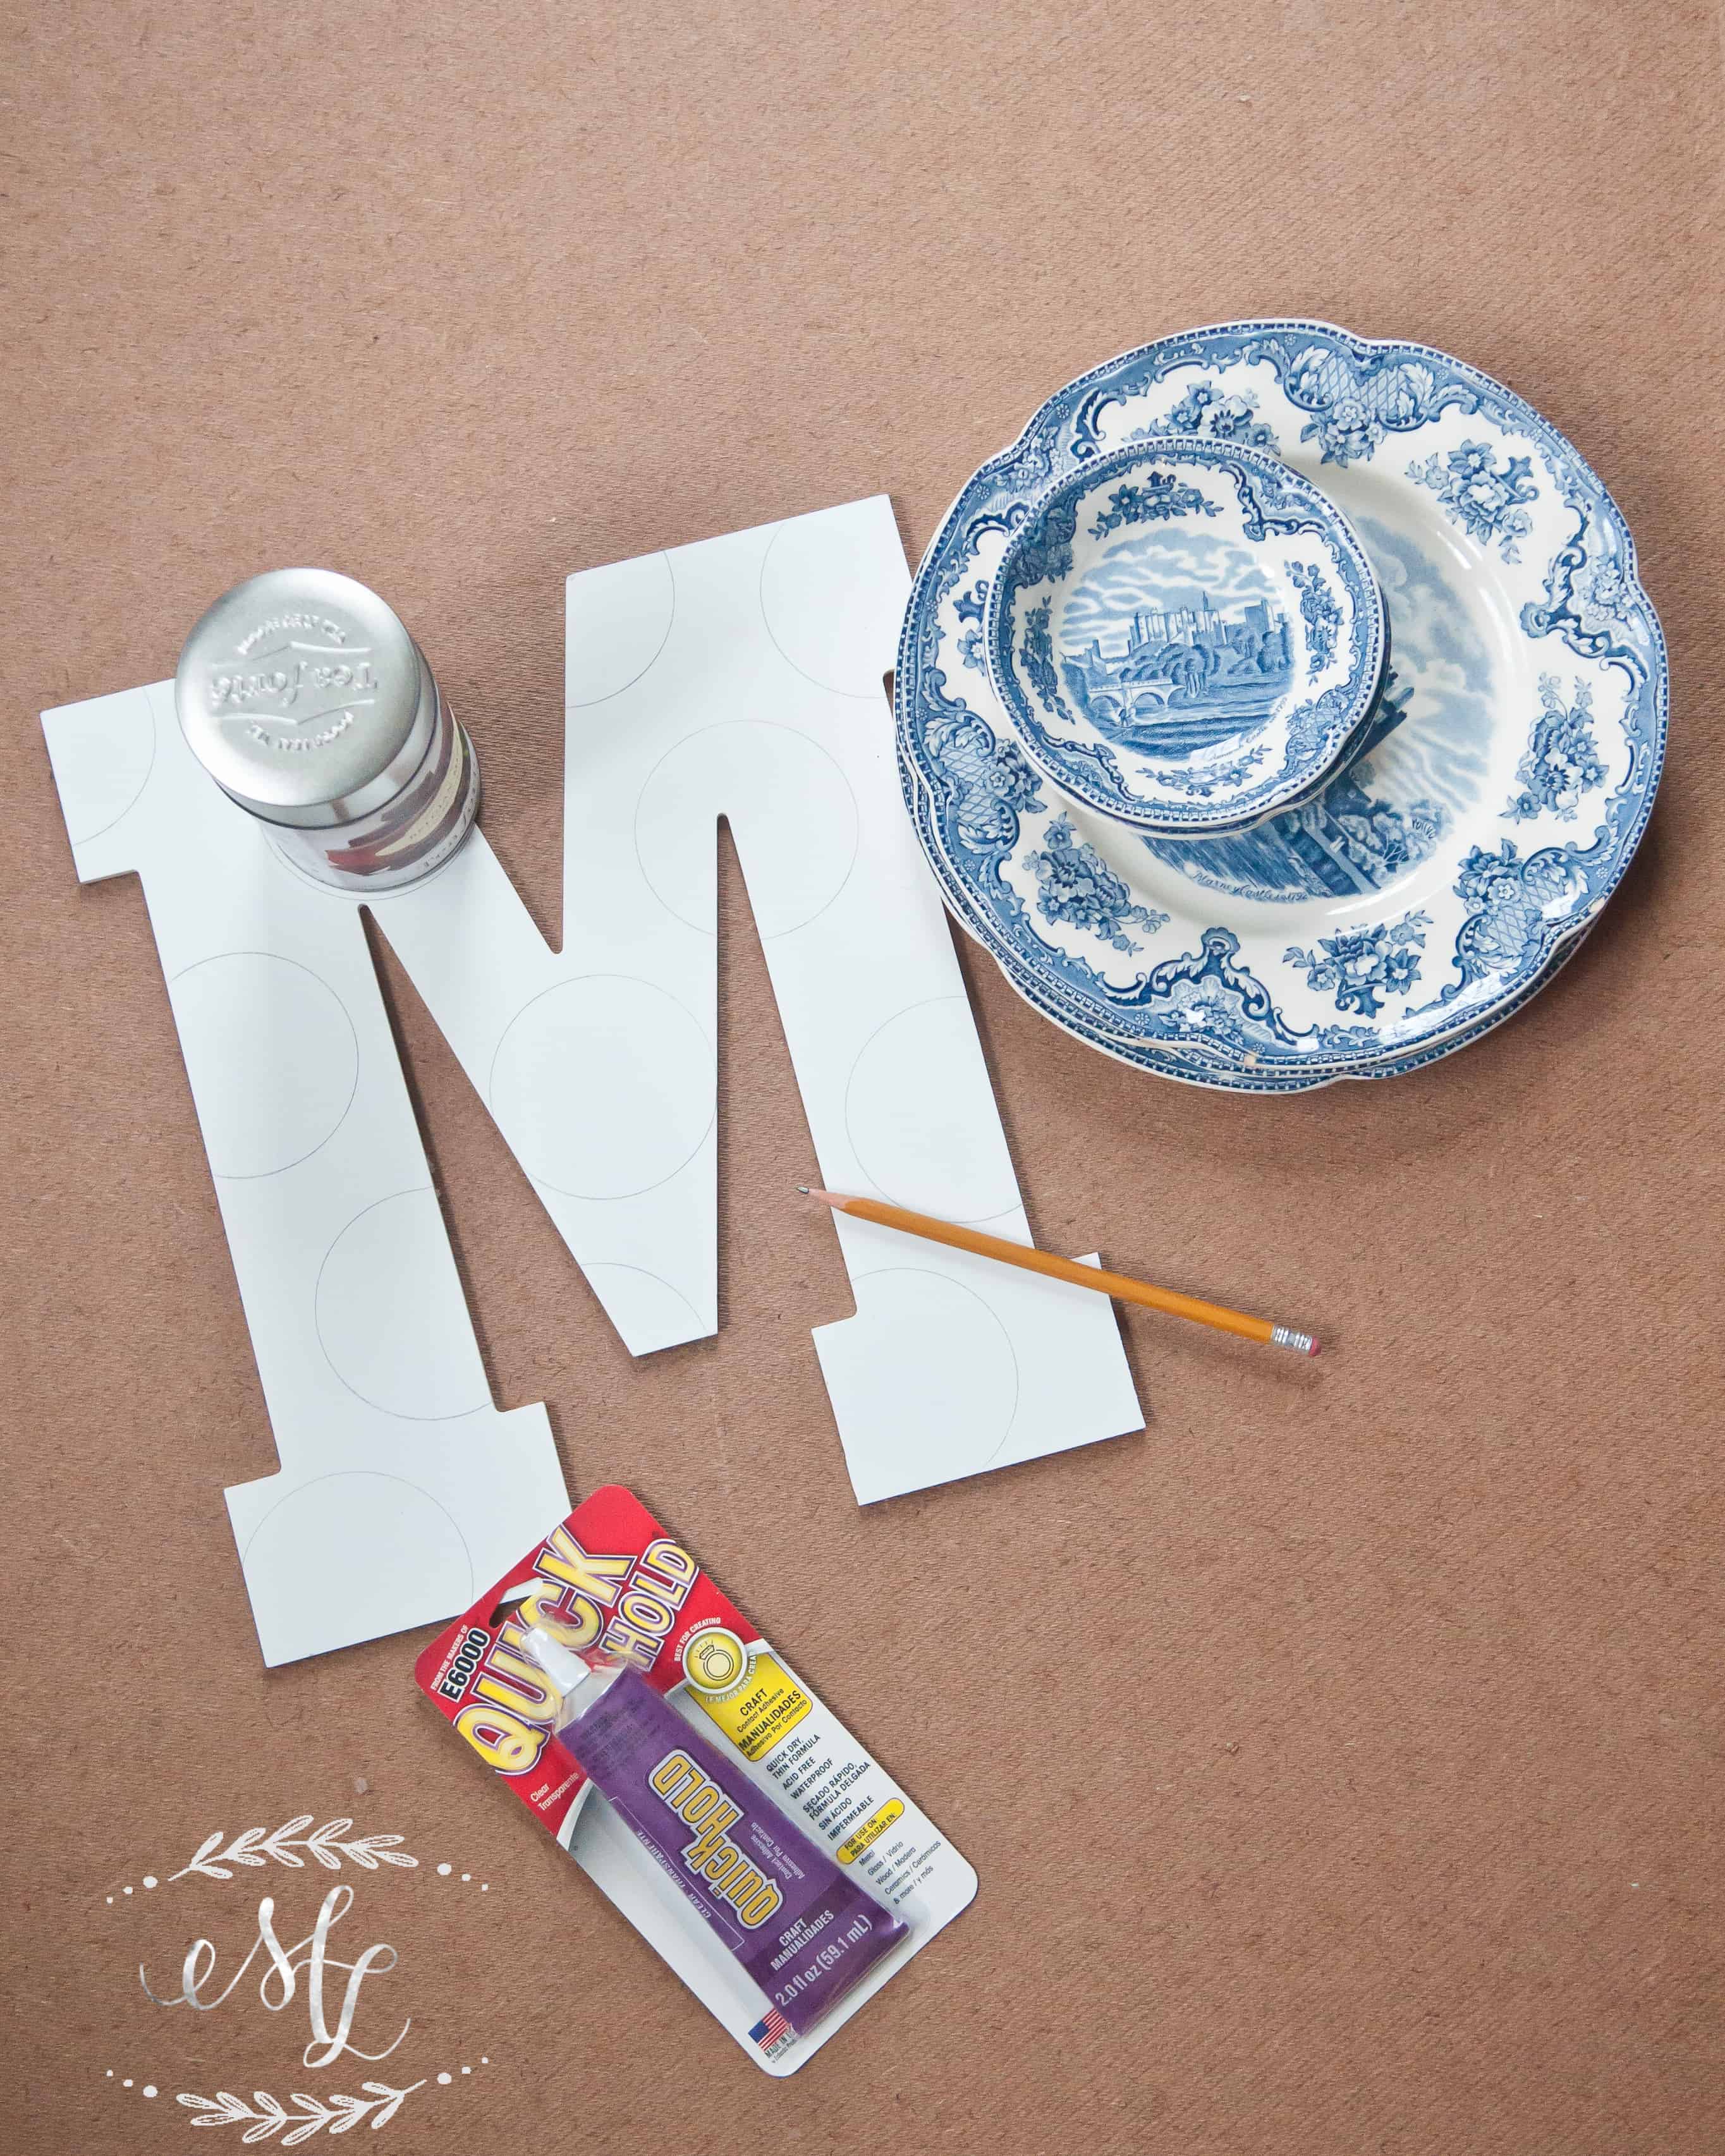
Before we get started, I must say this project is super simple. Thankfully, I had most of the supplies already. If you don’t, the supplies you’ll need are limited and inexpensive.
In preparation, I recommend going to local thrift shops to collect an array of plates or glass to use. Remember, you need flat surfaces, therefore I don’t recommend purchasing glassware for this project. Whatever your design, put some thought into it before you go so you have an idea what you’re hunting for.
Mortar or adhesive {had some Thin-Set Mortar from a previous project!}
Grout {I had some on hand but here is the brand I used}
Giant Letter {Michael’s with a 50% coupon, but here and here are a few options}
Pick a Pattern
Now, I have to confess, I wasn’t sure what I wanted my mosaic to look like when I started. I had grand ideas of elaborate scroll work, similar to the ones I had seen in murals, but I needed to be realistic. This was my first attempt at a mosaic, so I decided to go with simplistic pattern. A simplistic pattern of circles seemed to be a perfect solution.
To make an outline of sorts, I used an old tea tin and traced out some circles onto my wooden letter. This gave me a good guide to follow as I started laying down my pieces.
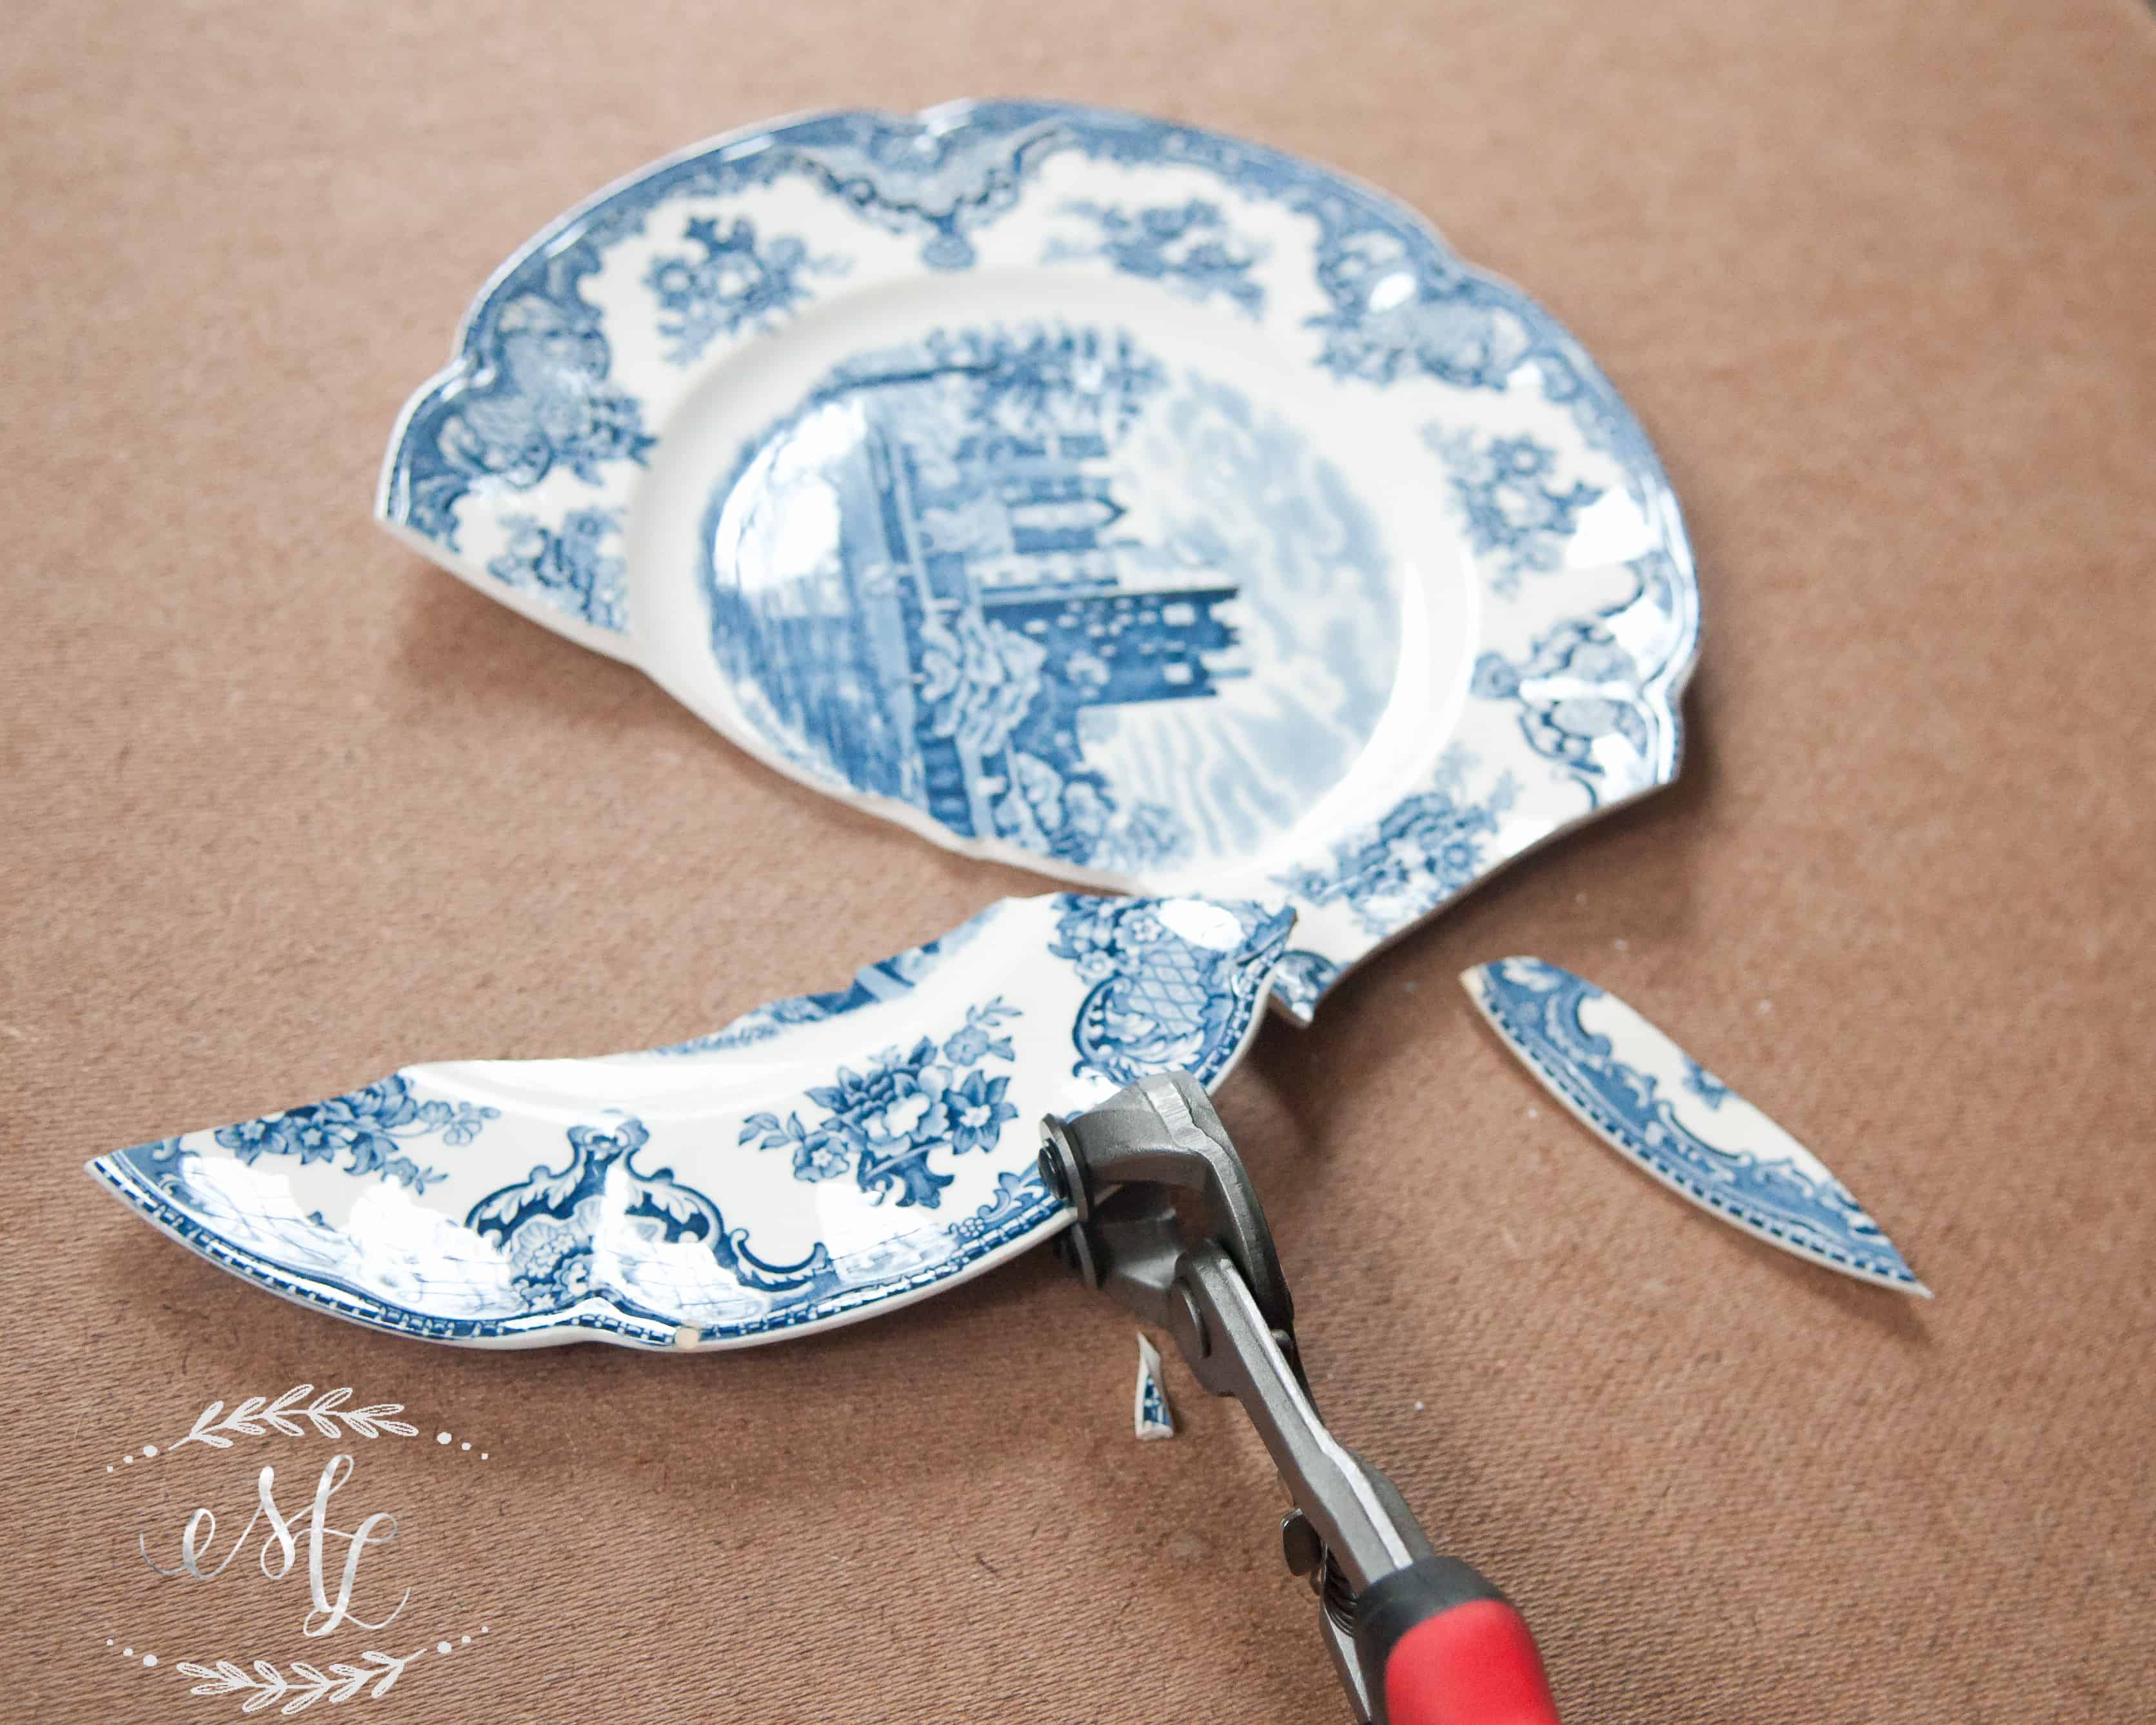
Quick Disclaimer: Do be carful and wear gloves and protective eyewear. You’re guaranteed to make quite a mess!
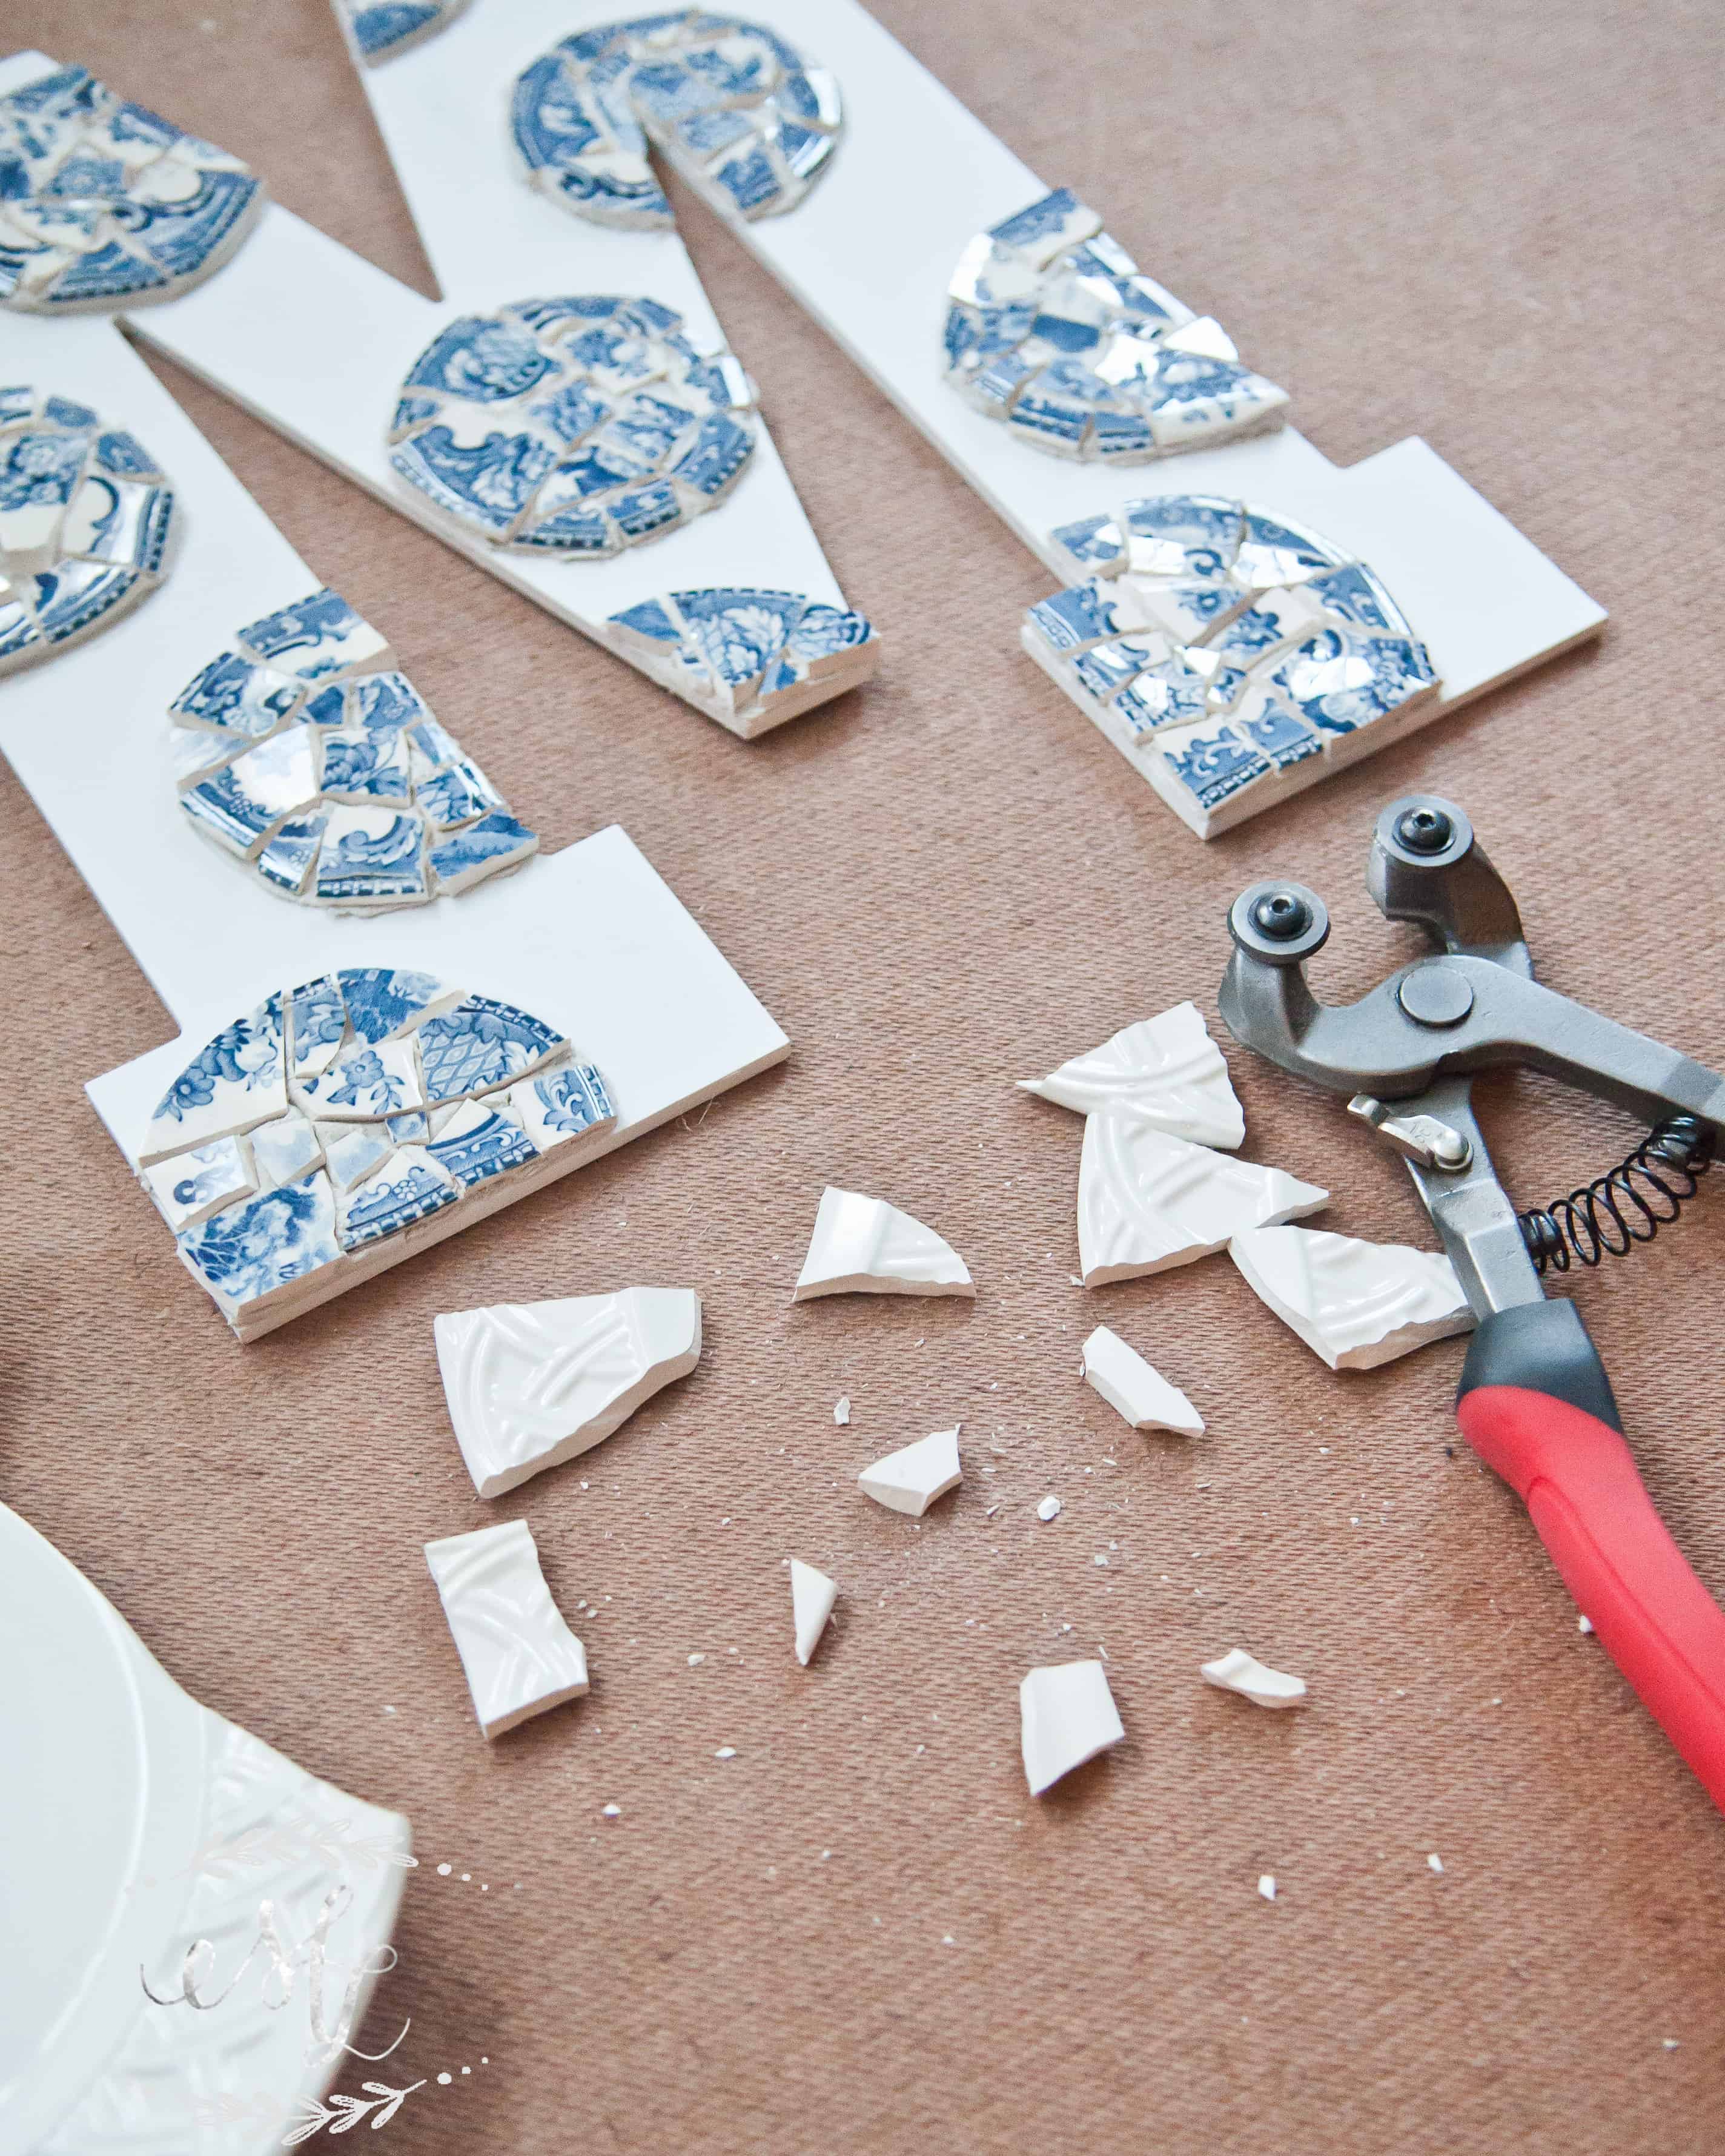
Make The Pieces
I started cutting pieces a few at a time. This helped me cut pieces the correct size and eliminated waste. Simply angle the nippers in the direction you want and squeeze, most of the time it will work in your favor. Sometimes, it will cut a little random. That’s the beauty of it. Mosaic artwork is all about being perfectly imperfect. I have to say, there is something so satisfying out of cutting plates into smithereens! It really is therapeutic.
Mortar Down The Pattern
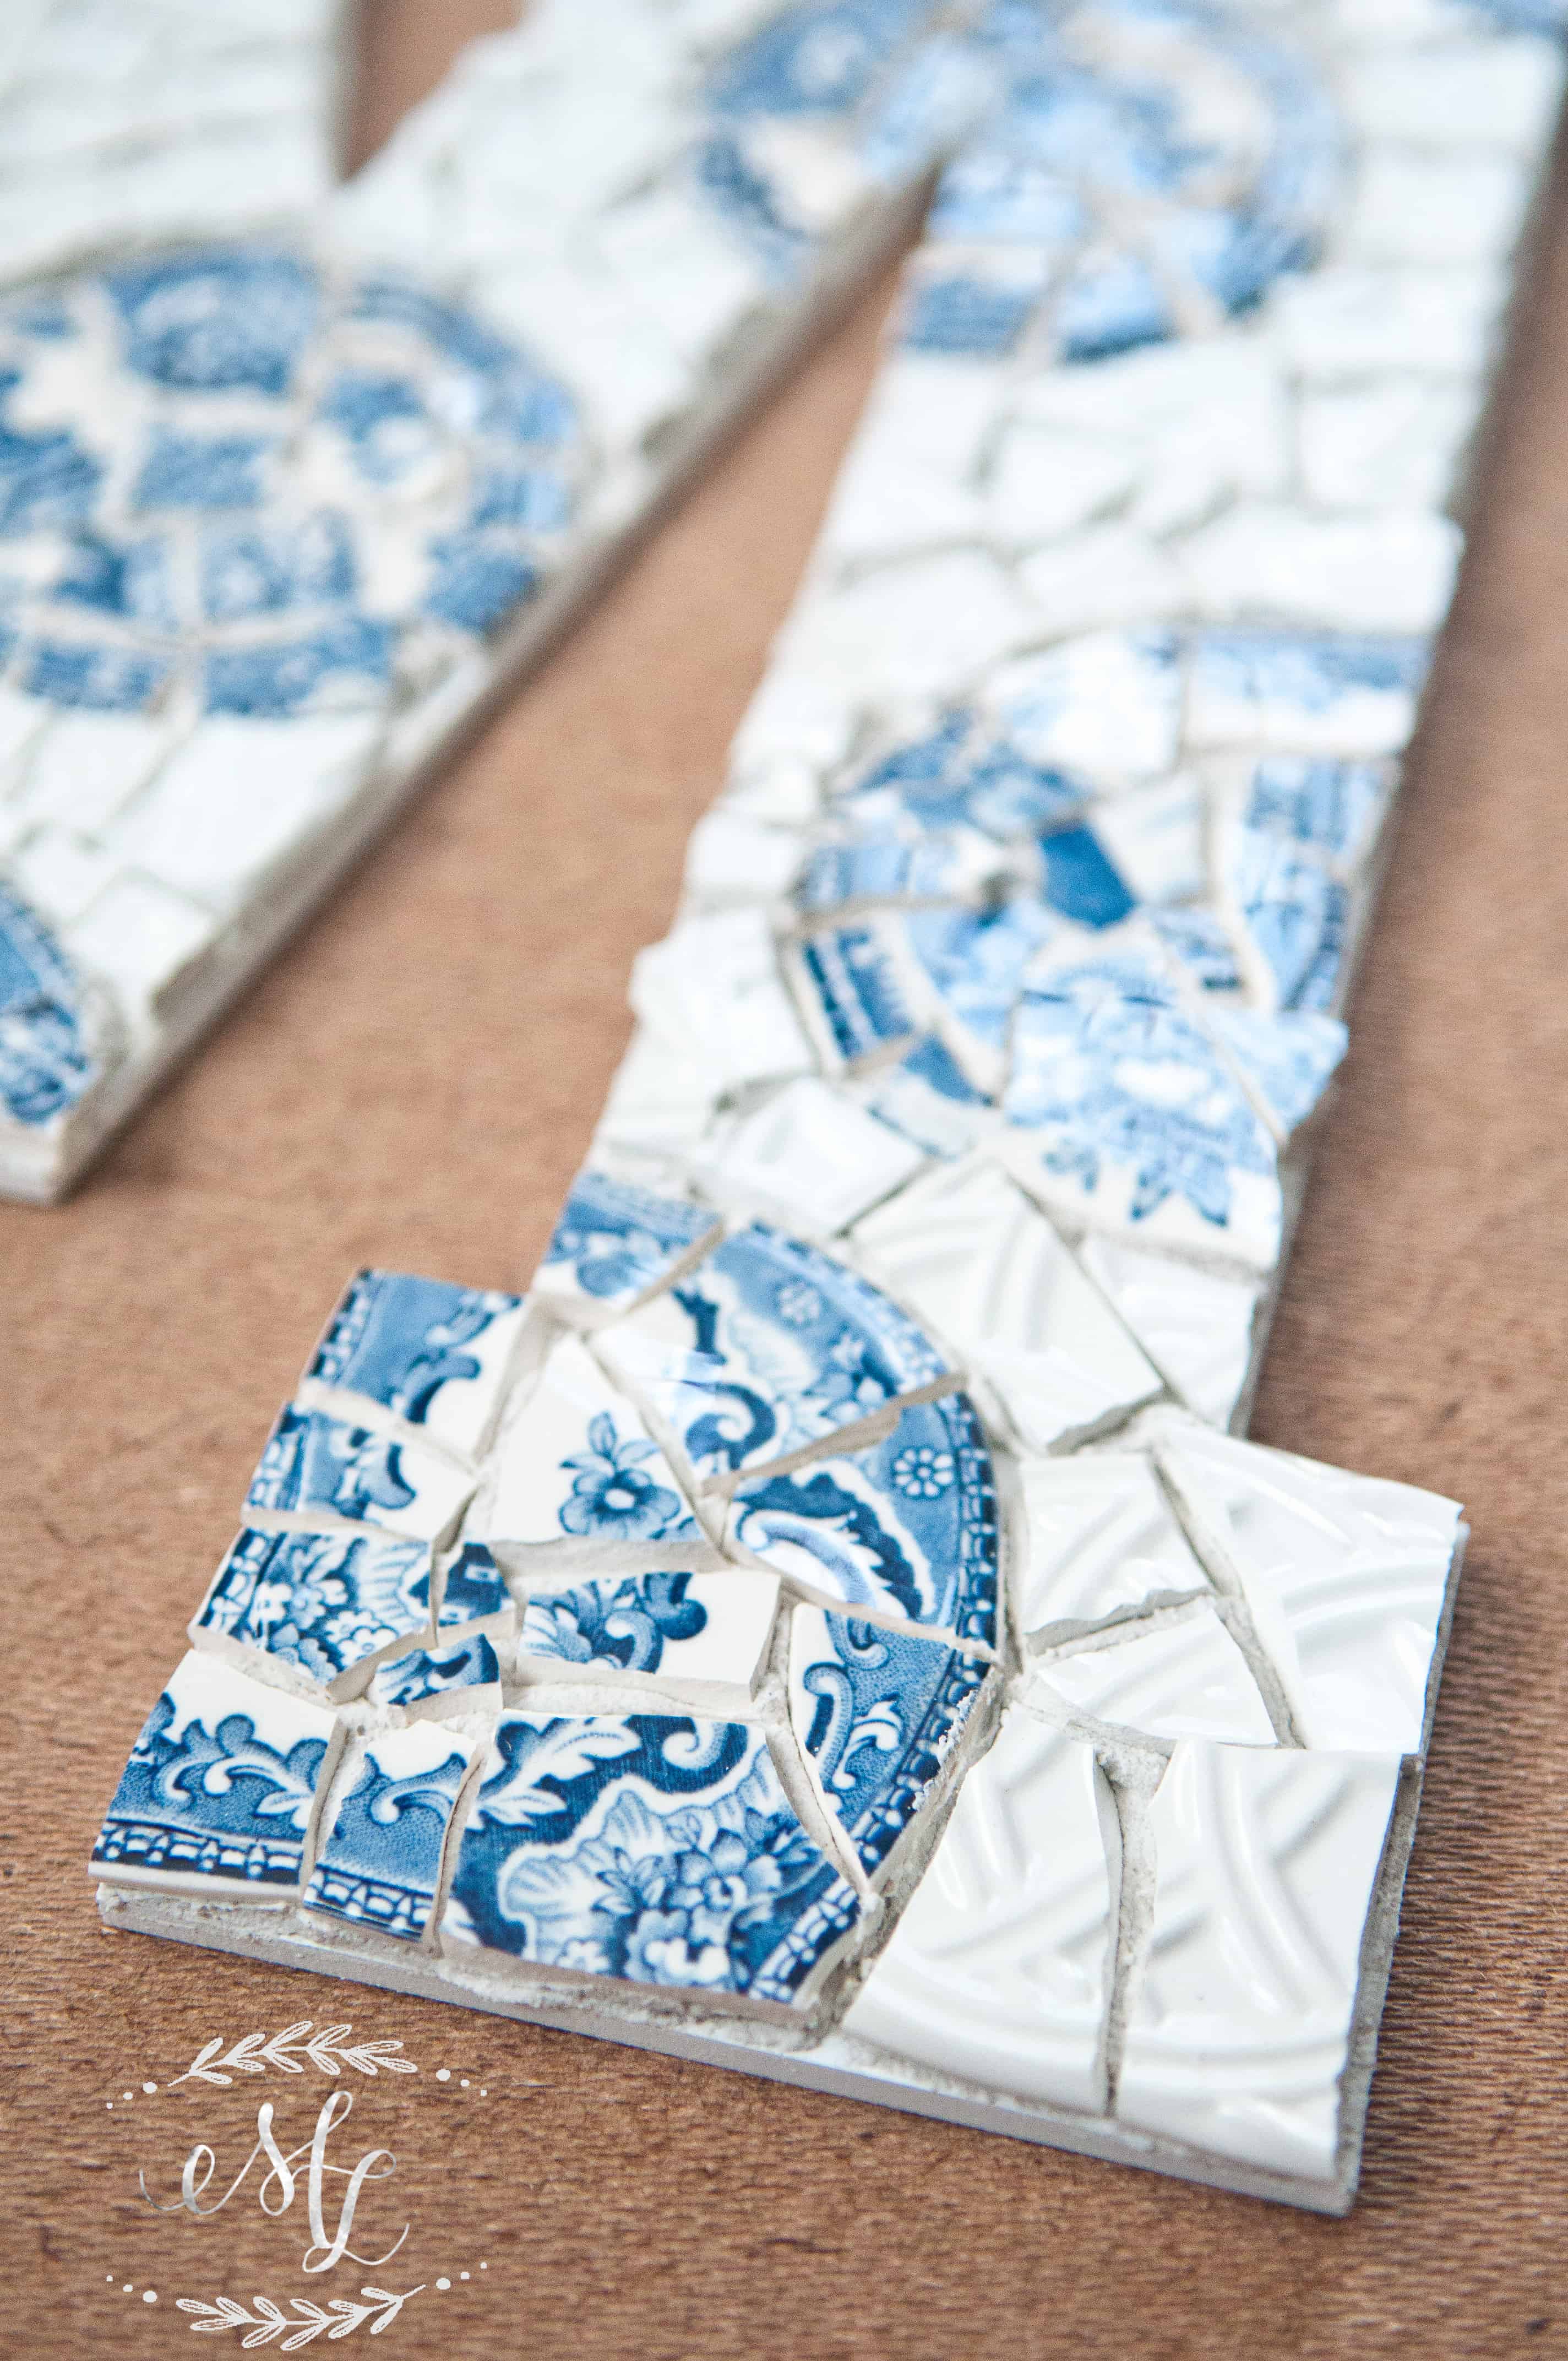
Working in small areas, I spread the thin-set mortar down using a butter knife and my finger. This let me cut pieces and lay down without having the adhesive dry too quickly. First, I started filling in the circle design. After they were completed, I then switched my palette and went to the white plates for the background. This kept the process simple. I wasn’t going back and forth between colors and making a bigger mess!
Once everything was covered to my satisfaction {or my patience became so thin my OCD calmed down}, I considered it done. The directions on the thin-set mortar indicate that the drying time depends on the amount and depth of medium use. They recommend that for a 8’x8’ area 24-72 hours are appropriate. Clear as mud right? Make sure you have a strong bond before you introduce the grout. With that said, I let mine dry overnight.
Grouting Your Project
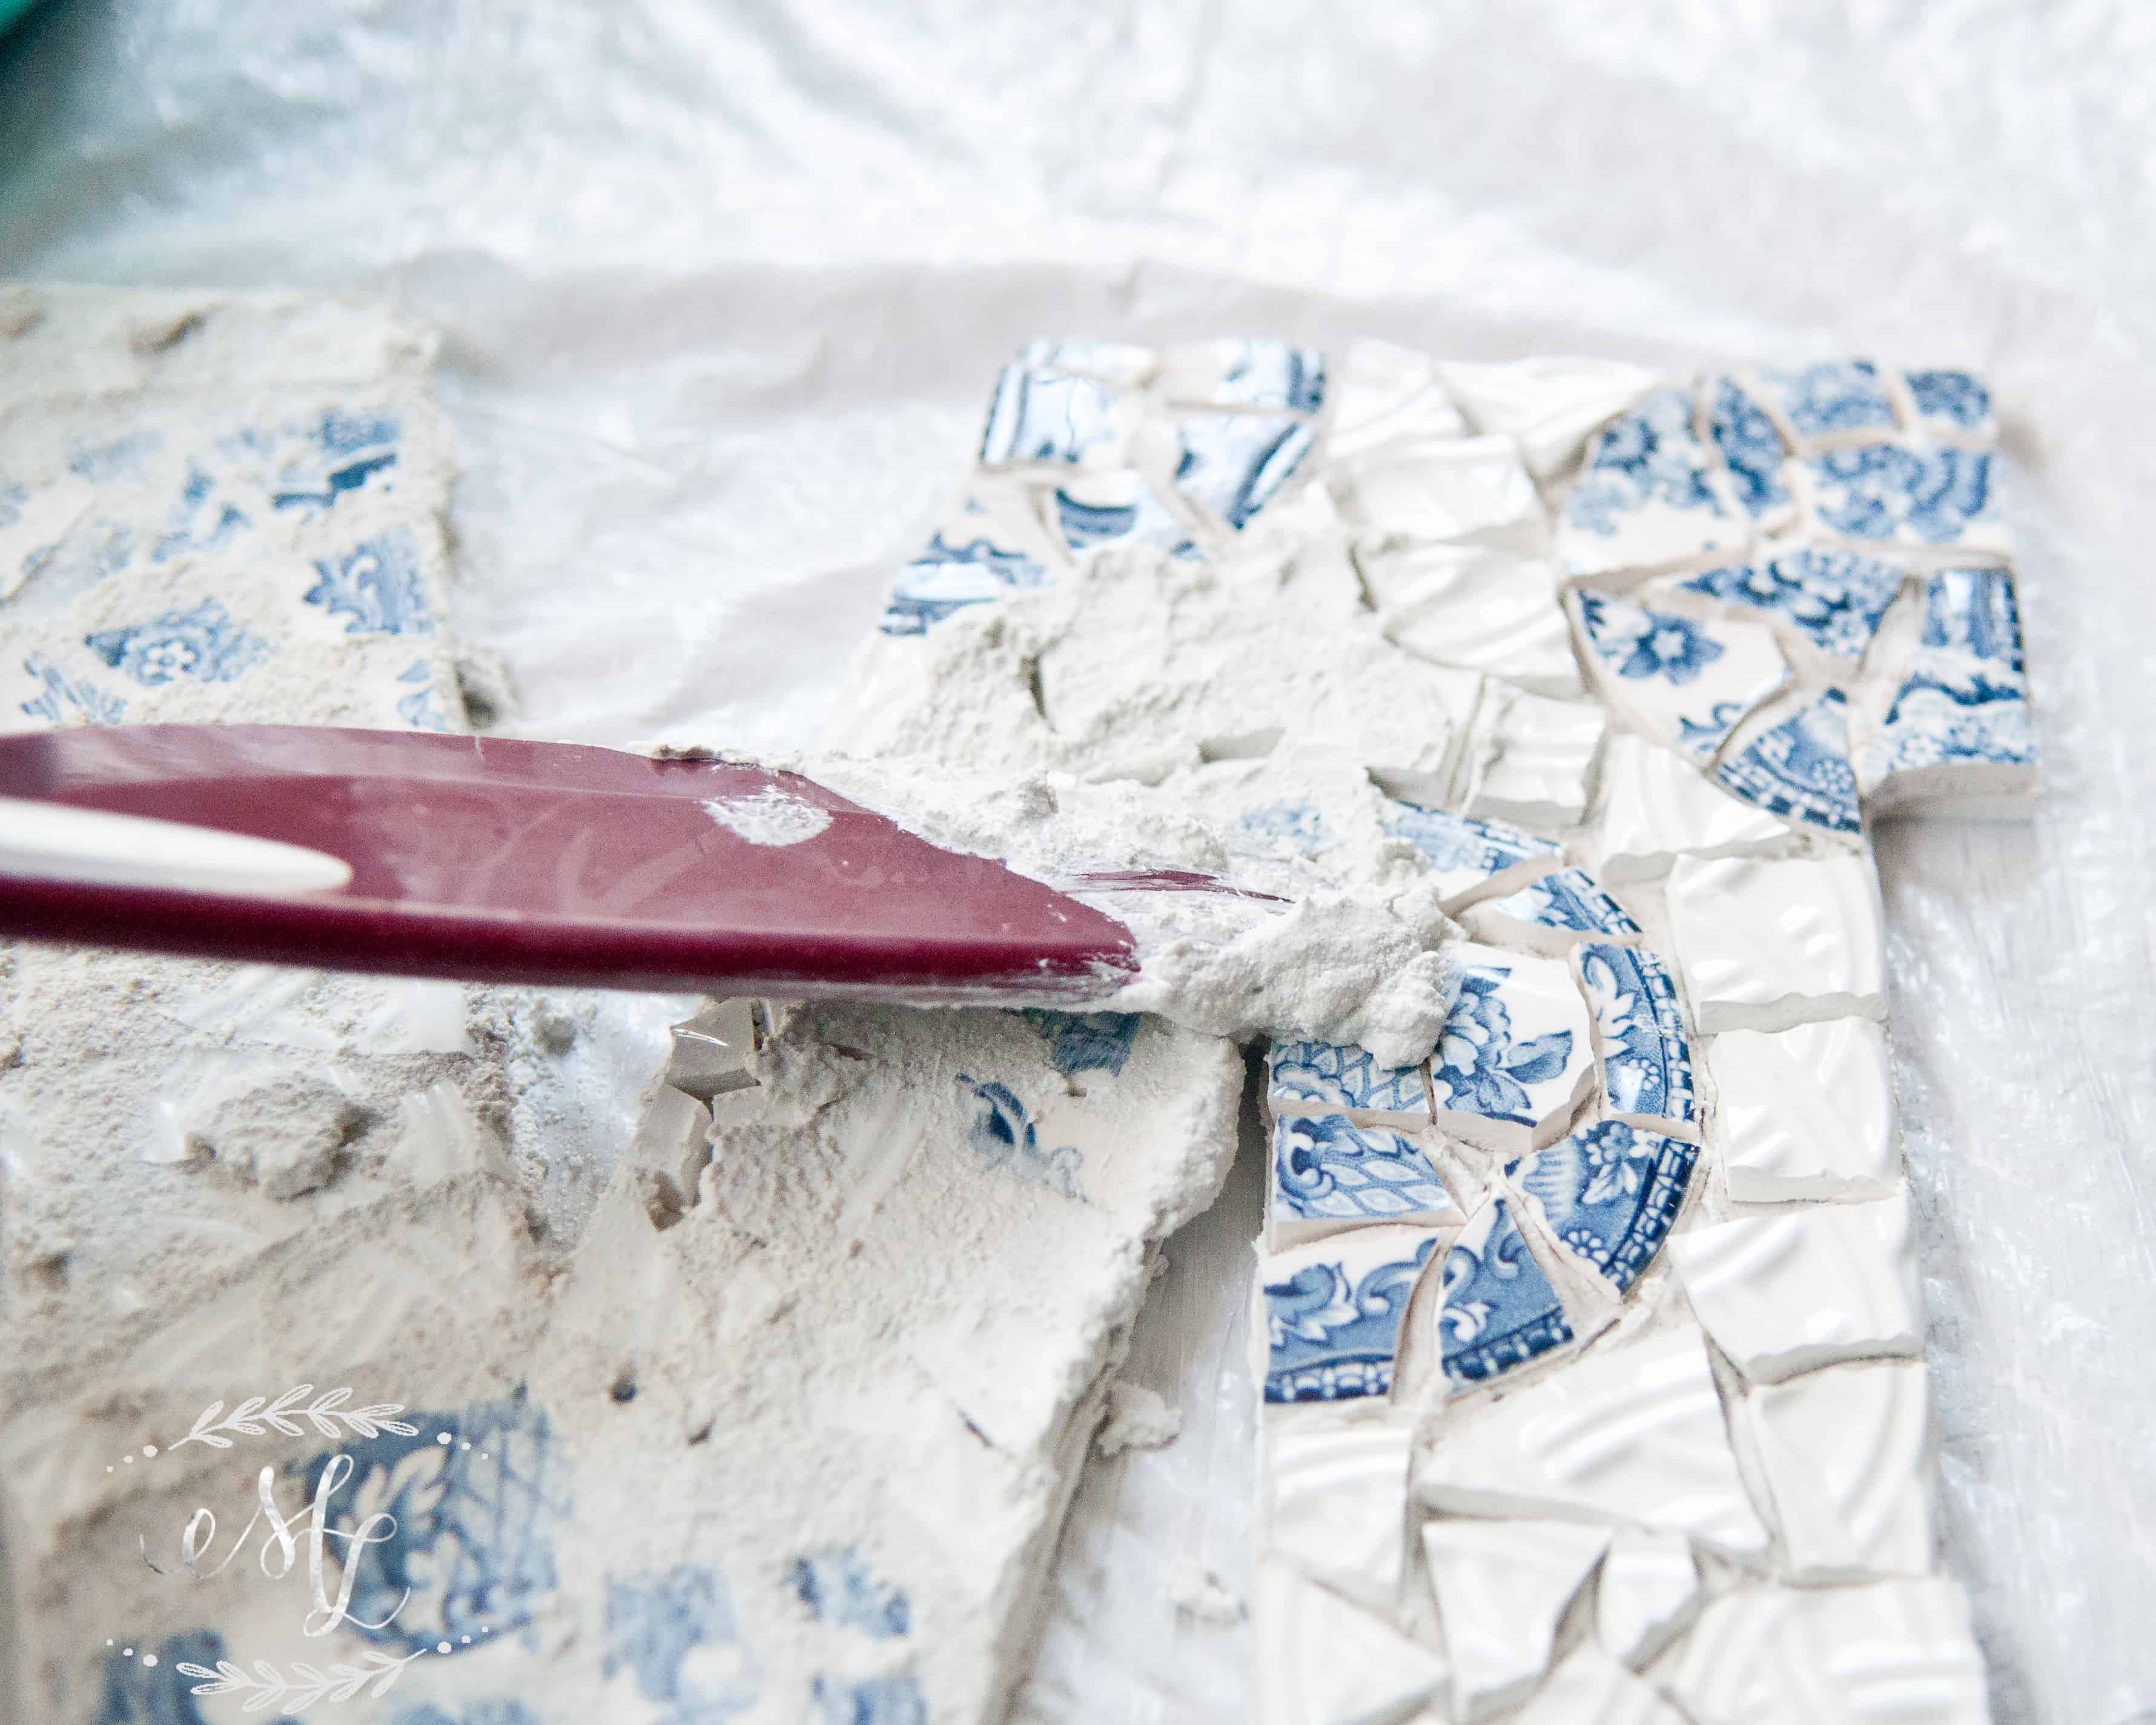
In the morning, this beautiful thing was ready to be grouted! Honestly, I’ve always wanted never grouted a thing in my life. But how hard could it really be? I watched a youtube video, didn’t look that hard!
The instructions are simple, mix a little powder grout and a little water. Mix to your desired consistency. Seriously folks, it’s that easy. I used a spatula and started working it into all the cracks.
Once completely covered, I let it stand for approximatly 20-30 minutes. Next, I took a damp sponge to wipe off the excess. It leaves the tiles a little hazy, that is ok, don’t panic. After an hour of letting it stand I simply wiped it off with a damp towel. The pieces polished up beautifully.
Sometimes when you start a project you have an idea of how something may turn out. Funny enough, this project was one of those, “I’m gonna love this, or HATE it.” Actually, I’m pretty impressed at how easy it was and how beautiful it turned out. I love when you surprise yourself with you own creativity.
I hope this inspires you to go break some plates get creative and make a mosaic of your own!
Leave a comment and share your creations on instagram, make sure you tag me using the hashtag #marialouisedesign. I’ll make sure to share some of your creations in my instafeed!
Thanks for visiting my little piece of the internet!
I’m Maria, a lover of furry things, coffee and anything creative. This blog is where I love to share affordable home decor ideas, great DIYs, yummy recipes, unique crafts and so much more.