I have wanted a folding laptop desk for a few months now. With more of us working from home, we are trying to redefine our spaces. My couch is getting a lot of one on one time over here.
For me, I spend a fair amount of time on my laptop. I’m usually hunched over it, trying to balance it on my lap. Since I’m never in the best ergonomic position, my neck and back make me aware when I’ve spent too much time over the keyboard.
Does this sound familiar to you? Too much time on your laptop give you neck pain?
That is exactly why I wanted to make this portable laptop desk. I will say, this desk has really been a game changer.
The main thing is it raises my screen so I’m not looking down as much. This relieves the stress on my neck and back and has really improved my sitting posture.
Let’s be honest – the more comfortable you are in your workspace, the more productive you are. You should enjoy my computer time!
If you’re feeling my pain over here, I’m telling you – you really need one of these in your life! I actually find myself using this desk for writing desk and even a serving tray when needed. It might be my new favorite piece of furniture in my house to date! Maybe…
Do I have you convinced you need one of these folding laptop desks in your life?
Ready to get to work? If you have the right tools, it is an easy build. And if you don’t have the tool – go buy them. One can never have too many tools!
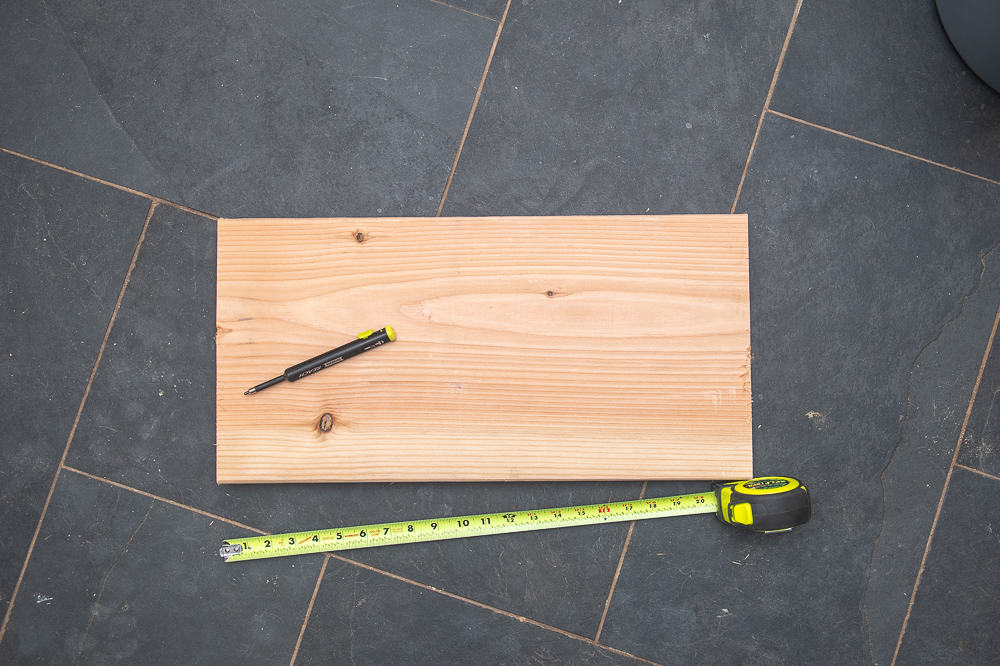
When designing this folding laptop desk, I decided to make the top out of a 2×12″ board. Why? I wanted enough depth for my laptop but I didn’t want something that weighs too much.
To start, I measured the top to be 22″ long, giving me plenty of room for my laptop and my mouse. I didn’t want to be too crammed, or the desk to be too cumbersome. Too large and it would weigh a lot and would be a nuisance. The whole purpose of having a folding laptop desk is it to be able to store it away easily when not in use!
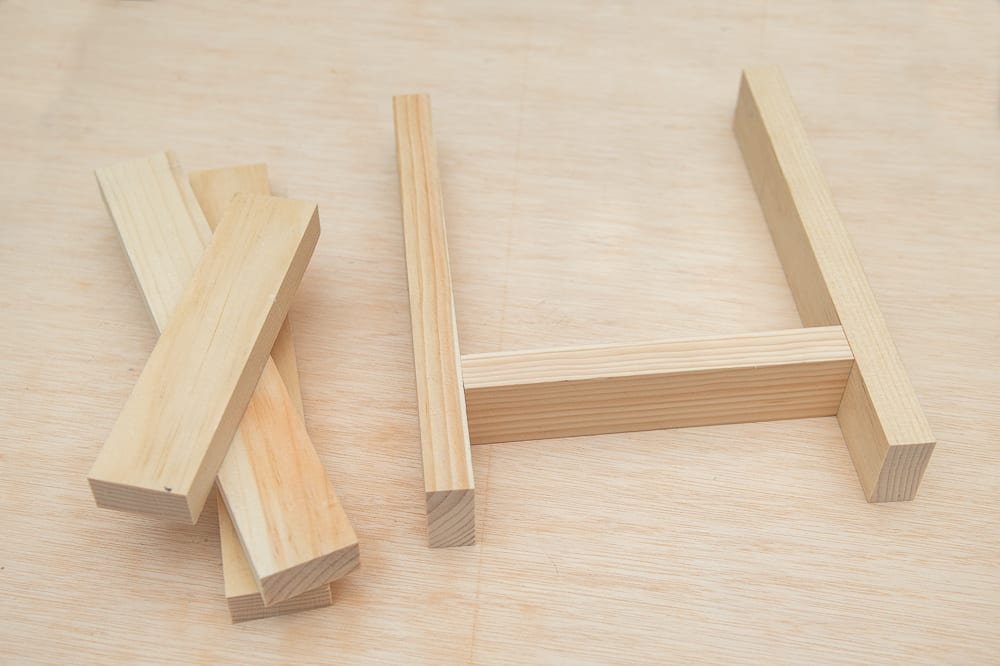
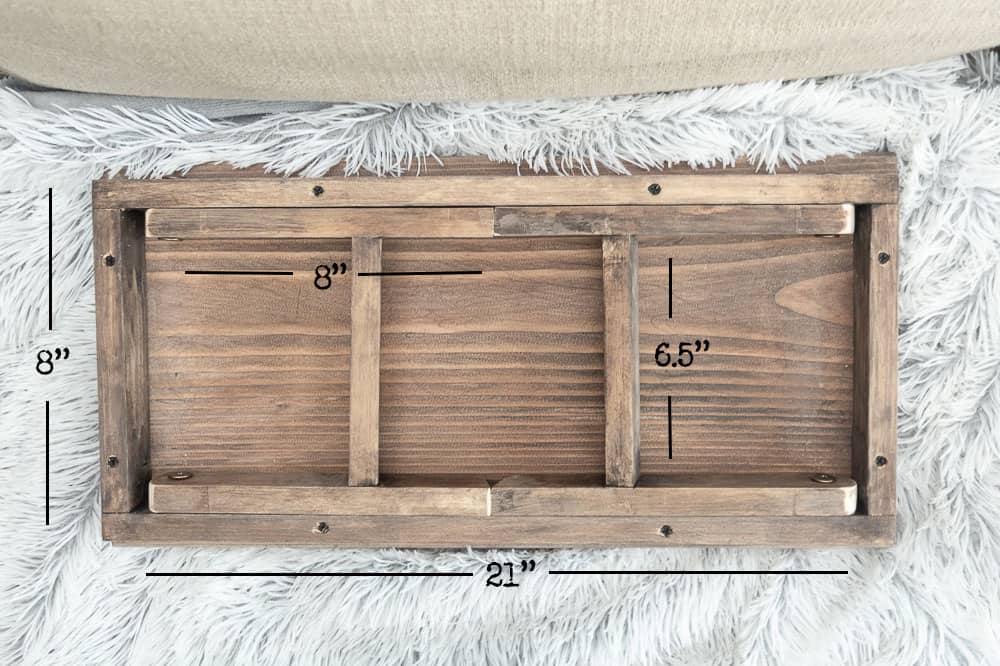
The underside, where the legs fold up, is called an apron. The apron provides an area to conceal the legs when folded, this means the legs need to factually fit flush inside! More on that later….
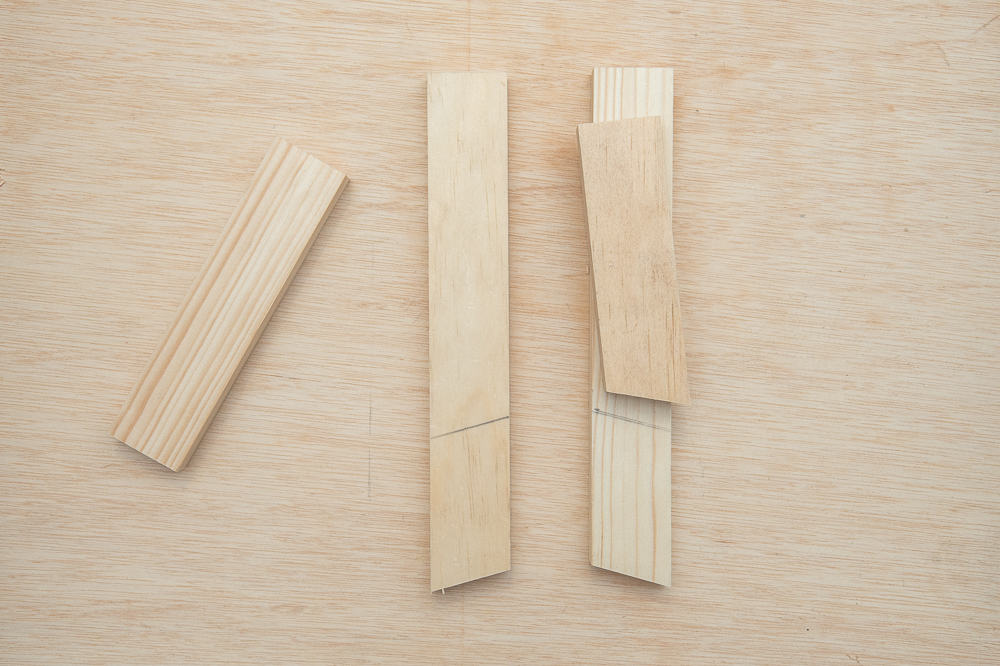
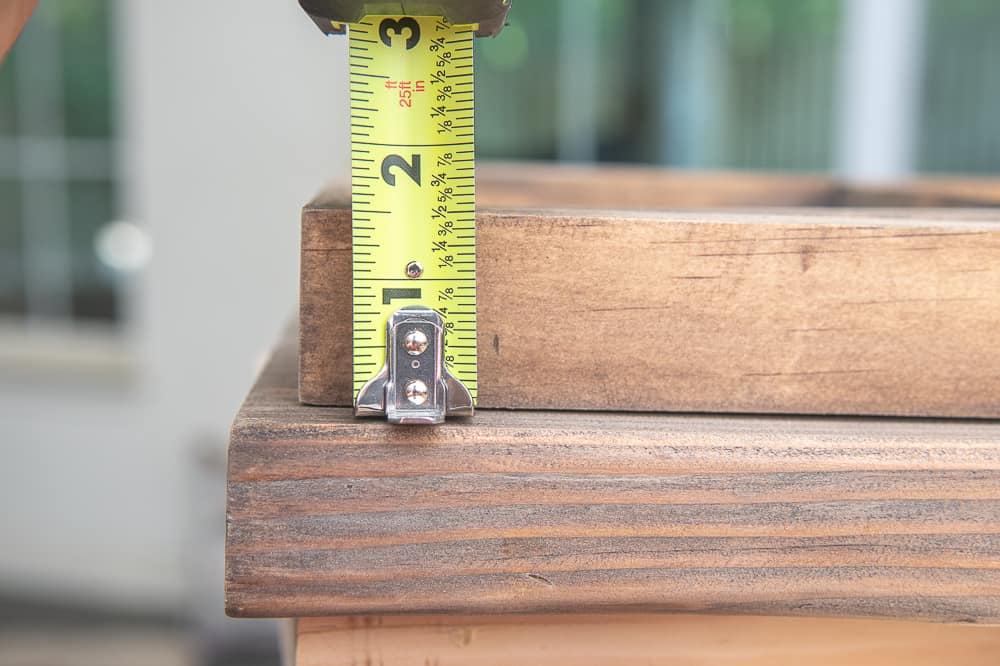
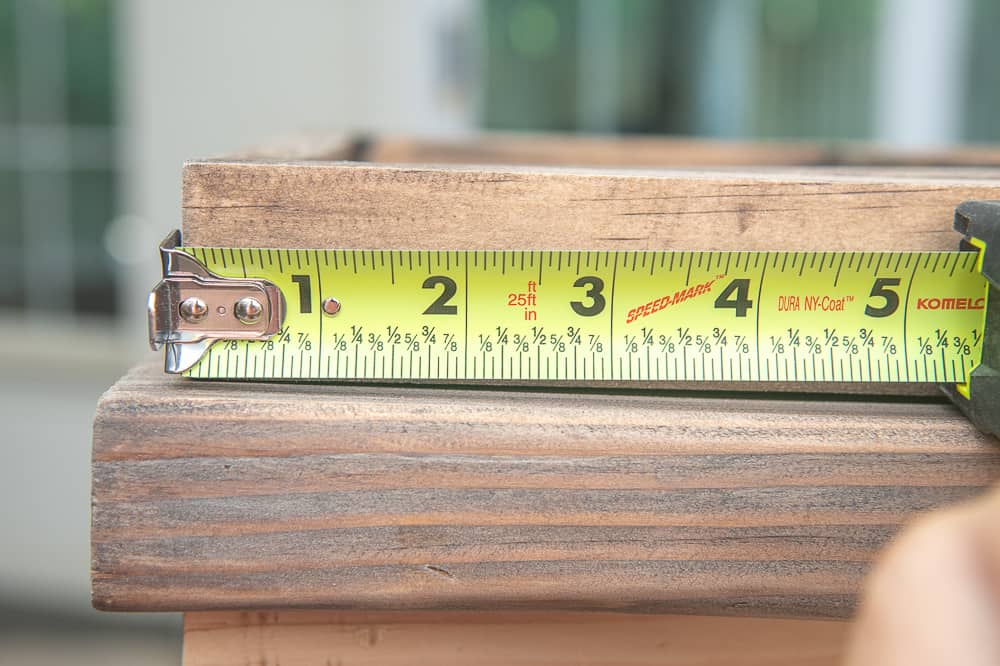
To make the apron, I measured 21″ long and 8″ on the sides. I used 1x2s to construct the apron, as well as the legs.
The sides of the legs are each 8″ long and the brace connecting them is cut at 6.5″ wide.
I also want to mention, I mitered the bottom of the legs at 15 degrees so the legs sit flush when unfolded. I felt like this would help the overall look.
Next, I used a jig saw to round the top of the legs. This allows them to unfold without interfering with the apron. (You think I would have taken a photo of this… bad blogger… bad, bad blogger.)
Side Note – this was my first time using a jig saw and man, I can’t wait to come up with more projects using it! It is so easy to use you’ll really want to add this tool to your workshop sooner than later.
I recommend assembling the apron first, and then measuring the legs. They need to fit within your constructed apron. This means your 6.5″ post may change depending on your previous cuts. You don’t want the fit to be too tight and the legs be difficulty to fold and unfold.
Since I got a little lost in the creative process, here’s a visual of the measurements and cuts I made for the apron and the legs. You can also see how I rounded the top of the legs with the jig saw.
Maybe one day I’ll stain them… but probably not!
ASSEMBLY - PART 1
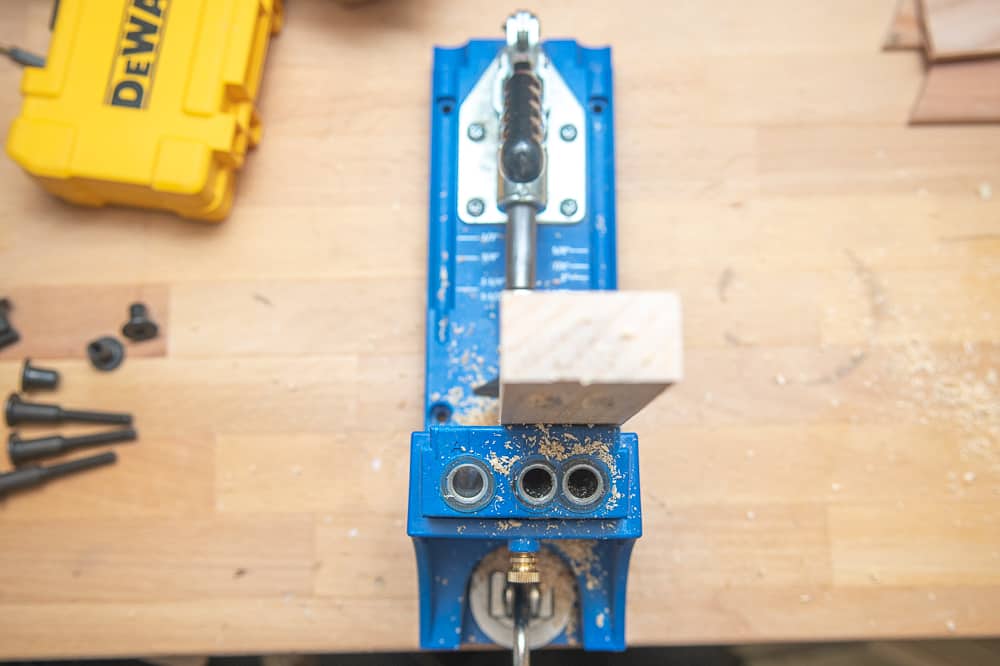
Oh the dreaded pocket holes… I won’t lie, they aren’t my favorite thing.
However, I get that they do help reinforce the structure – and since I know nothing about a biscuit joints – off I went making lots of pocket holes. I want this folding laptop desk to be sturdy.
I first assembled the apron (like I said above, I did this before cutting my legs.) To do this I put two holes in the 8″ short sides of the apron to join it to the 19″ sides. I used 1 1/4″ pocket hole screws.
I ended up using two different sized drill bits to make sure my drill fit in the frame of the apron. Sometimes you need to get creative.
One of these days I’m going to buy one of those 90 degree drill bit attachment. It would have made this process much easier.
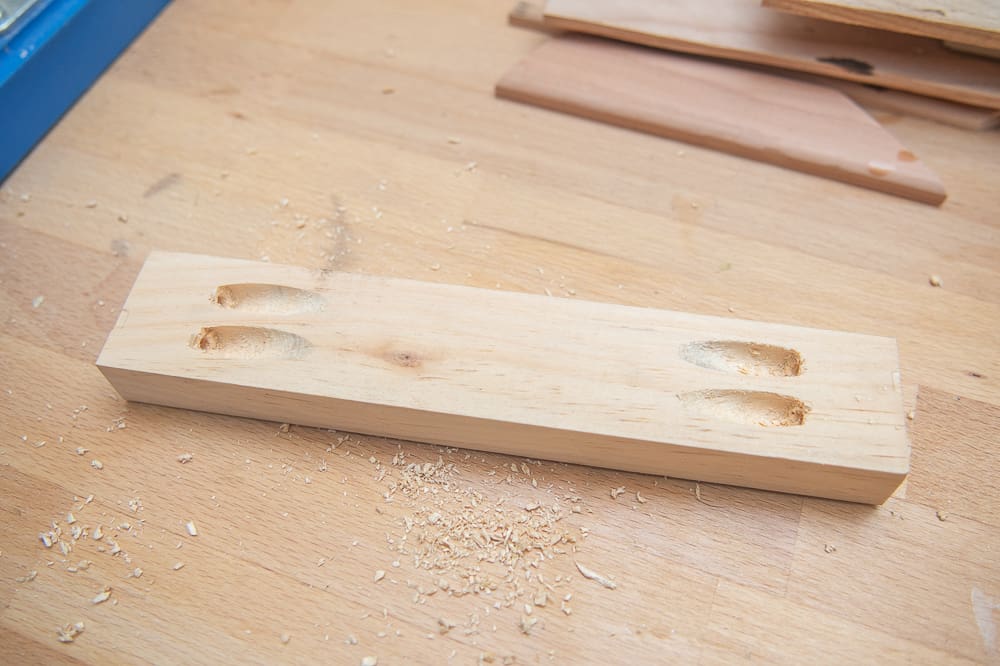
I used a scrap piece of wood – mitered at 15 degrees – as a template for the post for the legs. I wanted it angled so when the legs are unfolded the post is parallel to the floor. Gosh, I hope that makes sense…
Again, using two pocket holes on each side of the in the post, I fixed the post to the legs.
Now I decided now I needed to pause and stain what I had before the final assembly of this folding laptop desk. This is much easier to do before the piece is fully assembled.
STAINING
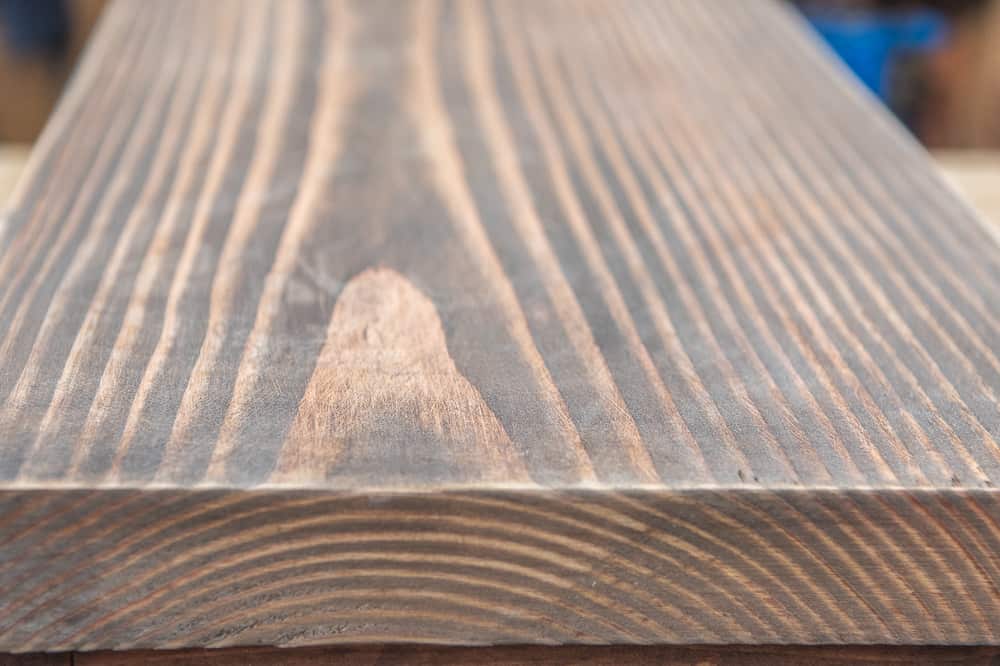
Well, my intention was to have this remain as natural wood (or bleached wood) with a matte polyurethane seal.
If you followed my stories, you would have seen me trying to bleach these pieces. For some reason, the pine 1x2s turned yellow! That’s right, yellow. I’ve bleached wood often and this was the first time I ever had an issue. I had to sand everything down again.
Every DIY gives me a little challenge and causes me to learn and grow. So, I decided I needed to change gears. I decided to take it the distressed wood route.
I grabbed a bucket of water and wet the wood first. This keeps the stain from setting in too dark. Next I applied a light coat of Minwax Espresso stain over the entire piece. Rubbing vigorously to take most of the stain off.
Next, I took a watered down white chalk paint and a rag and rubbed the white paint over the entire piece. Some areas got a little more than others. This helped give it that sun bleached aged feel. Lastly, I took some 150 grit sandpaper and scuffed up some areas too pull the raw wood through. This gave me the beat up distressed look I wanted – thought I wanted – well ended up wanting! You get me!
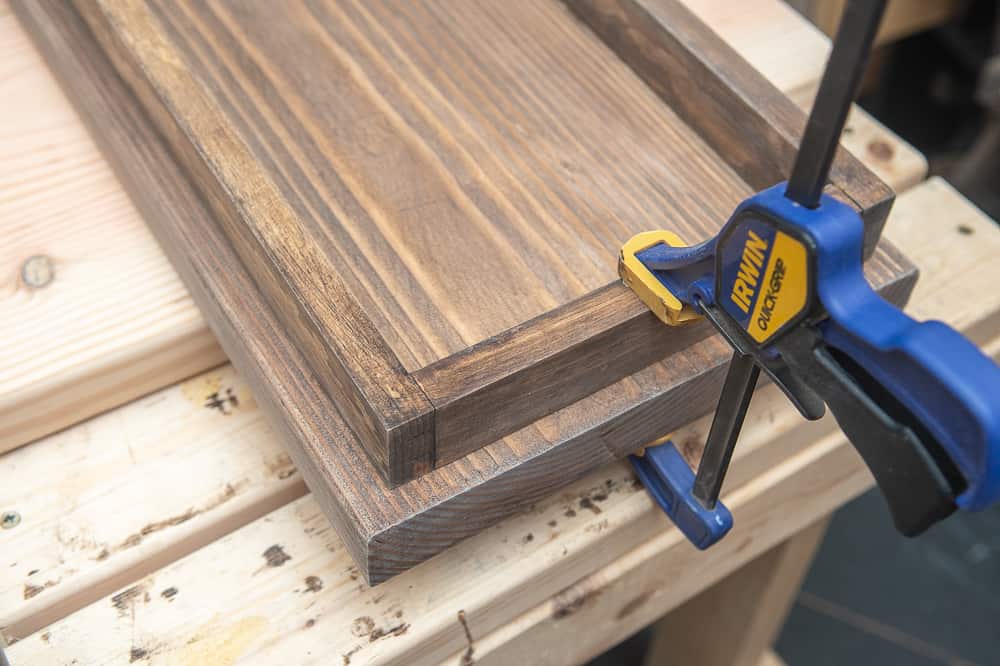
I sealed the piece using my favorite matte polyurethane and a foam brush. A total of 3 coats to make sure this foldable laptop desk is fully protected.
ASSEMBLY - PART 2
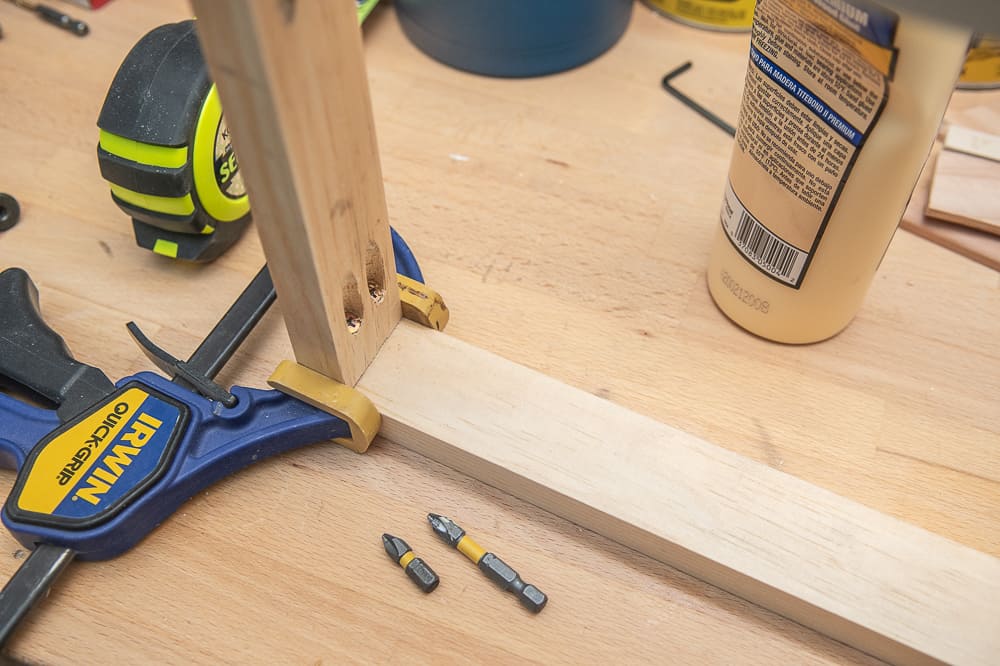
To assemble the apron to the top, I used 2 1/2″ screws and my impact driver. I made sure my impact driver was on setting 2, I recessed thee screw heads into the wood so the weren’t protruding from the wood.
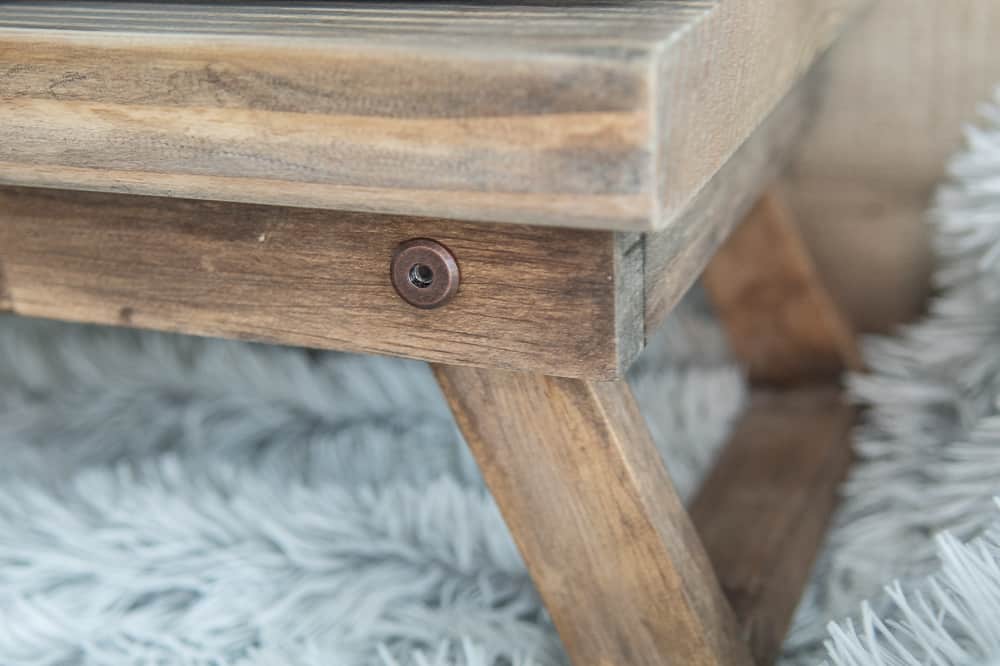
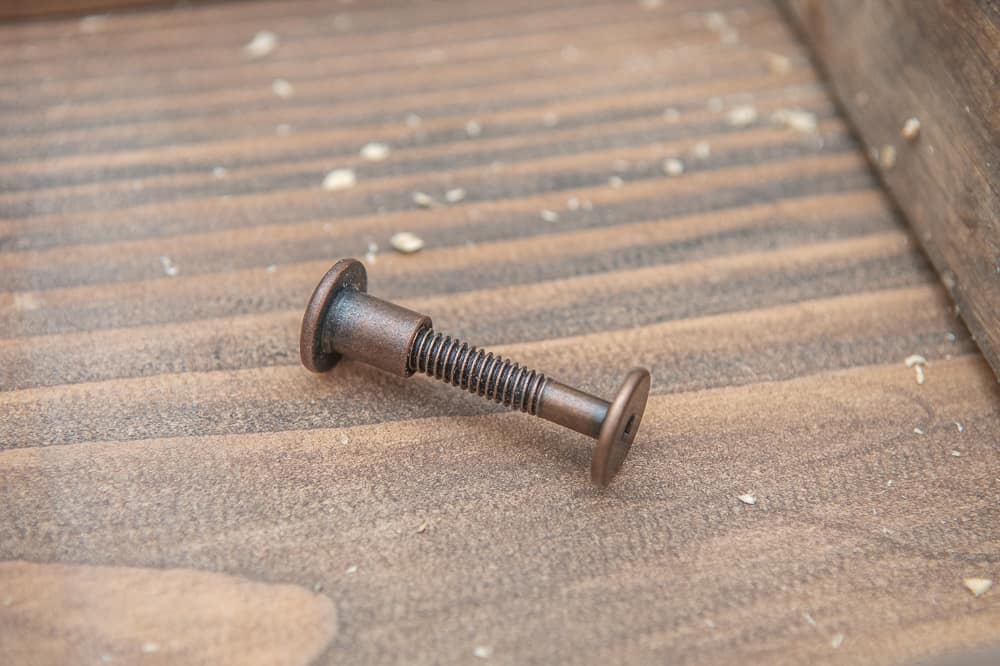
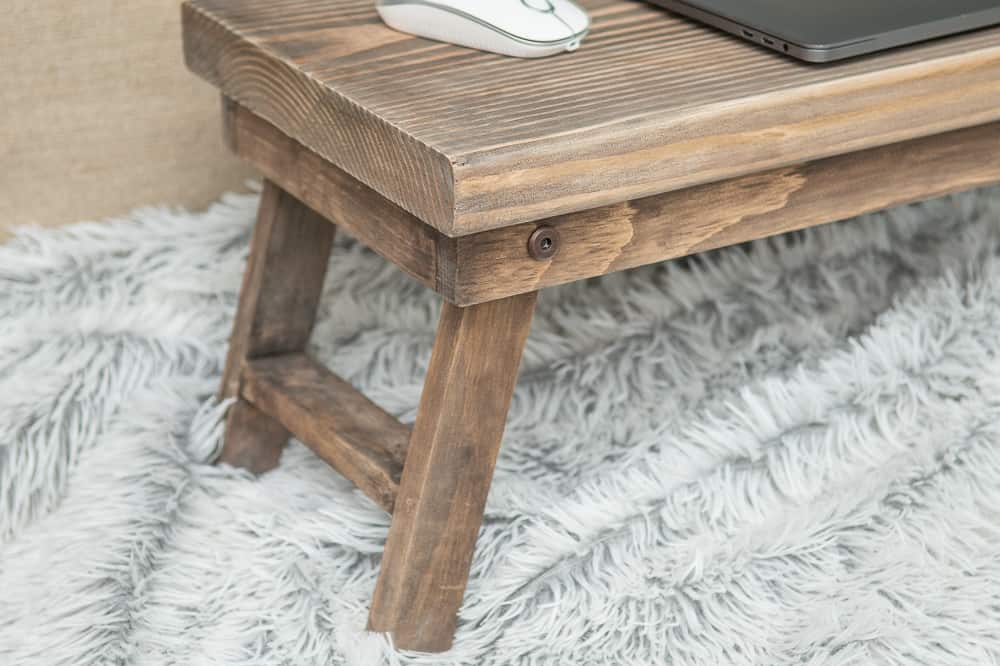
Lastly, I attached the legs using connecting bolts. I used these because they are not “hardware” looking and are more finished. They come in brass, copper and black – found at your local home depot.
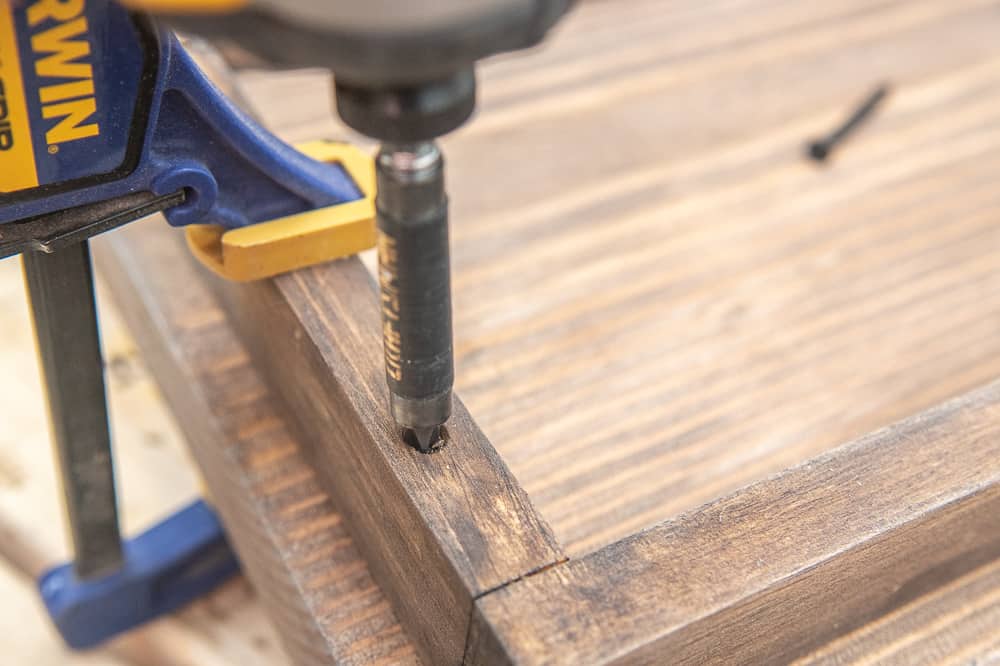
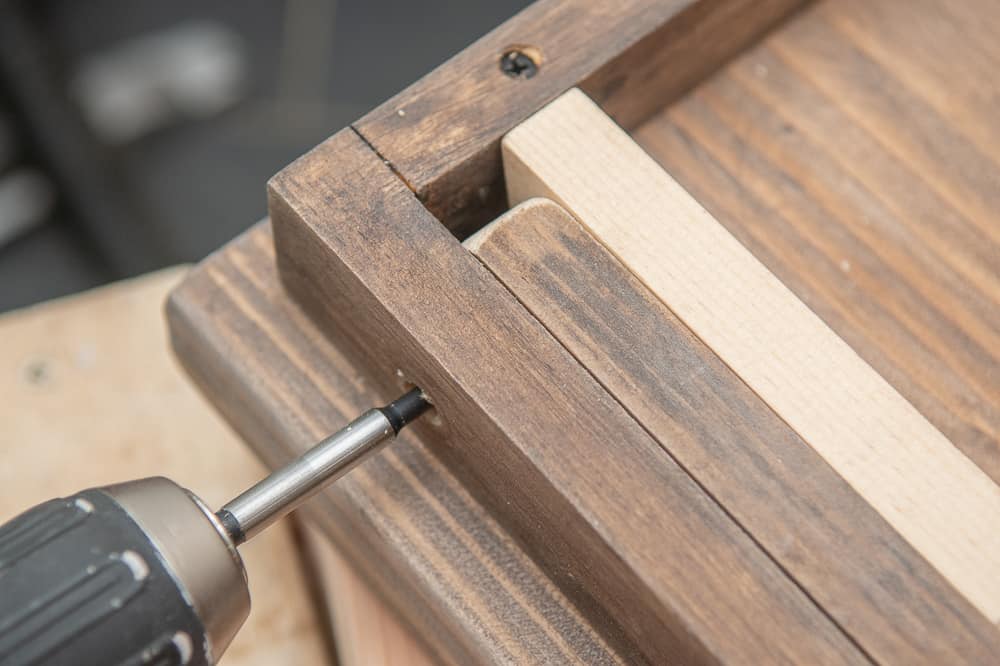
To attach the legs, I measured in 1 3/4″ from the edge and 3/4″ down and marked my spot.
As you can see below, the connecting bolt is thinner than the decorative cap. This means I needed to drill a hole large enough for the cap to fit inside.
To do this, you can use a spade bit, a large drill bit, or my choice – a forstner bit.
Forstner bits typically create less tear out than a spade bit. I also tried to prevent any tearing out by using a scrap piece of wood on the opposite side (seen below). Clamping everything down ensured nothing would shift as I drilled through both 1x2s.
Once all the holes are drilled, I use two allen wrenches to secure the bolts. You’ll notice the bolt and cap are two different sizes for this reason.
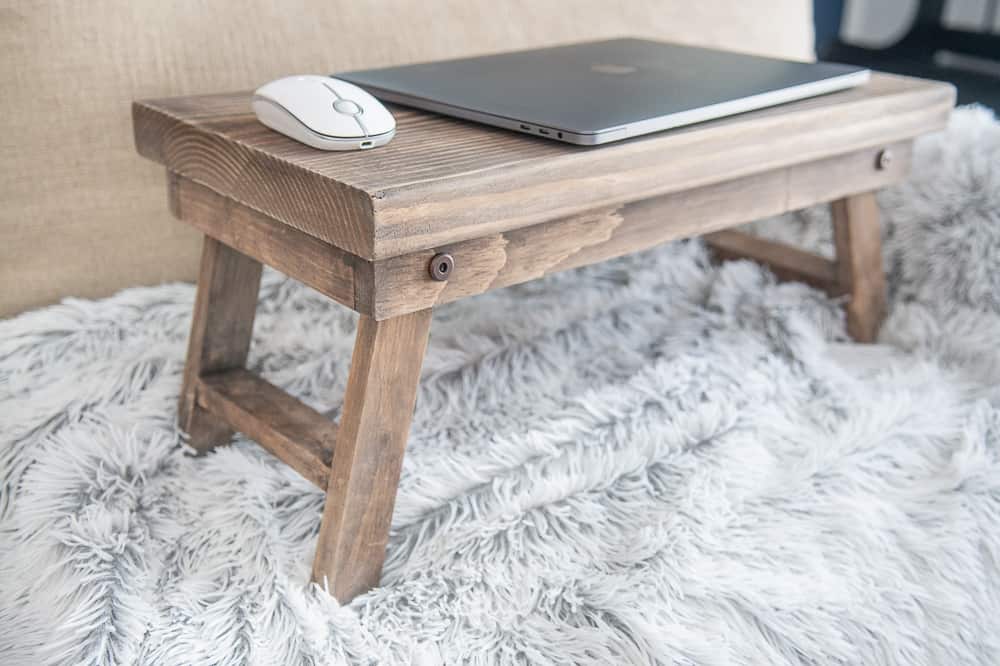
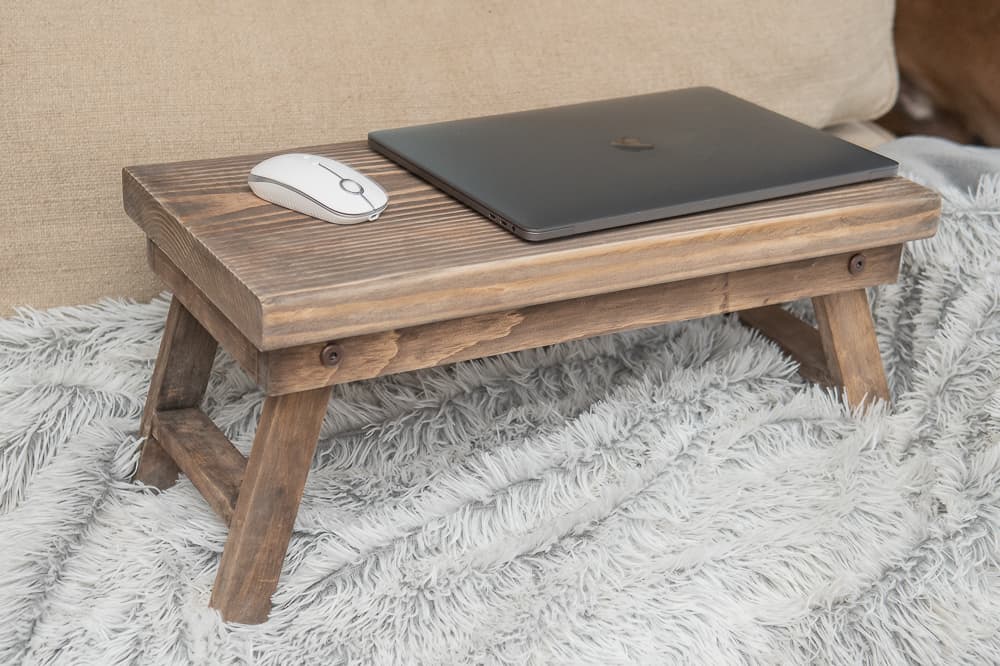
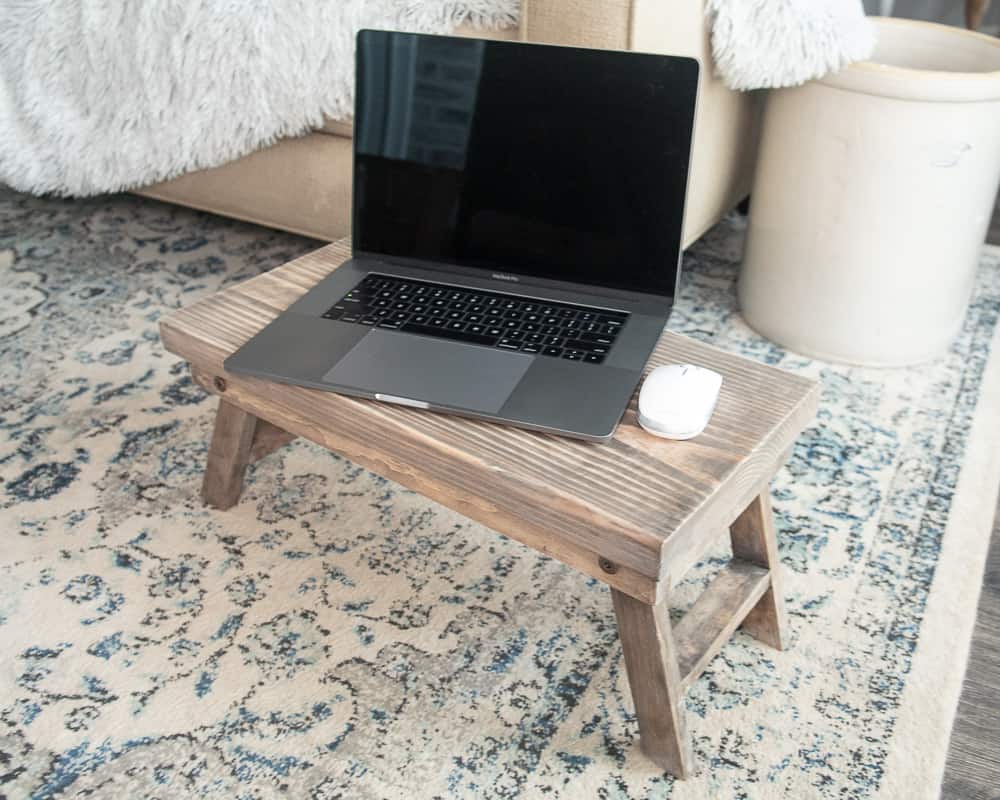
THE FINISHED FOLDING LAPTOP DESK
Well, there you have it. I think this is the perfect solution to my crappy posture while working on my laptop. Plus, if anyone ever wanted to serve me breakfast in bed… I’m ready!
Looking for other great builds? Keep scrolling down and check out some of my other DIY builds.
Hi, I was working on this table and got to the part about drilling the holes to attach the legs. So far, yours are the only plans that tell where to drill the hole for the apron, but no one gives any measurement as to where to drill the hole on the legs.
I honestly lined the leg and the apron up and drilled through both. I did run into an issue (because I didn’t measure) and used my jigsaw to round the ends to allow for the legs too fold up. That might be why I didn’t give exact measurements! Sometimes, I wing it… which leads to less accurate DIY instructions!
Thanks for visiting my little piece of the internet!
I’m Maria, a lover of furry things, coffee and anything creative. This blog is where I love to share affordable home decor ideas, great DIYs, yummy recipes, unique crafts and so much more.


3 thoughts on “How to Make a Folding Laptop Desk”
Pingback: 20 DIY Laptop Stand Ideas To Make From Home With Ease
Hi, I was working on this table and got to the part about drilling the holes to attach the legs. So far, yours are the only plans that tell where to drill the hole for the apron, but no one gives any measurement as to where to drill the hole on the legs.
Cyndy,
I honestly lined the leg and the apron up and drilled through both. I did run into an issue (because I didn’t measure) and used my jigsaw to round the ends to allow for the legs too fold up. That might be why I didn’t give exact measurements! Sometimes, I wing it… which leads to less accurate DIY instructions!
Thanks for following along. Happy building!
XO,
Maria