I’ve recently been motivated to create, build, and organize my home and life. {I’m just gonna apologize to my loved ones and friends now…}
However, I will not question it! I’m hoping the motivation lingers… like through all of 2019! But for now, I’m enjoying the new energy and inspiration.
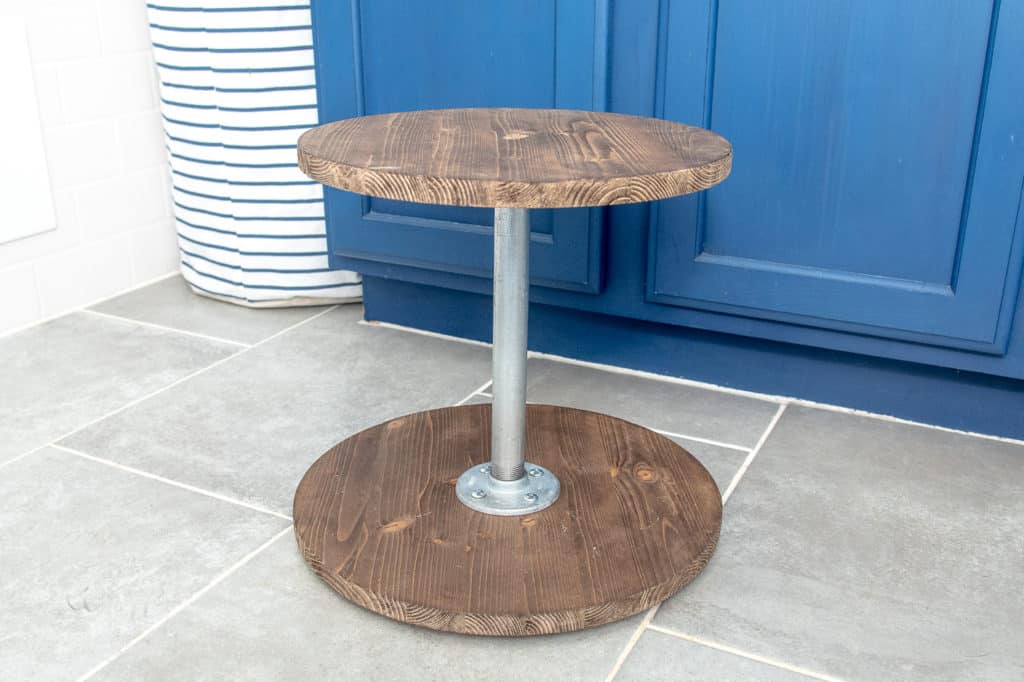
Last week, while organizing the area under my bathroom sink, I knew I needed to maximize my storage options. Then I got an idea. Behold, the lazy susan!
Let’s be real, when was the last time you saw a lazy susan displayed in a kitchen? I thought so. Well if you’re wondering, they do still sell them. However, I didn’t love any I came across. So my easy solution was to make one.
When constructing this project, my biggest challenge was creating wooden circles. I do not own a router {yet… but my birthday is right around the corner… hint, hint!} so I needed to come up with a better solution.
I started looking into pre cut options, but most were too large or there was a bit of sticker shock!
After some searching, I found this great informative video illustrating how to make a jig for cutting circles with a table saw. Yes, I said it… a table saw. The thing in your garage {or in my case basement} that cuts straight lines. Yup, that tool! Not only did I have one on hand, the whole process seemed completely doable with scraps I had already.
Ok, let’s get started on the process of cutting circles with a table saw. Followed by how I used those circles to build an industrial double tiered lazy susan.
What You'll Need
Supplies:
1×16 laminated wood board {I used this board for my two circles}
Circle Jig {I made mine from this super informative video}
Impact Driver/Cordless Drill
Orbital Sander
To Make The Jig:
Plywood
Trim Wood
Large Decking Nail
Nail Gun and Nails
Measuring Tape
{Note: this post contains affiliate links. This means that I will make a small commission – at no additional cost to you – if you make a purchase using my links.}
Thanks you for supporting my blog!
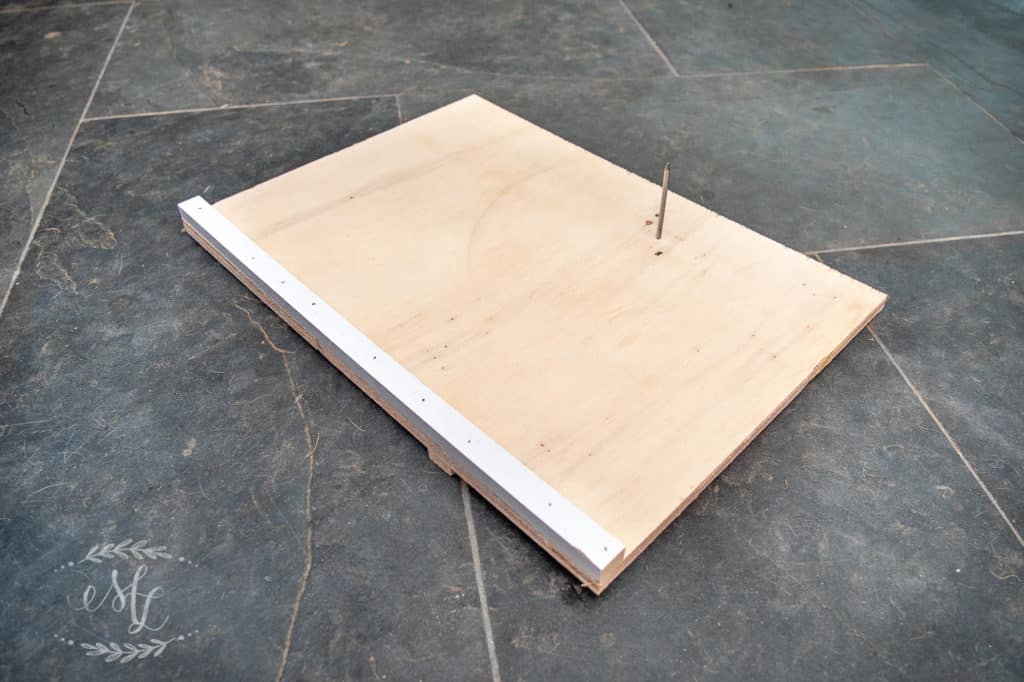
Step 1: Making The Jig
I have to admit, I was somewhat skeptical at the idea of using a table saw to cut a circular pattern. However, the more I read, the more confident I became.
The premise: to have a guide that can navigate the wood across the blade, allowing it to spin around a central axis, while keeping all my precious digits intact!
To make the jig, I started with a scrap piece of plywood. I cut it down to 16×16. Next, I found a piece of trim that fit snugly it into the miter gauge on my table saw deck. I attached the trim to the bottom of my plywood. Then, I attached a piece of trim to the top edge of the jig, to give me a better grip while using it. Again, save those digits folks!
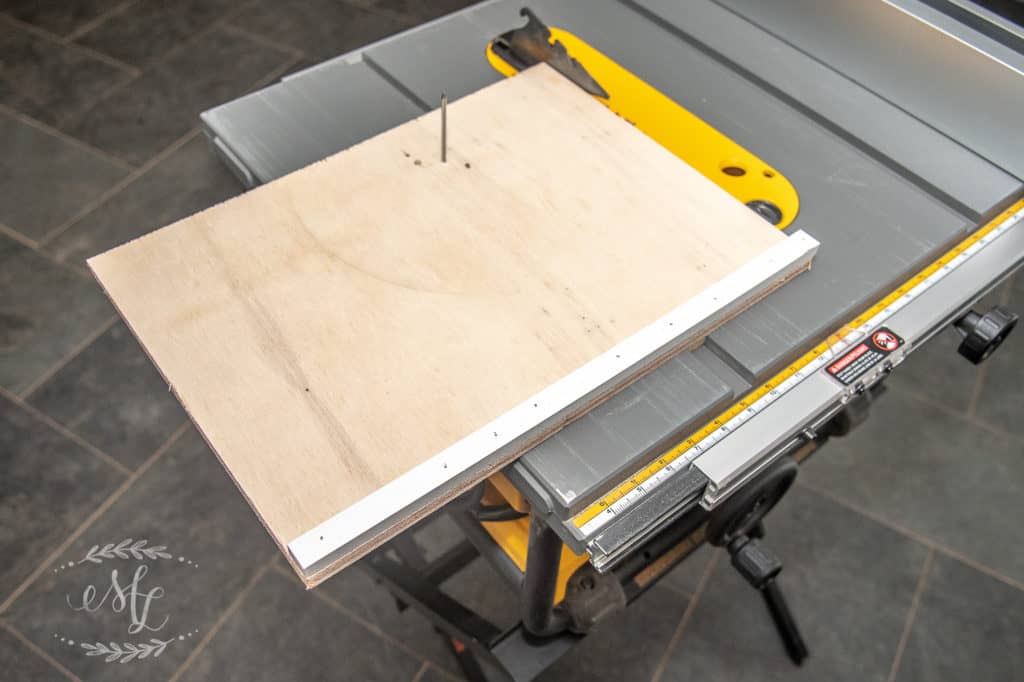
Step 2: Cutting a Circle Using Your Table Saw
Ok, now that we have the jig all set up, we’re going to discuss the steps I followed to safely cut both circles.
I knew I needed two circles, in two different sizes. The first circle needed a diameter of 14 inches and the second needed to be 12 inches. Go ahead, ask how to make that happen?
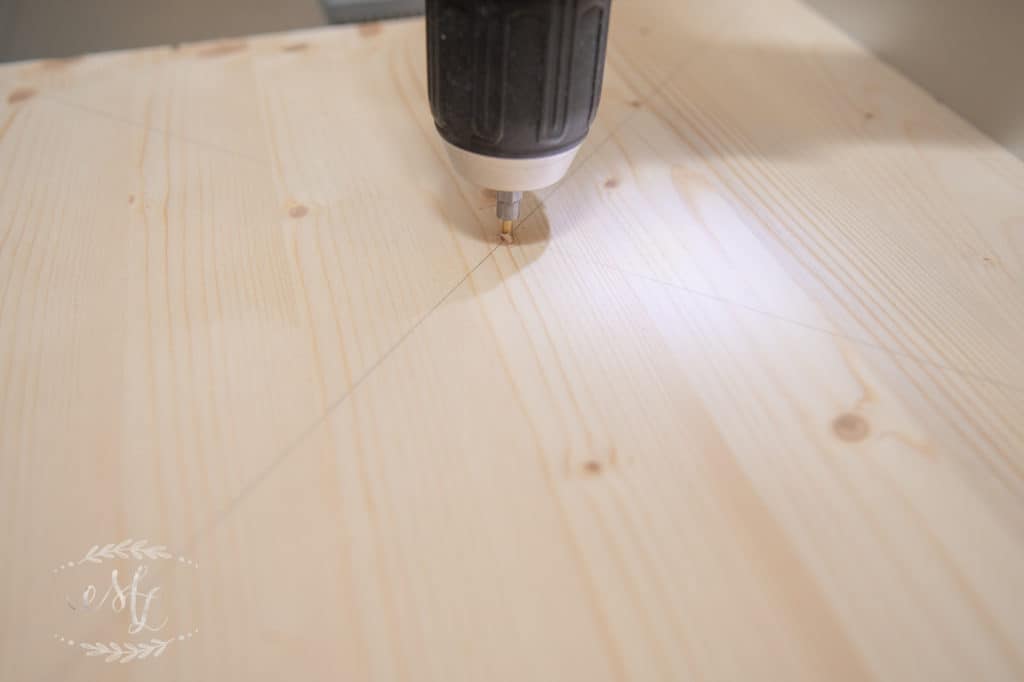
To make a circle of 14 inch diameter, I measured 7 inches from the edge of the jig and drilled a hole. This will be your center axis point.
For the 12 inch diameter circle, I repeated this process but this time measured 6 inches, then drilled the center axis a hole. {Maybe I drilled a few extra for good measure too…shhh no ones really counting!}
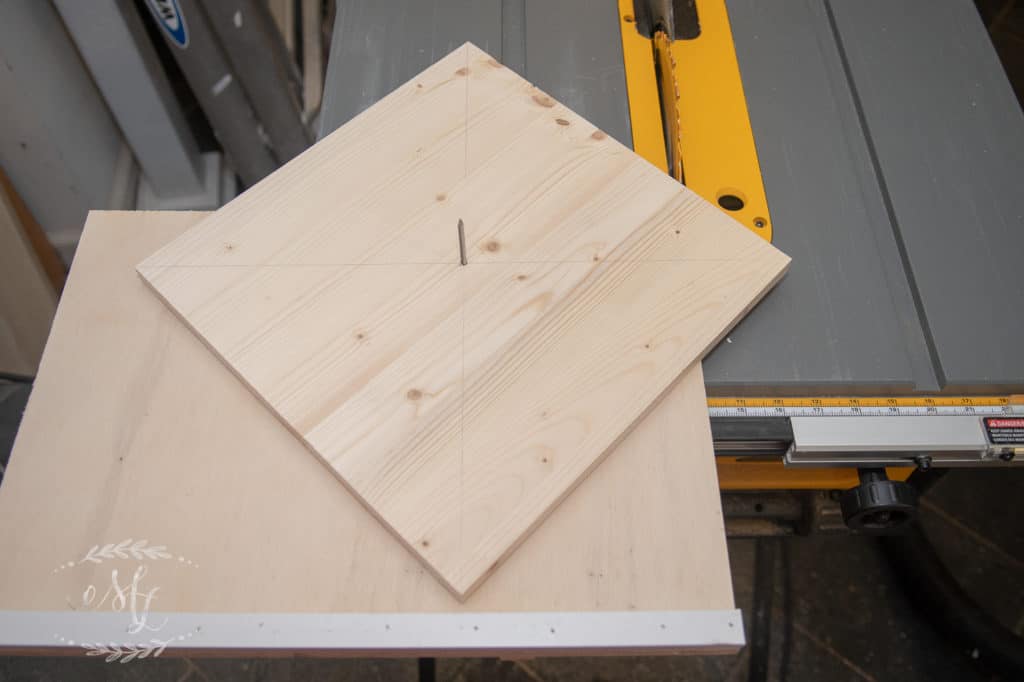
In order to make the 14″ circle I cut the original 1×16 board into a square measuring 14″ on each side. My next step I drew two lines, each line from corner to corner creating the X-pattern shown above. I then drilled a hole where the two lines crossed, approximatly the size of the pivot nail fixed to the jig. Thus allowing the board to rotate freely while being worked across the table saw blade.
The first cuts I made removed each corner of the board, creating an 8 sided pattern.
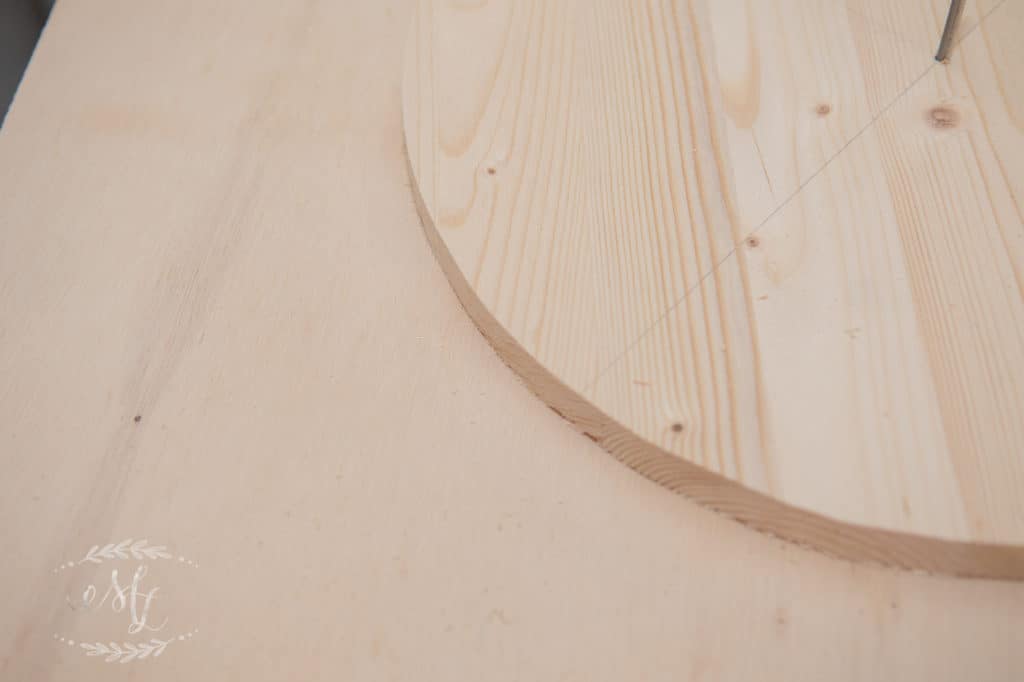
Once the four corners were removed, I began to slowly slide the jig back and forth across the blade, while simultaneously slowly turning the wood. These small little cuts allow the circle to develop.
Just a little sanding using my orbital palm sander and there you have it, a perfect 14″ circle.
In order to create the second 12″ circle, I first moved the pivot nail on the jig from the 7″ hole to the 6″ hole. I then repeated the same steps described above, only this time I used the 12″ square board.
And voila, now you have two round circles ready for stain and assembly!
Step 3: Constructing the Lazy Susan
Once everything was cut, sanded and stained, the last thing I needed to do was attach the hardware.
Since the centers of the circles were indicated by the previous drill mark, I just used that as my guide. Using 1/2″ screws, I attached the flanges as well as the lazy susan hardware appropriately.
Hint: I used cheap Dollar Store felt pads on the bottom of the lazy susan hardware.
Thanks for visiting my little piece of the internet!
I’m Maria, a lover of furry things, coffee and anything creative. This blog is where I love to share affordable home decor ideas, great DIYs, yummy recipes, unique crafts and so much more.