Spring, it’s officially in the air! The windows are open, curtains blowing in the breeze, and the house if covered in flowers! No really.
This year I was so excited to dye wood easter eggs. In searching for easter decorations, I ran across beautiful wooden easter egg. I wasn’t about to pay 3-4 dollar a piece! However, my DIY brain kicked in and I knew I could make my own dyed eggs.
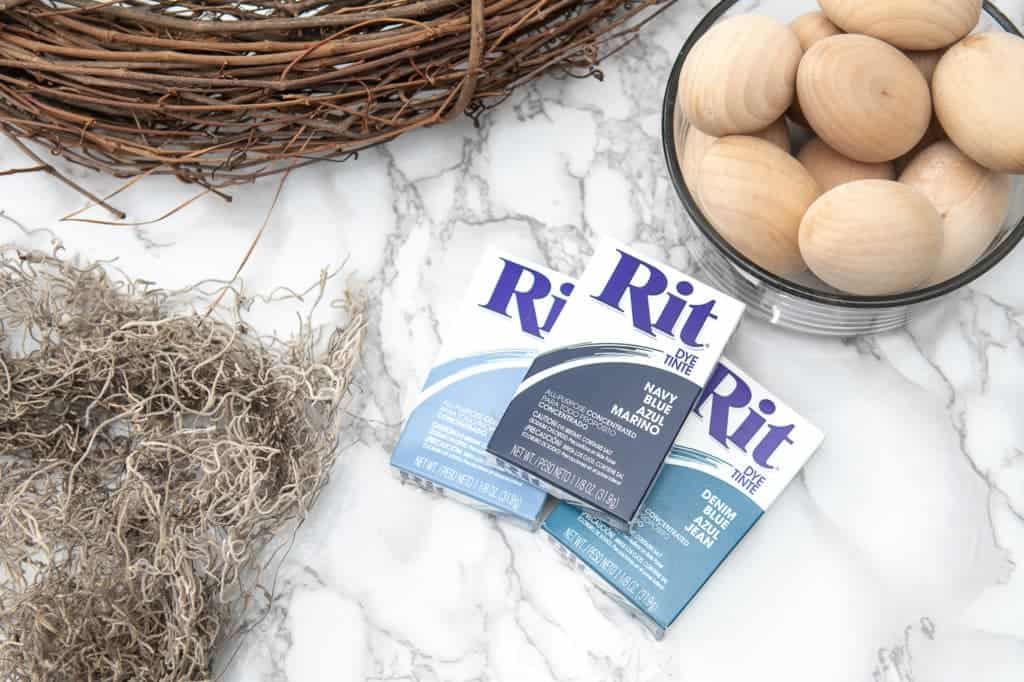
I have fond memories of dying Easter eggs with my mother as a child. Always trying to make the most beautifully unique pieces of artwork. It’s been years since I have dyed Easter eggs, but this season I wanted to try something new. I wanted to try to dye wood using Rit fabric dye.
Yup, I said it. Fabric dye. I have a few of these packets laying around the house… bless if I can remember why honestly.
I knew I needed a wreath and some filler so I grabbed my Michael’s reward coupons and headed to the store. I managed to snag this 18″ grapevine wreath for $2.49 – yup 60% off folks!
Pro Tip: If you shop online. Add a few items to your shopping cart and leave it there. Usually, within 24-48 hours I have “extra” coupons sent to my email inbox! Why yes, I would like to pay less for my craft supplies. Thank you!
Typical me, I couldn’t decide on a color. I decided to experiment with 3 variations of blues. Unsure how it was going to take to the wooden eggs, this gave me options!
For each color, I mixed 1 tablespoon of the powder with 1 1/2 cups of hot water. I also added a teaspoon of white vinegar into the dye to help the achieve an even, rich color.
I made dye bath accordingly and then began to dip my eggs. I let them sit for various times, giving me a beautiful ombre effect. The longer in the bath the darker the color. I was really pleased as to how they turned out!
Keeping in mind I wanted to make this wreath for my front door, I needed to waterproof these beauties! My solution was to grab some Annie Sloan Clear Wax. I rubbed in a light coat of wax on each egg.
Now, just like with painting furniture and using wax, the wax enhances the color of the dye and will darken it slightly.
For example, in the picture below the egg on the left has been waxed and the one on the right is without. It’s a slight difference but something to note. Also, the more you “polish” the more sheen the wax will give you. It all depends on the look you’re after!
One all the eggs were waxed, I started to assemble to wreath. Using some spanish moss as the “nest material,” I began gluing down the eggs sorta haphazardly. I didn’t have enough to make it a tight fit, so I found some nice leftover greenery I had on hand. This was a nice filler to complete the look.
Ok, now I’m no bow expert. I actually suck at making them truthfully. I’m not sure why I always find myself attempting to make the biggest and best wire bows for my wreaths. Following some YouTube tutorials, I managed to come up with this pretty burlap topper.
Not bad right? I didn’t think so…
And there you have it, a beautiful Wooden Egg Wreath.
I actually think I enjoyed it more than dying traditional eggs. They certainly will last longer! My fingers are still blue… next time I’ll wear some gloves!
I am curious about the salt dough I’m going to try some projects. But I have only sea salt how will that work or should I wait and get the regular salt? I’m so glad I found your recipe also the clay so I’m very excited to get started thank you for keeping me busy for quite a few days happy smiles!!!
Thank you so much for your kind words! I’m so happy you found my blog and this recipe! I believe you could use sea salt as long as it’s not course ground salt. Give it a go. I haven’t tried it personally, but that’s how we learn right? Let me know how it turns out and HAVE FUN!! Hugs.
Thanks for visiting my little piece of the internet!
I’m Maria, a lover of furry things, coffee and anything creative. This blog is where I love to share affordable home decor ideas, great DIYs, yummy recipes, unique crafts and so much more.


2 thoughts on “How to Dye Wood Easter Eggs”
I am curious about the salt dough I’m going to try some projects. But I have only sea salt how will that work or should I wait and get the regular salt? I’m so glad I found your recipe also the clay so I’m very excited to get started thank you for keeping me busy for quite a few days happy smiles!!!
Sandra,
Thank you so much for your kind words! I’m so happy you found my blog and this recipe! I believe you could use sea salt as long as it’s not course ground salt. Give it a go. I haven’t tried it personally, but that’s how we learn right? Let me know how it turns out and HAVE FUN!! Hugs.
XO,
Maria