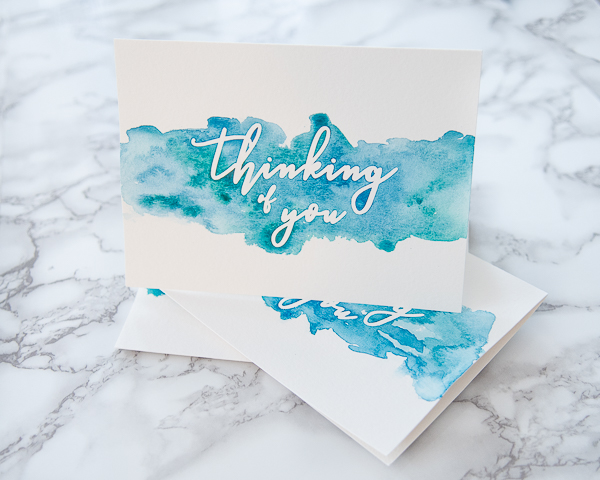
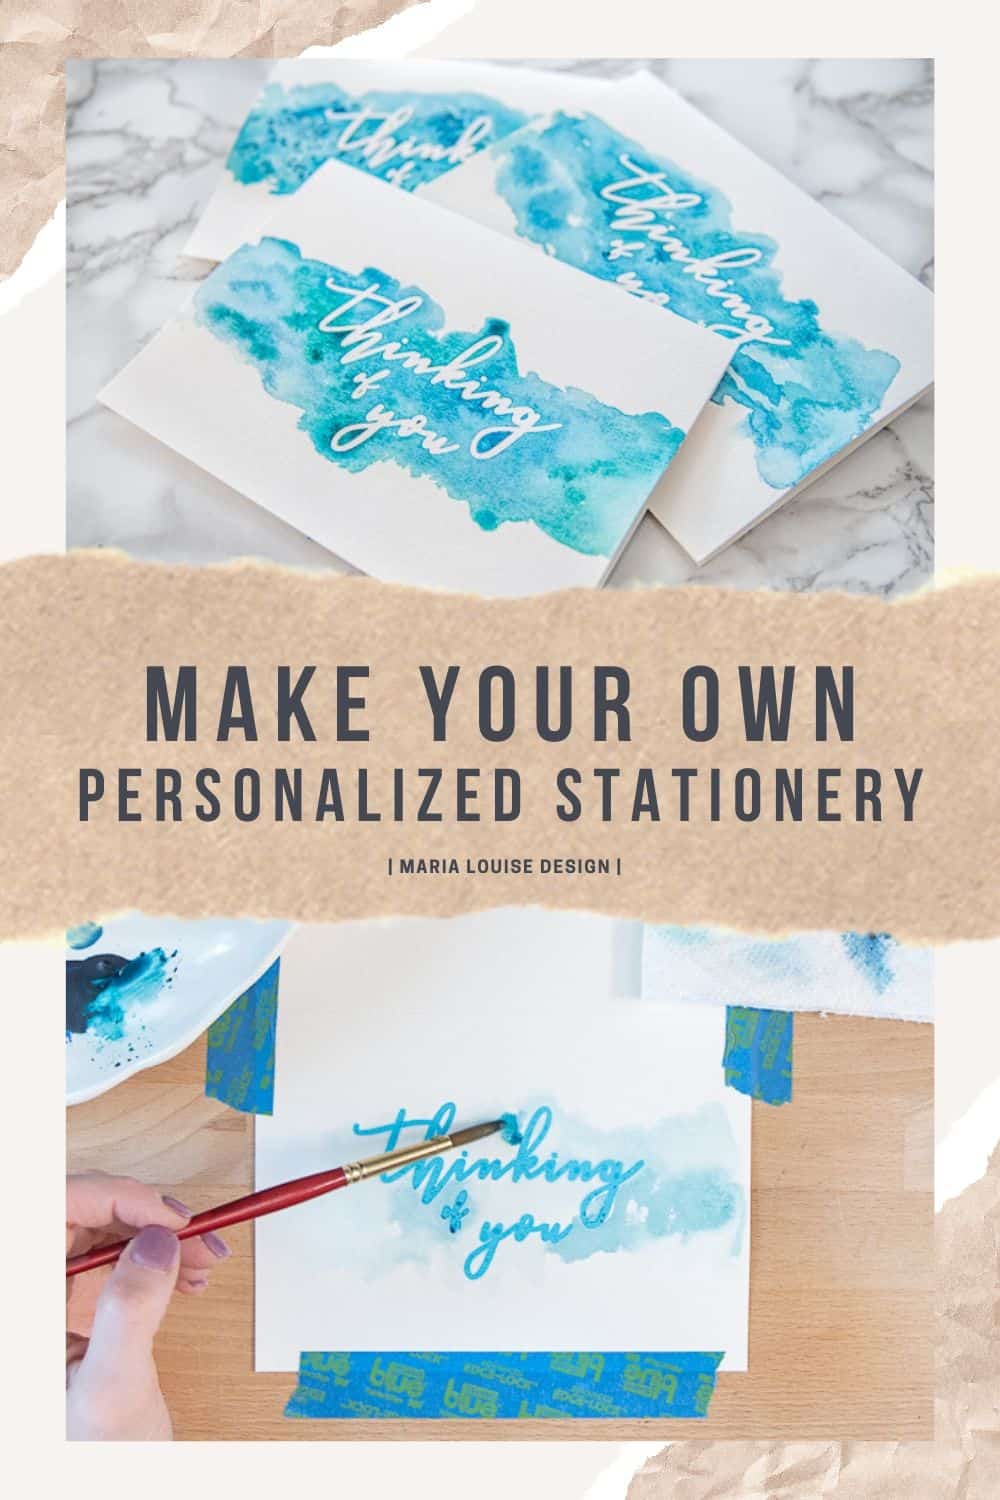
Remember the ancient art of the handwritten letter? Back when you wrote a thank you note, not just sent a text or an email? Yeah, me too. If you’re like me and still love this lost art, this post is for you. Let me show you how you can make your own personalized stationery.
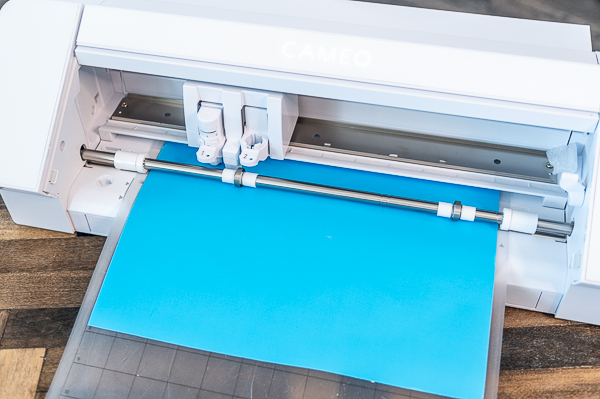
Side Note: I purchased a new Silhouette Cameo 4 a few months ago, and I couldn’t be more happy! If you don’t have a die cutting machine, please let me recommend this glorious machine. My favorite feature, bluetooth! I can print from anywhere. Oh, and it’s wicked fast, and no, I’m not from Boston. It’s just that fast!
Ok, back on track… I have been trying different ways to make personalized stationery for a while. I’ve tried watercolor using masking fluid, brush pens (my hand lettering still needs some work) , but nothing has really produced look I wanted.
However, using the die cutting machine, and Oracal 813 Oramask Stencil Material was the game changer. No artistic talent needed my friend. Yes, even if you’ve never held a paintbrush, you can make these beautiful cards. You can create whatever imaged you want too. Monograms, pictures, there’s no limits!
You can absolutely use this method with your Circuit Machine! The instructions are for the Silhouette Cameo because that’s what I have.
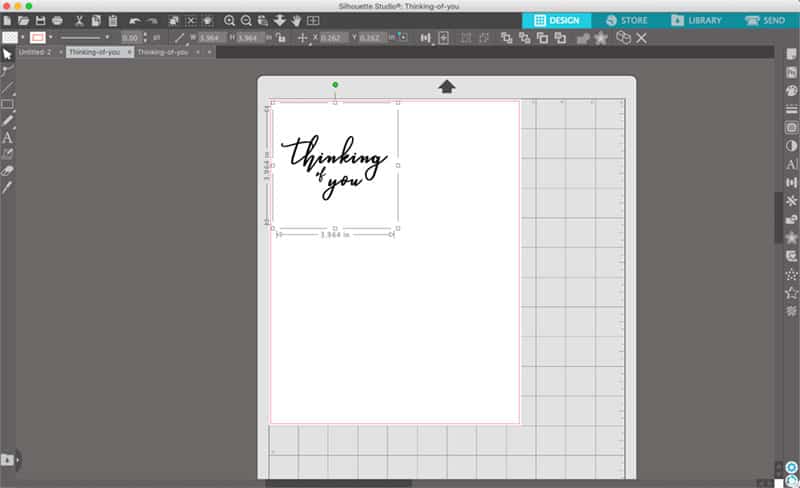
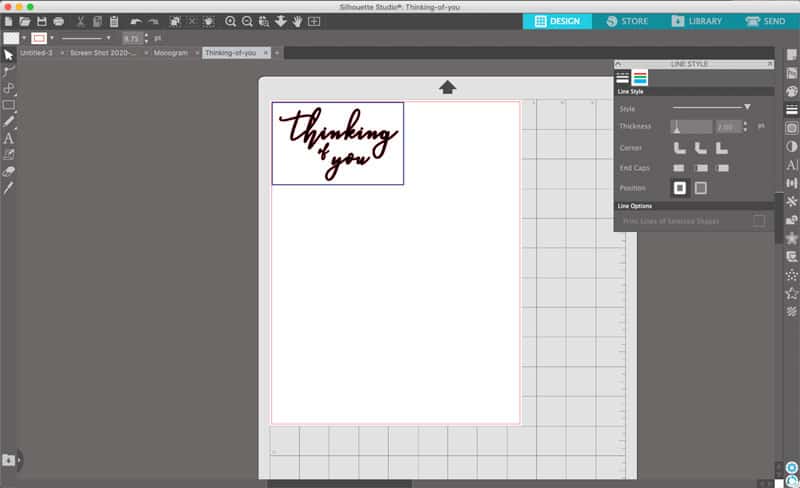
First, we need to create a saying or image in Silhouette Studio. This software comes with your machine and is free to use. It also has a ton of great features!
For my cards, I wanted to send some friends a sweet note, so “thinking of you” seemed to be appropriate.
Once in your Silhouette Studio, choose your font and design the front of your card.
For my card, I used a font called “Love Hewits.” I downloaded this font from DaFont, a great website I use often for free fonts.
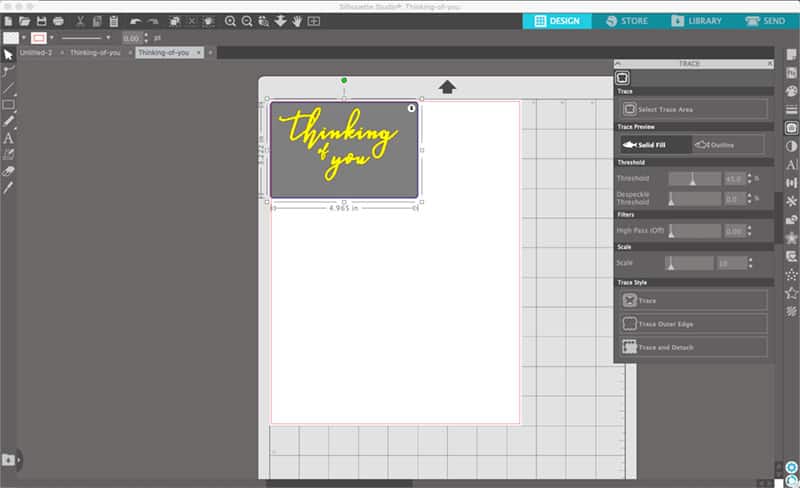
Once designed, you then need to establish the cutting path. Go to “Trace” (found on the right hand tool bar) and select the “Trace Area.” Highlight the lettering and then click “trace” at the bottom under trace style. This will give the Silhouette Cameo an idea where to cut, using a red outline to your lettering.
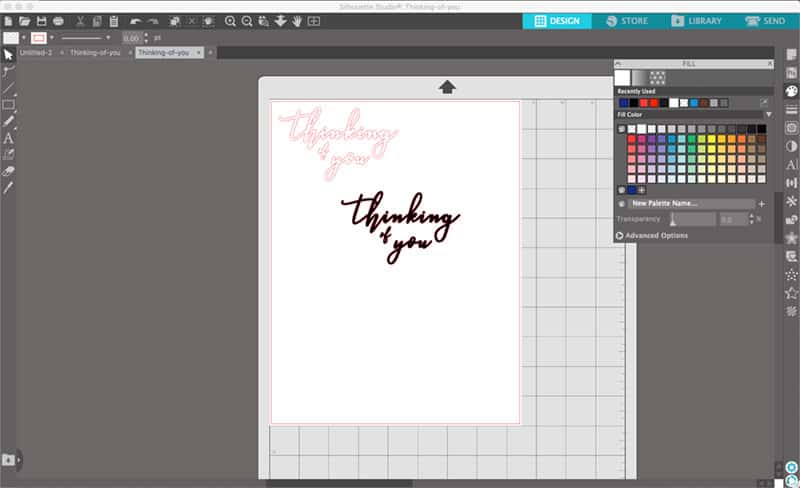
Once traced, slide the image off the outline (seen in red.) You can then open the fill and fill the outline with whatever color you choose. I usually choose black to let me see the image better, but it’s your choice.
Now that you have your outline, you’re ready to cut. I placed a blue box around my image to cut away the extra. But this is your choice. If you do, it will need to be another color and have another cut parameter.
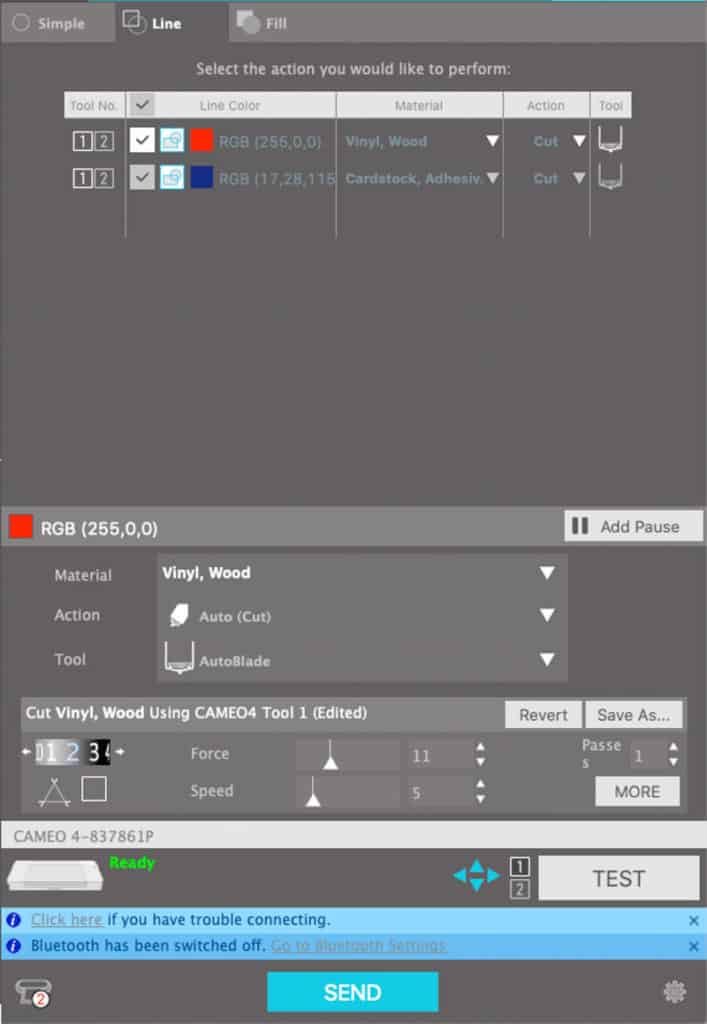
Now that you have your image ready to go, click “Send” in the upper right hand corner. It might take a little playing around for you to find the perfect settings for your project. Always use the test cut too, that will help you not waste material determining if your settings are appropriate.
Each cutting machine is different, but for my cutting parameters I used my Blade on 2, Force on 11 and Speed on 5.
The Setup:
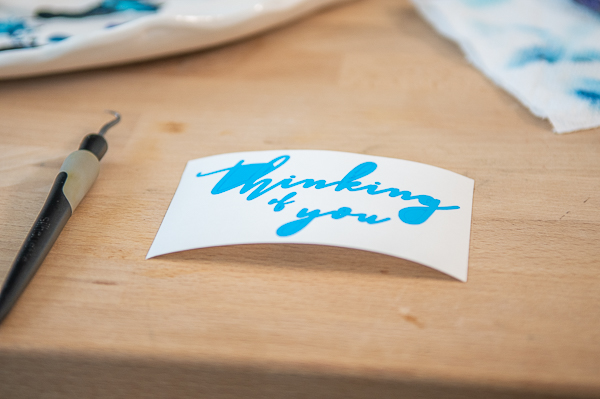
Now that your stencil is cut out, you need to weed out the excess stencil material.
Using a hook tool, make sure you remove all the excess material.
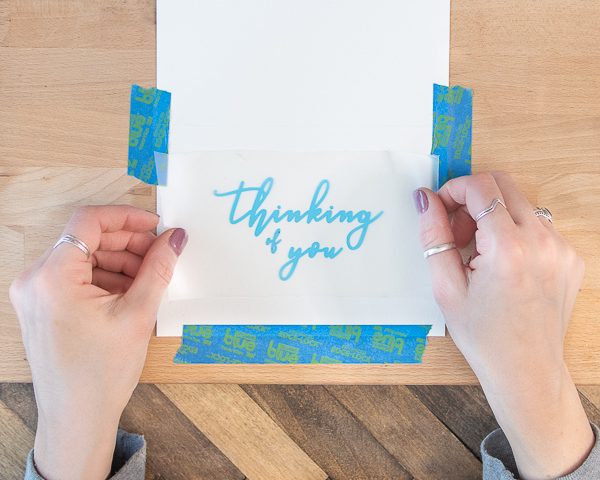
Once the stencil is all weeded out, use clear transfer material to transfer the stencil to the watercolor note card. I highly recommend using watercolor safe paper. I purchased blank watercolor cards for this project. They are a little big, but the images come out beautifully.
I also recommend taping down your card to prevent any rippling or unwanted movement while working on your project. Watercolor paper tends to ripple when it dries. Taping it down will minimize any distortion of the card as it dries.
The Painting:
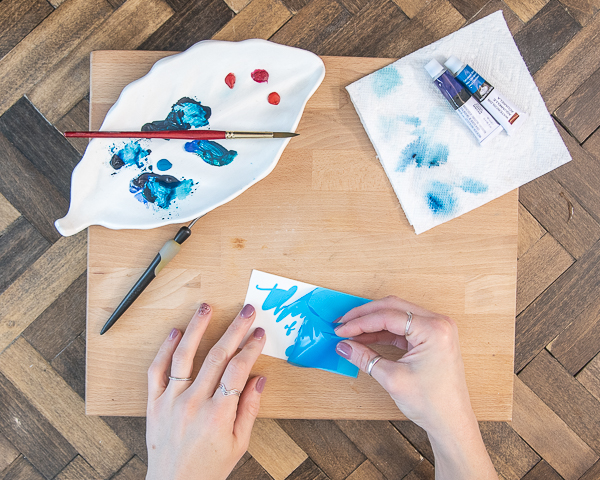
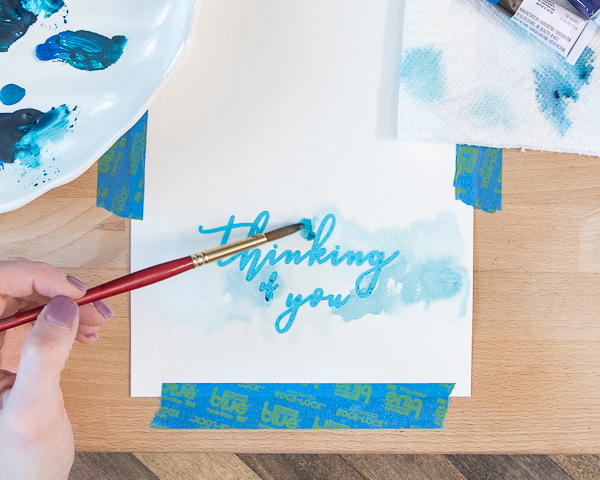
Now this is the fun part! Paint your card. Use whatever technique you desire.
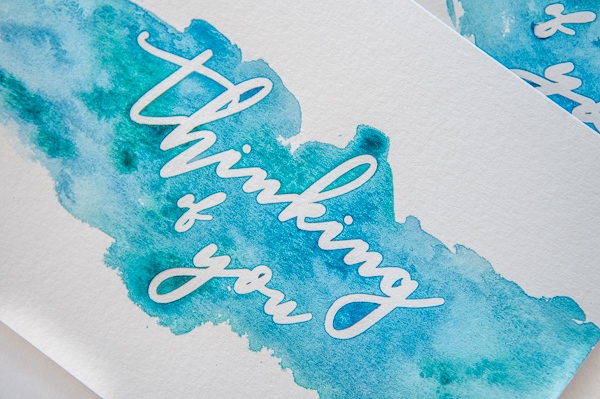
For these cards, I used a wet-on-wet technique. I did a light water wash around my desired area, then simply dabbed the watercolor around the lettering. You want the area around the letters to be the darkest. This give you a nice contrast around the lettering, making your words come out nice and crisp.
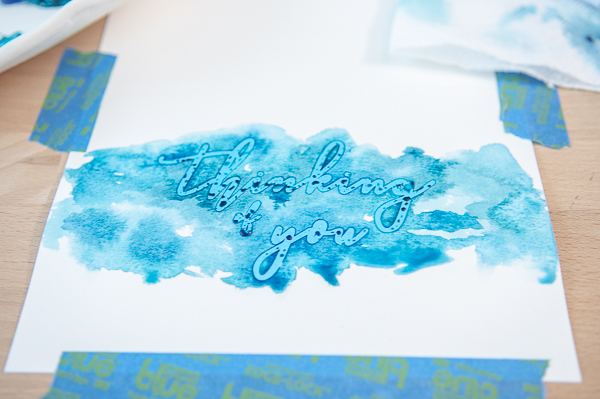
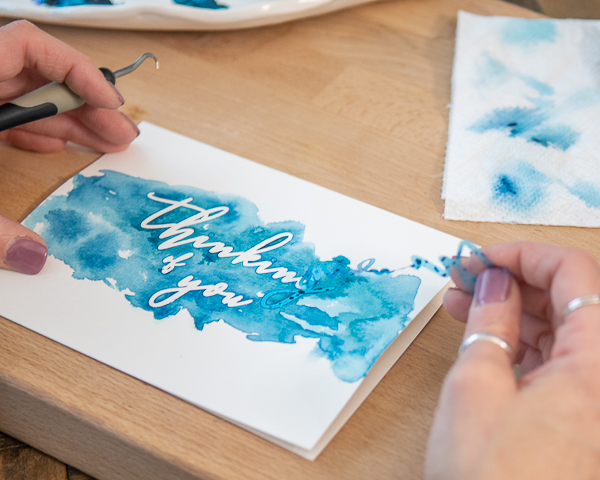
Once your card is dry to the touch, you can then use your hook tool and peel off the stencil. I love how there is absolutely no bleeding. The stencil material also does not damage the paper. It’s designed to peel, stick and then remove.
You can reused these lightweight Oracal 813 Oarmask stencils before, but after 2-3 uses, they may get a little stretches out and can possibly bleed. But don’t be afraid to reuse!
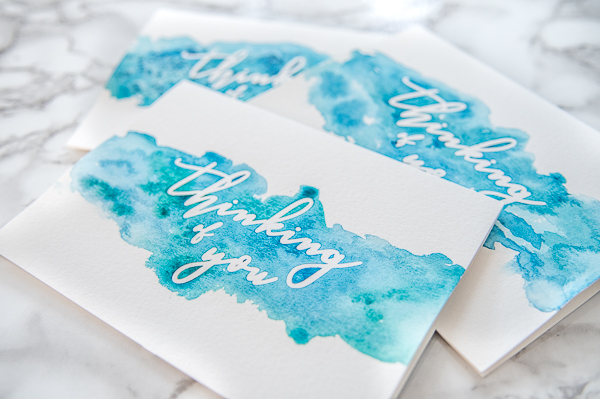
There you have it! Beautiful, handmade, personalized stationery.
I was really impressed at the performance of the Oracal 813 Oramask stencil material. I expected a little bleeding, but it worked brilliantly. The best part is how inexpensive it is!
This project takes less than 20 minutes from start to finish, which makes it a super easy to whip out a whole bunch in an afternoon. You could easily make these into beautiful wedding invitations.
I told you, there’s really no artistic need when making your own personalized stationery. This method will allow you to create beautiful customized note cards for any occasion. Thanks for following along and happy crafting.
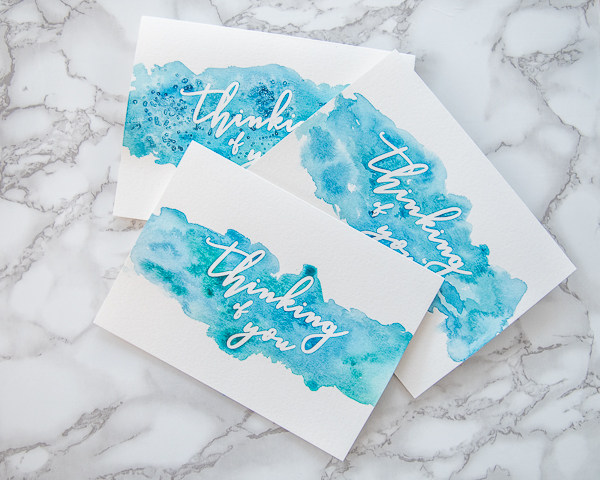
The salt (if you notice one of the cards has a difference effect) that’s from the salt. I didn’t really do that justice now did I? You caught me blogging and drinking apparently. I kid! I’ll make sure it’s more clear in the test. Watercolor will react with the salt giving you a cool pattern look.
You mean the Marg I shared in my stories on IG? I rimmed my glass with Tajin seasoning. It’s amazing on mango and watermelon!
Thanks for visiting my little piece of the internet!
I’m Maria, a lover of furry things, coffee and anything creative. This blog is where I love to share affordable home decor ideas, great DIYs, yummy recipes, unique crafts and so much more.


2 thoughts on “Make Your Own Personalized Stationery”
Maria darling!
What is the salt used for in your supply list? Your margarita that you are enjoying while you make these beautiful cards?
Love,
A
Hey lovely,
The salt (if you notice one of the cards has a difference effect) that’s from the salt. I didn’t really do that justice now did I? You caught me blogging and drinking apparently. I kid! I’ll make sure it’s more clear in the test. Watercolor will react with the salt giving you a cool pattern look.
You mean the Marg I shared in my stories on IG? I rimmed my glass with Tajin seasoning. It’s amazing on mango and watermelon!
Hope that helps some! 😀
XOXO,
Maria