Crochet Your Own Apple Koozie with Free Pattern

Total confession: I enjoy packing healthy lunches for Rich and myself!

Weird right? I actually enjoy making sure we have plenty of wholesome and healthy options. One of my lunch staples has always been peanut butter paired with a crisp, delicious apple. Got your mouth watering yet?! But how to pack an apple is always the problem, and quickly too!

My favorite old school method was to wrap it up in a paper towel and pray it didn’t get smashed to smithereens! Great strategy right? Not so much… When it came time to eat my apple, I’d unwrap the paper towel and find a bruised and/or squishy apple every time.


Clearly, I needed a better solution. So I went searching for a solution. Most were very good solutions, however, time consuming. I don’t want to soak my apple slices for 10 minutes. Who has the time?

After much review, I came up with an idea. What about a koozie. I could just pop in the apple, tie up the top, and go! That’s my kinda time saving solution. So I set out to crochet just that.

What You'll Need

Supplies:

{Note: this post contains affiliate links. This means that I will make a small commission – at no additional cost to you – if you make a purchase using my links.}

Thanks you for supporting my blog!

Important Notes:

  • The loop on your hook does not count as a chain.

  • The apple koozie is worked in one piece from the bottom up.

  • Ch 1 at the beginning of rounds does not count as a stitch.

  • At the end of each round, the stitch count is in parenthesis ( ).

Key:

CH – chain stitch

SC – single crochet

HDC – half double crochet

DC – double crochet

Sl st – slip stitch

Sk – skip stitch


I linked each of the stitches to video demonstrations. For those beginners out there. You’re welcome!  

The first step in my Apple Koozie pattern is the “Magic Ring.” I use this method because I know it will give me a good clean look right from the start. Incase you’re unfamiliar with this, I provided a tutorial below.

How To Start A Magic Ring:

Was that confusing? I hope not. To clarify a little more, I decided making a video may help some readers more.

With that said, check out this awesome video below to see it done in real time.

Now that you’ve mastered the magic ring,  you’re ready to begin crocheting your rounds!

The Pattern In Rounds:

The Apple Koozie

  • Round 1: Make 6 sc into magic ring. Join with a slip stitch. Pull the tail of the ring tight to close the circle.(6 sc)
  • Round 2: Ch 1, make 2 sc in same space as Ch 1, 2 sc in every stitch around. Join with a slip stitch. (12 sc)
  • Round 3: Ch 1, sc in same space as Ch 1, *2sc in next stitch, sc in next stitch**, repeat from * to ** around, 2 sc in last stitch. Join with a slip stitch. (18 sc)
  • Round 4: Ch 1, sc in same space as Ch 1, sc in next stitch, *2 sc in next stitch, sc in next 2 stitches**, repeat from * to ** around, 2 sc in last stitch. Join with a slip stitch. (24 sc)
  • Round 5: Ch 1, sc in same space as Ch 1, sc in next 2 sts, *2sc in next stitch, sc in next 3 stitches**, repeat from * to ** around, 2 sc in last stitch. Join with a slip stitch. (30 sc)
  • Round 6: Ch 1, sc in same space as Ch 1, sc in next 3 sts, *2 sc in next stitch, sc in next 4 stitches**, repeat from * to ** around, 2 sc in last stitch. Join with a slip stitch. (36 sc)
  • Round 7: Ch 1, sc in same space as Ch 1, sc in next 4 sts, *2 sc in next stitch, sc in next 5 stitches**, repeat from * to ** around, 2 sc in last stitch. Join with a slip stitch. (42 sc)
  • Round 8: Ch 1, 2 sc in same space as Ch 1, skip one stitch, *2sc in next stitch, skip one stitch**, repeat from * to ** around. Join with a slip stitch. (42 sc)
  • Rounds 9 to 14: Repeat round 7.
  • Round 15: Ch1, sc in same space as Ch1, sc in every stitch around. Join with a slip stitch. (42 sc)
  • Round 16: Ch 1, dc in same stitch as Ch 1, *chain 1, skip one stitch, dc in next stitch**, repeat from * to ** around, skip the last stitch, chain one and join with a slip stitch. (21 dc and 21 chains made)
  • Fasten off and weave in ends. 

Leaf Tie Off:

  • Ch 8
  • Sc in second chain from hook, hdc in next stitch, dc in next 2 sts, hdc in next stitch, sc in next stitch, 2 slip stitches in the last chain.
  • Work opposite side of chain, sc in next stitch, hdc in next stitch, dc in next 2 sts, hdc in next stitch, sc in next stitch. Join with a slip stitch to the first sc of leaf.
  • Do not break yarn. Ch 70 more
  • Slip stitch in second chain from hook, sc in next stitch, hdc in next stitch, dc in next 2 sts, hdc in next stitch, 2 sc in next stitch.
  • Work opposite side of chain, hdc in next stitch, dc in next 2 sts, hdc in next stitch, sc in next stitch, slip st in next stitch. Join with another slip stitch to the first slip st you made for the second leaf.
  • Fasten off, weave in ends. 

Once your leaf tie off is completed, all you need to do is weave it into the loops of your red koozie. There you have it!

Copyright © 2019 Maria Louise Design

All rights reserved. This pattern is for individual, non-commercial use only. Therefore, the sale, unauthorized transfer, copying, re-publishing, distribution and any other commercial usage of this pattern is prohibited. 

Click below to subscribe and get your VIP access to my free library.

If you are already a subscriber, your free printable pattern should already be in your inbox. (or you can access my free library anytime, just click the printable library link with the password that’s at the bottom of all of my emails.)

I really hope you guys enjoyed reading my tutorial as much as I did writing it! I truly loved putting this post together. Between the usefulness of the koozie and the tutorial on how to make a magic ring, I hope you learned a thing or two.

‘Till next time,

Hugs

PIN IT FOR LATER

RELATED POSTS:

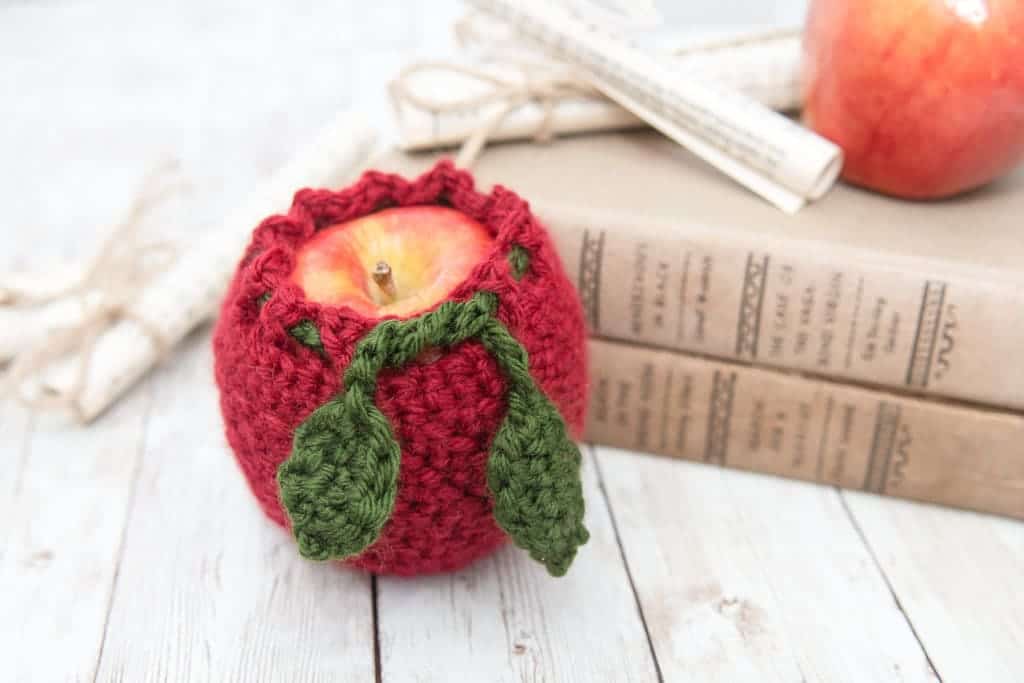
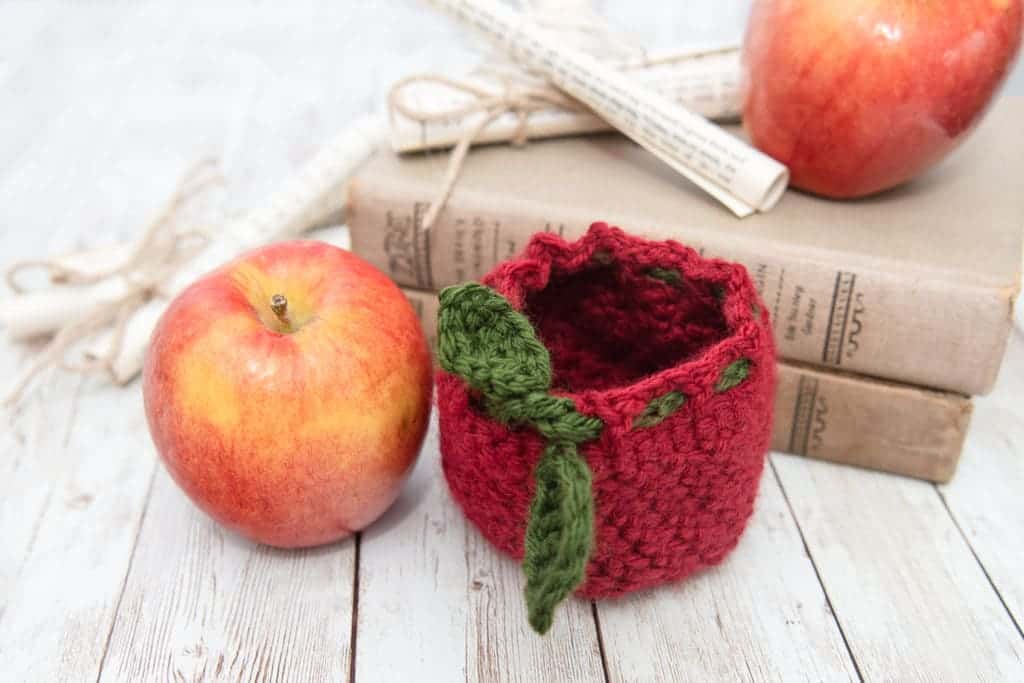
4 thoughts on “Crochet Your Own Apple Koozie with Free Pattern”
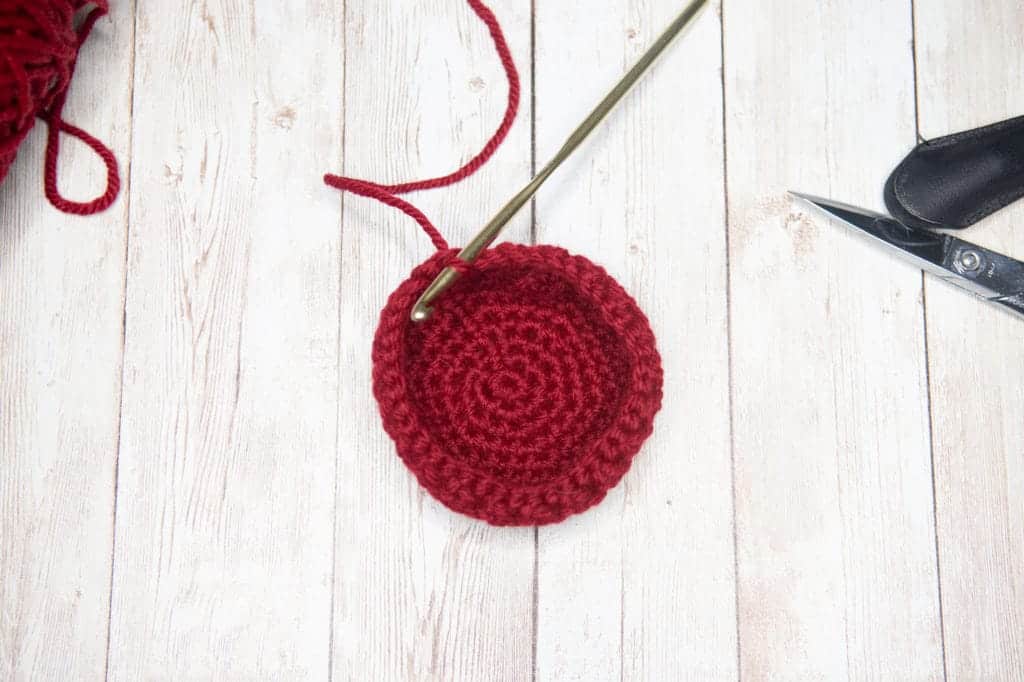
    1. Paula,

      Make sure after every round your numbers aren’t increasing. Check the number count at the end of each row, and make sure you’re not continually increasing. You’ll have a coconut holder in no time! 😉

      Hope that helps.

      XO,

      Maria

    1. Check your inbox. I have a welcome email that comes and the password is bolded in the text! You longin using the password and you’ll have access to ALL my free downloadable files!

      Cheers,

      Maria

Leave a Comment

Your email address will not be published. Required fields are marked *

Like What You See?

Join the newsletter and stay updated on all the DIYs, recipes, crafts, renovations and much more!